Your search criteria found
957
images
Target is Asteroid and Comets
Go to PIAxxxxx:
Refine this list of images by:
Target:
2002 JF56
2010 AB78
Annefrank
Asteroid
Borrelly
Braille
C/2007 Q3 (Siding Spring)
C/2008 Q3 (Garradd)
Comet
Dactyl
Eros
Gaspra
Hale-Bopp
Hartley 2
Holmes
Hyakutake
Ida
Mathilde
P/2010 B2 (WISE)
Schwassmann-Wachmann 3
Tempel 1
Toutatis
Vesta
Wild 2
Mission:
Astronomical Observatory of Mallorca
Catalina Sky Survey (CSS)
Dawn
Deep Impact
Deep Space 1 (DS1)
Deep Space Network (DSN)
Double Asteroid Redirect Test (DART)
Double Asteroid Redirection Test (DART)
EPOXI
Galileo
Gingin Observatory
Goldstone Deep Space Network (DSN)
Hubble Space Telescope
MESSENGER
NEAR
NEAR Shoemaker
NEO Surveyor
NEOWISE
NEOWISE Project
New Horizons
OSIRIS-REx
Psyche
Rosetta
Samford Valley Observatory
Siding Spring Observatory
Spitzer Space Telescope
Stardust
StardustNExT
Wide-field Infrared Survey Explorer (WISE)
Spacecraft:
DART
Dawn
Deep Impact
Deep Impact (DIXI)
Deep Space 1
Galileo Orbiter
Goldstone Antenna
MESSENGER
NEAR Shoemaker
NEO Surveyor
New Horizons
Philae Lander
Psyche
Rosetta
Stardust
WISE
Instrument:
Advanced Camera for Surveys
Arecibo Observatory
Arecibo Radar Data
Autonomous Navigation System
Chandra X-ray Telescope
Comet Infrared and Visible Analyser (CIVA)
Deep Space Network
Framing Camera
Gamma Ray and Neutron Spectrometer (GRNS)
Gamma Ray/Neutron Spectrometer (GRNS)
Goldstone Solar System Radar
Hale Telescope 200-inch
High Resolution Instrument (HRI)
Hubble Space Telescope
Impactor Targeting Sensor (ITS)
Infrared Array Camera (IRAC)
Infrared Spectrometer (IRS)
Ion Engine
Kitt Peak National Observatory's 2.1 m Telescope
La Sagra Sky Survey
Laser Rangefinder
MIRO
Magnetometer
Medium Resolution Instrument (MRI)
Mercury Dual Imaging System - Wide Angle
Miniature Integrated Camera Spectrometer
Multi-Spectral Imager
Multiband Imaging Photometer (MIPS)
Multispectral Visible Imaging Camera (MVIC)
NEOWISE Telescope
Near Infrared Spectrometer
OSIRIS
ROsetta Lander Imaging System (ROLIS)
Rosetta NAVCAM
Solid-State Imaging
Star Tracker
Stardust Navigation Camera
Very Large Telescope (VLT)
Visible and Infrared Spectrometer (VIR)
Visible and Infrared Spectrometer (VIR)
WISE Telescope
Wide Field Camera 3
Wide Field Planetary Camera 2
ZTF
Click on an image for detailed information
Click on a column heading to sort in ascending or descending order
My
List
Addition Date
Target
Mission
Instrument
Size
2005-07-01
Tempel 1
Deep Impact
720x540x3
PIA02106:
The Road to Tempel (Artist's Concept)
Full Resolution:
TIFF
(1.168 MB)
JPEG
(15.33 kB)
2005-07-01
Tempel 1
Deep Impact
Medium Resolution Instrument (MRI)
720x169x3
PIA02111:
Analyzing a Cometary 'Sneeze'
Full Resolution:
TIFF
(365.7 kB)
JPEG
(18.19 kB)
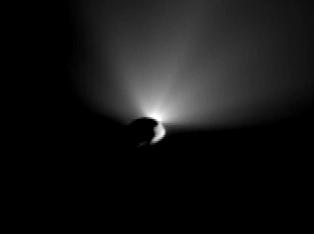
2005-06-30
Tempel 1
Deep Impact
Medium Resolution Instrument (MRI)
512x512x1
PIA02113:
Headed Toward the Light
Full Resolution:
TIFF
(262.6 kB)
JPEG
(15.74 kB)
2005-07-01
Tempel 1
Deep Impact
Medium Resolution Instrument (MRI)
512x512x1
PIA02114:
Less Than Three Days Away!
Full Resolution:
TIFF
(262.6 kB)
JPEG
(17.8 kB)
2005-07-04
Tempel 1
Deep Impact
Medium Resolution Instrument (MRI)
516x499x1
PIA02115:
Separation Anxiety Over for Deep Impact
Full Resolution:
TIFF
(258 kB)
JPEG
(12.95 kB)
2005-07-04
Tempel 1
Deep Impact
Impactor Targeting Sensor (ITS)
512x512x1
PIA02116:
Impactor Eyes Comet Target
Full Resolution:
TIFF
(262.6 kB)
JPEG
(3.756 kB)
2005-07-04
Tempel 1
Deep Impact
Medium Resolution Instrument (MRI)
516x290x1
PIA02117:
Journey to a Comet (Animation)
Full Resolution:
TIFF
(150 kB)
JPEG
(14.68 kB)
2005-07-04
Tempel 1
Deep Impact
Chandra X-ray Telescope
458x425x3
PIA02118:
X-ray Eyes on Tempel
Full Resolution:
TIFF
(584.9 kB)
JPEG
(7.752 kB)
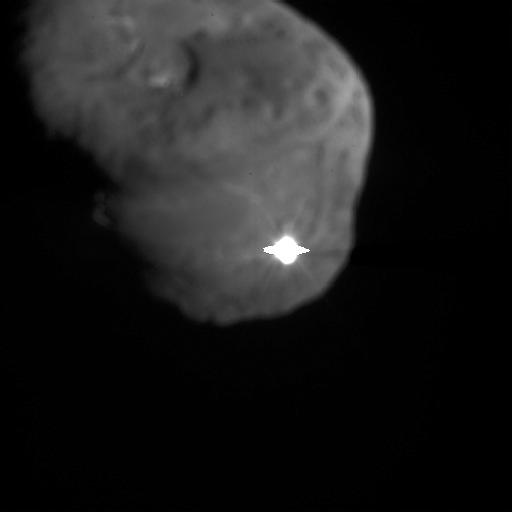
2005-07-04
Tempel 1
Deep Impact
High Resolution Instrument (HRI)
516x402x1
PIA02119:
Tempel 1 Nucleus
Full Resolution:
TIFF
(207.9 kB)
JPEG
(10.41 kB)
2005-07-04
Tempel 1
Deep Impact
Impactor Targeting Sensor (ITS)
247x240x1
PIA02120:
Face-to-Face With a Comet
Full Resolution:
TIFF
(59.57 kB)
JPEG
(5.865 kB)
2005-07-04
Tempel 1
Deep Impact
Medium Resolution Instrument (MRI)
484x444x1
PIA02121:
Bull's Eye!
Full Resolution:
TIFF
(215.4 kB)
JPEG
(7.146 kB)
2005-07-04
Tempel 1
Deep Impact
Impactor Targeting Sensor (ITS)
256x256x1
PIA02124:
Before the Crash
Full Resolution:
TIFF
(65.83 kB)
JPEG
(4.034 kB)
2005-07-04
Tempel 1
Hubble Space Telescope
Hubble Space Telescope
800x350x1
PIA02122:
Hubble Witnesses Comet Crash
Full Resolution:
TIFF
(280.5 kB)
JPEG
(22.82 kB)
2005-07-04
Tempel 1
Deep Impact
High Resolution Instrument (HRI)
471x471x1
PIA02123:
Gone in a Flash
Full Resolution:
TIFF
(222.3 kB)
JPEG
(11.77 kB)
2005-07-04
Tempel 1
Deep Impact
Impactor Targeting Sensor (ITS)
256x256x1
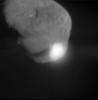
PIA02125:
We're Going In!
Full Resolution:
TIFF
(65.83 kB)
JPEG
(4.034 kB)
2005-07-04
Tempel 1
Deep Impact
Impactor Targeting Sensor (ITS)
494x494x1
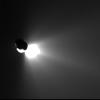
PIA02126:
Blinded by the Jets
Full Resolution:
TIFF
(244.5 kB)
JPEG
(13.57 kB)
2005-07-04
Tempel 1
Deep Impact
Impactor Targeting Sensor (ITS)
500x500x1
PIA02127:
Hit Me With Your Best Shot
Full Resolution:
TIFF
(250.5 kB)
JPEG
(13.7 kB)
2005-07-04
Tempel 1
Deep Impact
Impactor Targeting Sensor (ITS)
494x494x1
PIA02128:
So Close You Can Almost Touch It
Full Resolution:
TIFF
(244.5 kB)
JPEG
(21.56 kB)
2005-07-04
Tempel 1
Deep Impact
Impactor Targeting Sensor (ITS)
480x480x1
PIA02129:
Untouched Tempel
Full Resolution:
TIFF
(230.9 kB)
JPEG
(18.74 kB)
2005-07-04
Tempel 1
Deep Impact
Impactor Targeting Sensor (ITS)
1000x1016x1
PIA02131:
Moment of Impact
Full Resolution:
TIFF
(1.017 MB)
JPEG
(39.3 kB)
2005-07-04
Tempel 1
Deep Impact
High Resolution Instrument (HRI)
Infrared Spectrometer
275x232x3
PIA02132:
Sunny Side of a Comet
Full Resolution:
TIFF
(191.8 kB)
JPEG
(4.867 kB)
2005-07-04
Tempel 1
Deep Impact
High Resolution Instrument (HRI)
504x506x1
PIA02133:
Looking Back at a Job Well Done
Full Resolution:
TIFF
(255.5 kB)
JPEG
(7.689 kB)
2005-07-04
Tempel 1
Deep Impact
High Resolution Instrument (HRI)
720x540x1
PIA02134:
Capturing the Flash
Full Resolution:
TIFF
(389.4 kB)
JPEG
(20.02 kB)
2005-07-04
Tempel 1
Deep Impact
Impactor Targeting Sensor (ITS)
616x458x1
PIA02135:
One-Way Trip to Tempel
Full Resolution:
TIFF
(282.6 kB)
JPEG
(27.03 kB)
2005-07-04
Tempel 1
Deep Impact
Medium Resolution Instrument (MRI)
239x222x1
PIA02130:
Impactor No More (Animation)
Full Resolution:
TIFF
(53.34 kB)
JPEG
(3.669 kB)
2005-07-05
Tempel 1
Deep Impact
Autonomous Navigation System
720x540x3
PIA02136:
A Cyber-Astronaut's Final Moves
Full Resolution:
TIFF
(1.168 MB)
JPEG
(15.58 kB)
2005-07-05
Tempel 1
Deep Impact
High Resolution Instrument (HRI)
900x900x1
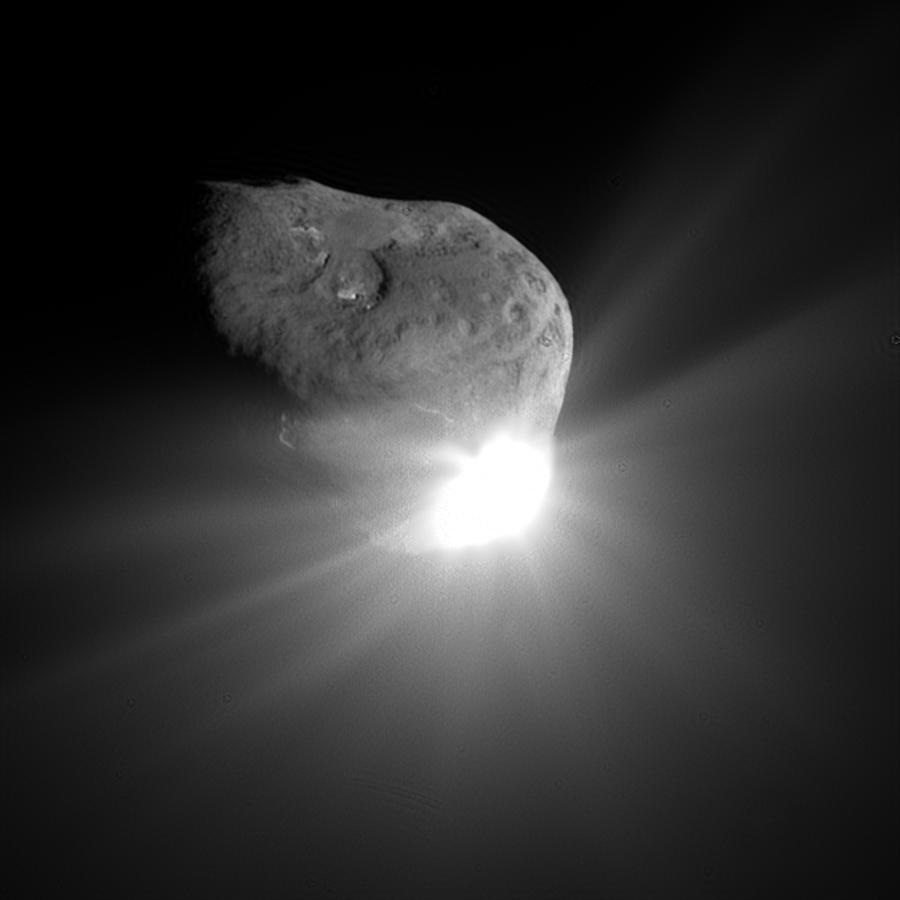
PIA02137:
Tempel Alive with Light
Full Resolution:
TIFF
(811 kB)
JPEG
(31.7 kB)
2005-07-06
Tempel 1
Deep Impact
Impactor Targeting Sensor (ITS)
247x241x1
PIA02138:
Wipe Out
Full Resolution:
TIFF
(59.82 kB)
JPEG
(6.405 kB)
2005-07-08
Tempel 1
Deep Impact
High Resolution Instrument (HRI)
512x512x3
PIA02139:
Comet Tempel's Silhouette
Full Resolution:
TIFF
(264.2 kB)
JPEG
(37.36 kB)
2005-07-11
Tempel 1
Deep Impact
High Resolution Instrument (HRI)
314x234x1
PIA02140:
Tempel Fades into Night
Full Resolution:
TIFF
(73.78 kB)
JPEG
(2.4 kB)
2005-07-20
Tempel 1
Deep Impact
High Resolution Instrument (HRI)
512x512x1
PIA02141:
First Contact
Full Resolution:
TIFF
(262.6 kB)
JPEG
(8.103 kB)
2005-09-06
Tempel 1
Deep Impact
Impactor Targeting Sensor (ITS)
2048x2048x1
PIA02142:
Tempel 1 Composite Map
Full Resolution:
TIFF
(4.199 MB)
JPEG
(121.6 kB)
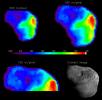
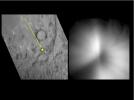
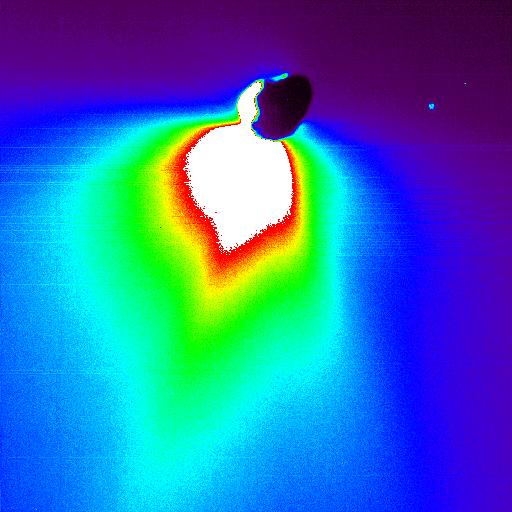
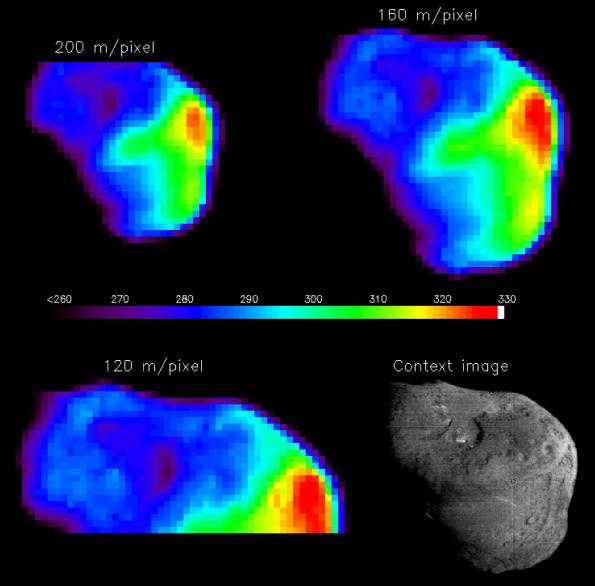
2005-10-20
Tempel 1
Deep Impact
Infrared Spectrometer (IRS)
595x586x3
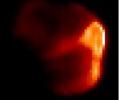
PIA02143:
Temperature Map of Tempel 1
Full Resolution:
TIFF
(1.047 MB)
JPEG
(36.92 kB)
2005-11-28
Tempel 1
Deep Impact
Medium Resolution Instrument (MRI)
2608x1950x3
PIA02144:
Tempel 1 Mission Update
Full Resolution:
TIFF
(15.27 MB)
JPEG
(225.4 kB)
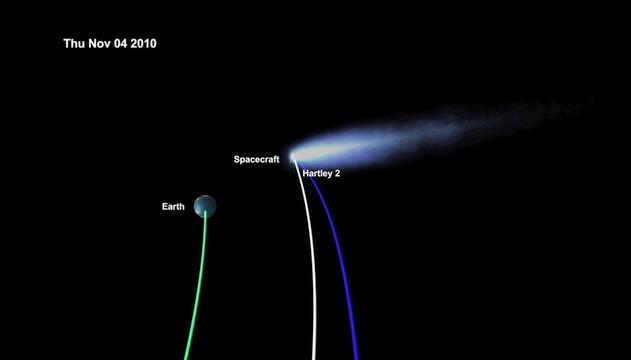
2010-10-26
Tempel 1
EPOXI
631x360x3
PIA13546:
EPOXI's Trip to Meet Comet Hartley 2
Full Resolution:
TIFF
(682.4 kB)
JPEG
(8.732 kB)
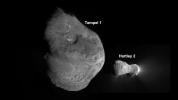
2010-11-18
Tempel 1
EPOXI
Medium Resolution Instrument (MRI)
1280x720x1
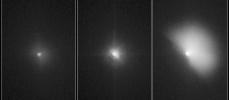
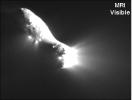
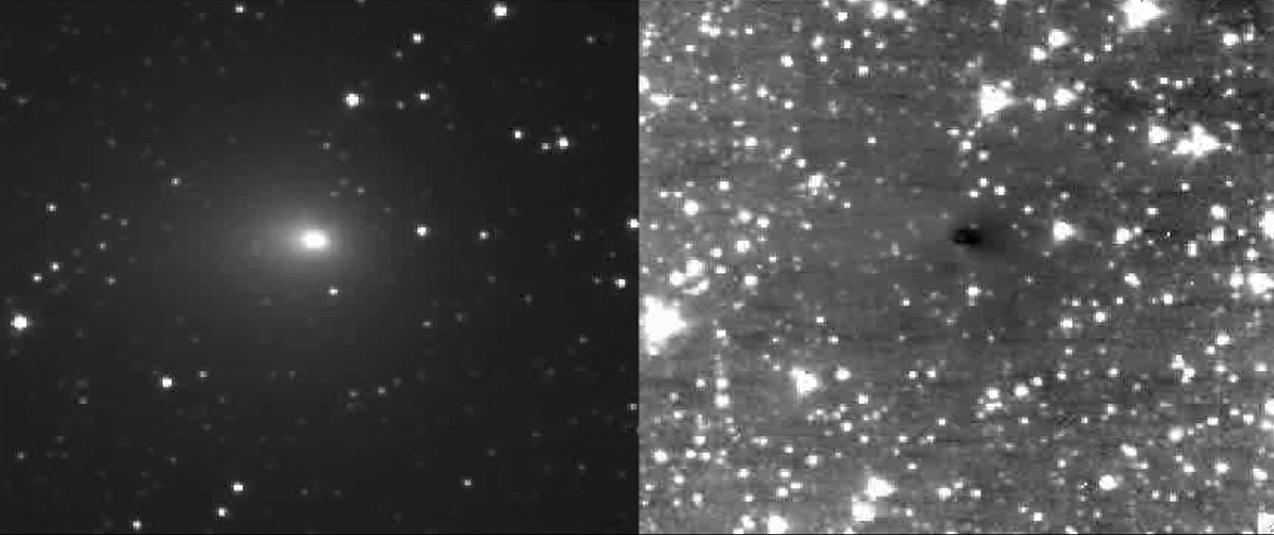
PIA13629:
Tempel 1 and Hartley 2
Full Resolution:
TIFF
(922.8 kB)
JPEG
(39.88 kB)
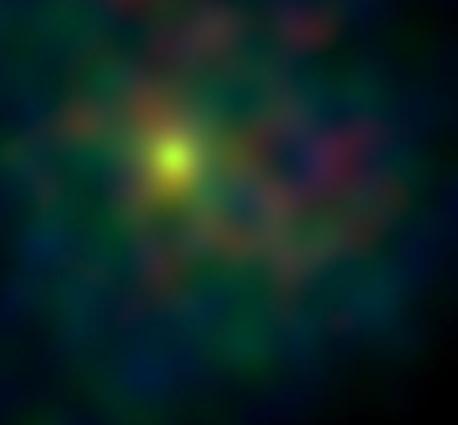
2011-01-27
Tempel 1
StardustNExT
Stardust Navigation Camera
649x644x1
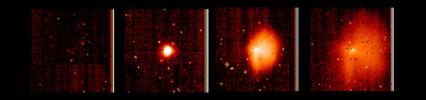
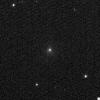
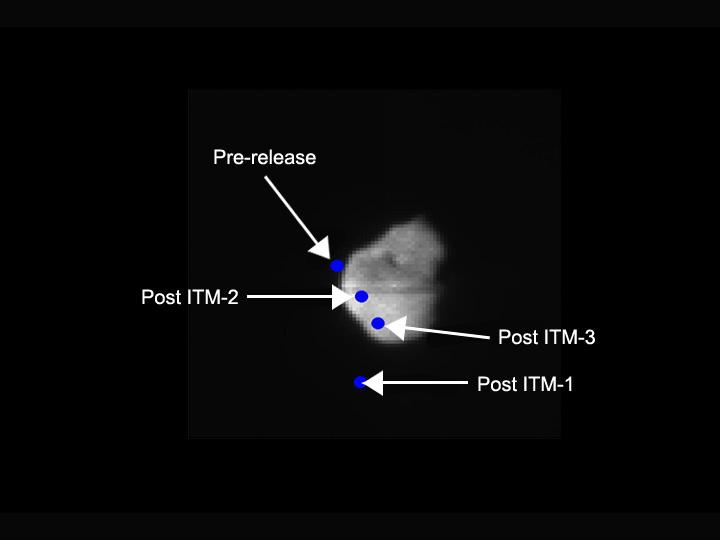
PIA13829:
NASA Comet Hunter Spots its Valentine
Full Resolution:
TIFF
(418.6 kB)
JPEG
(54.69 kB)
2011-02-10
Tempel 1
StardustNExT
2400x3000x3
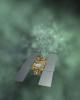
PIA13847:
Stardust-NExt (Artist Concept)
Full Resolution:
TIFF
(21.62 MB)
JPEG
(474.3 kB)
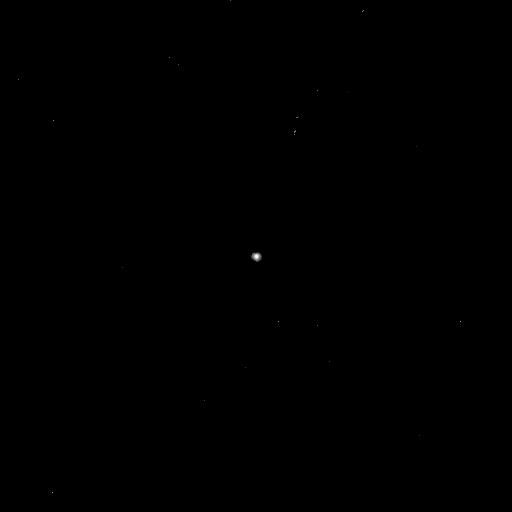
2011-02-14
Tempel 1
StardustNExT
Stardust Navigation Camera
1291x1291x1
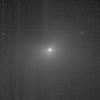
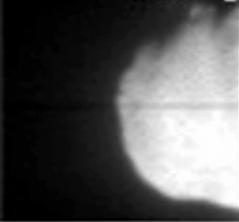
PIA13851:
NASA Spacecraft Hours from Comet Encounter
Full Resolution:
TIFF
(1.669 MB)
JPEG
(156.6 kB)
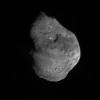
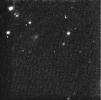
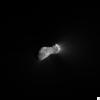
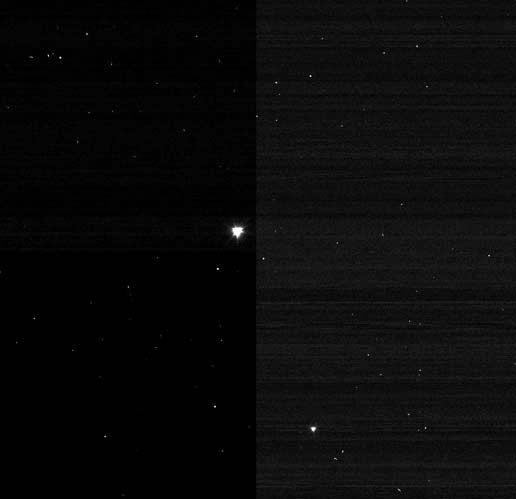
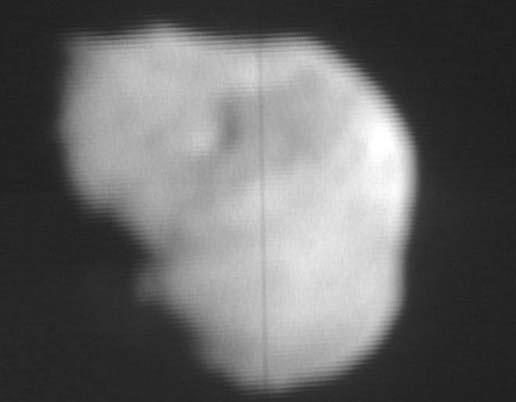
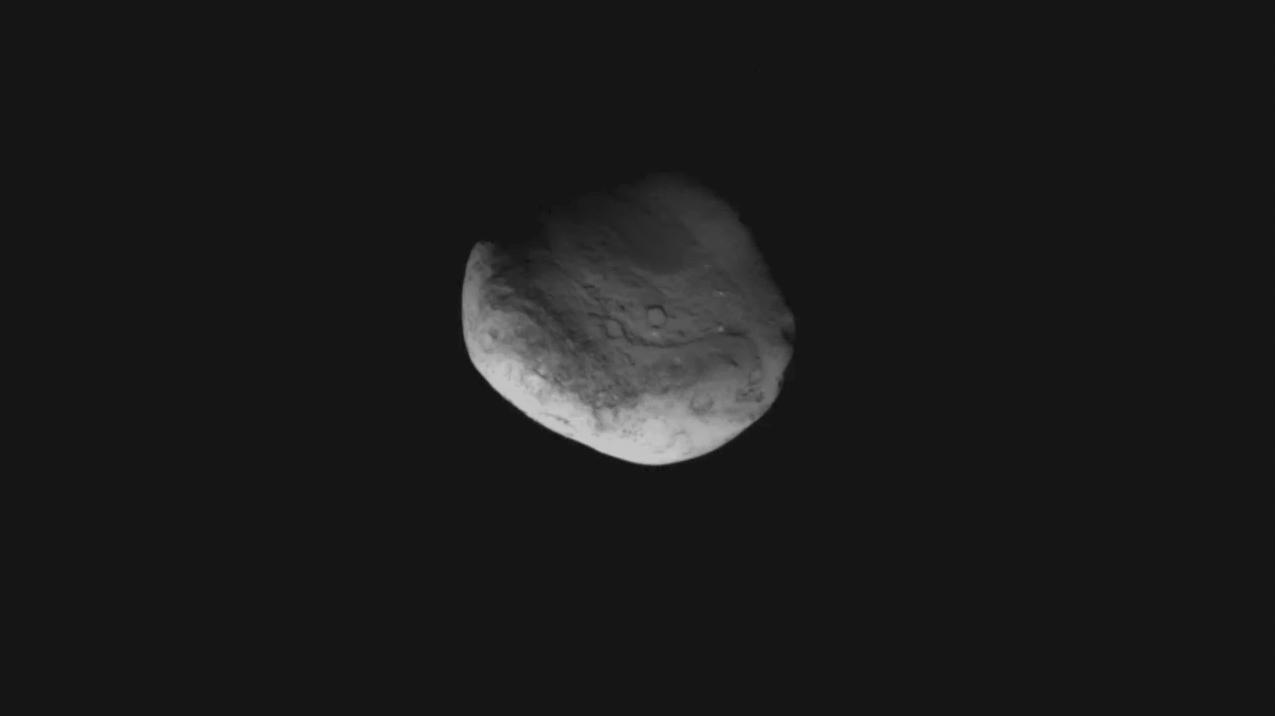
2011-02-15
Tempel 1
StardustNExT
Stardust Navigation Camera
1024x1024x1
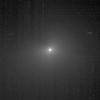
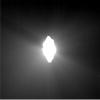
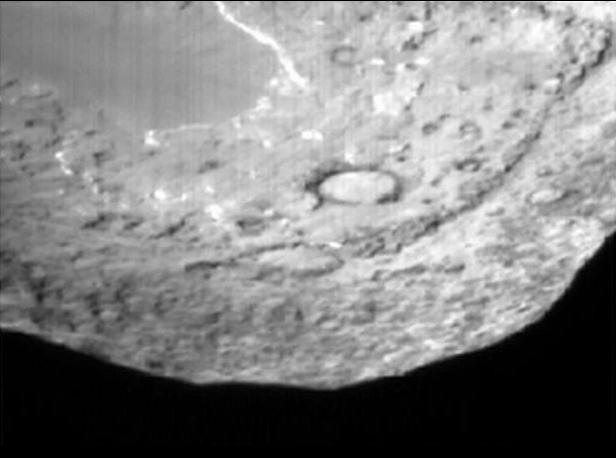
PIA13853:
Comet Tempel 1 as Seen by NASA's Stardust
Full Resolution:
TIFF
(1.05 MB)
JPEG
(12.94 kB)
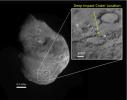
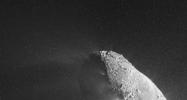
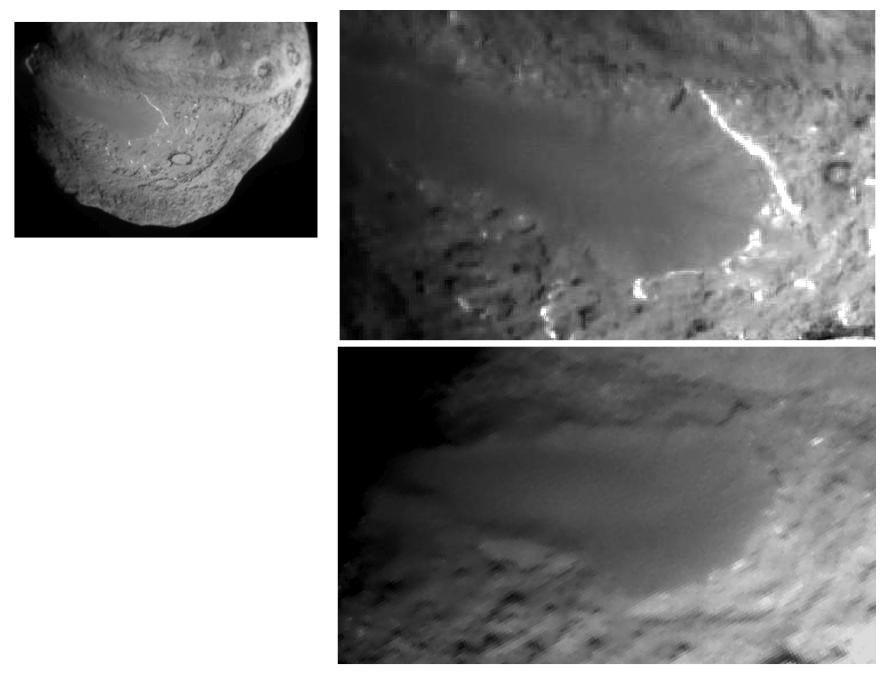
2011-02-16
Tempel 1
StardustNExT
Stardust Navigation Camera
1556x1253x3
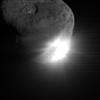
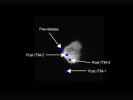
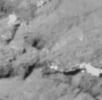
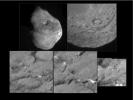
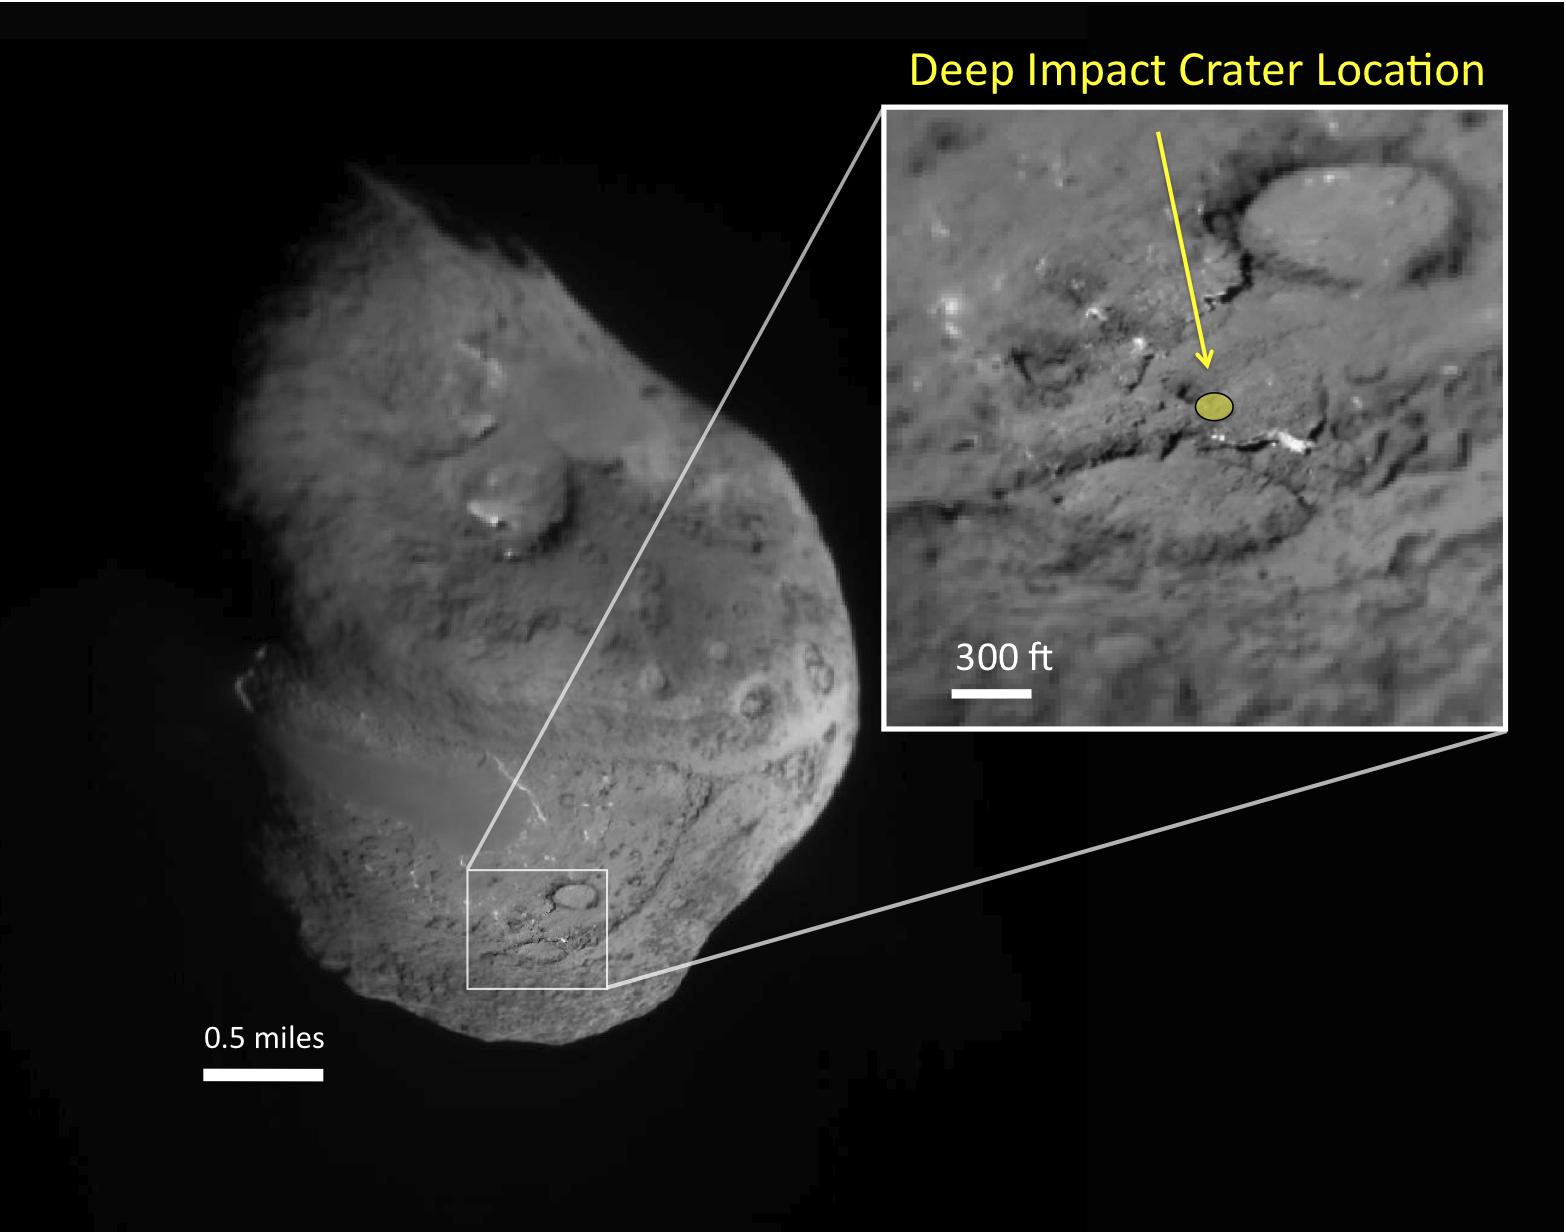
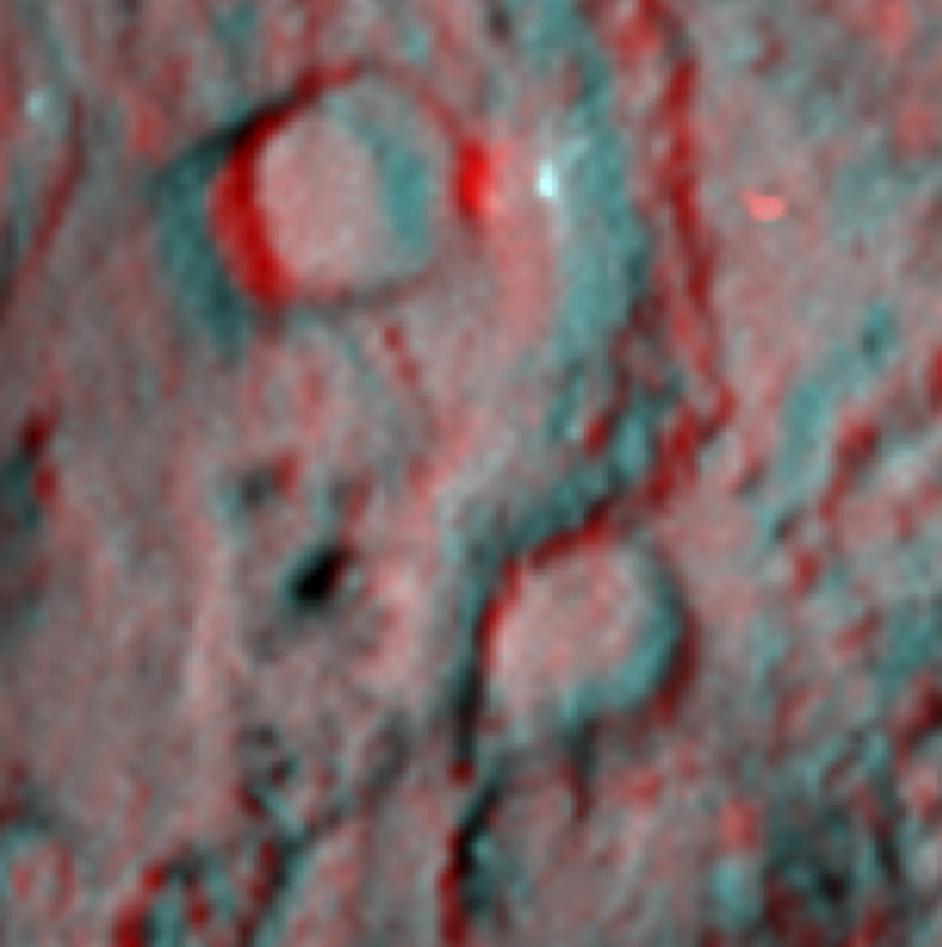
PIA13855:
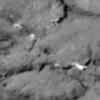
Tempel 1 Impact Site
Full Resolution:
TIFF
(5.859 MB)
JPEG
(98.48 kB)
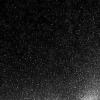
2011-02-16
Tempel 1
StardustNExT
Stardust Navigation Camera
1565x1252x3
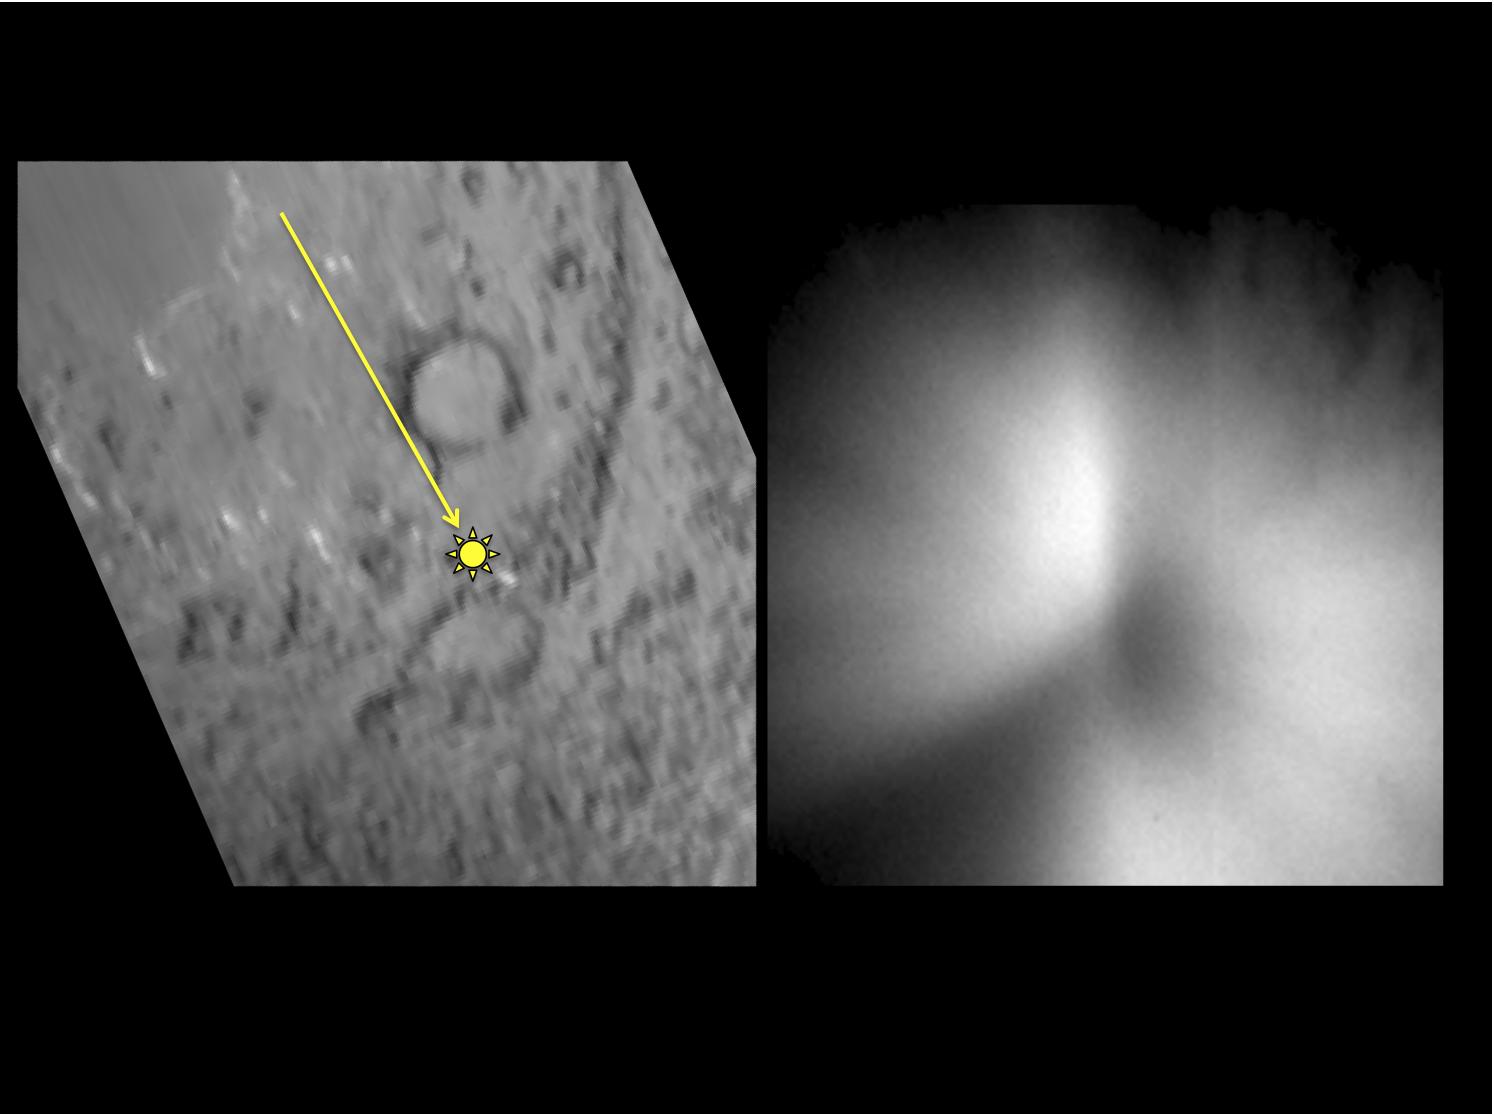
PIA13856:
Tempel 1 Impact Site
Full Resolution:
TIFF
(5.888 MB)
JPEG
(98.12 kB)
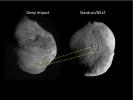
2011-02-16
Tempel 1
StardustNExT
Medium Resolution Instrument (MRI)
1489x1117x3
PIA13859:
Tempel 1, as Seen by Two Spacecraft
Full Resolution:
TIFF
(4.999 MB)
JPEG
(88.61 kB)
2011-02-16
Tempel 1
StardustNExT
Medium Resolution Instrument (MRI)
1566x1232x3
PIA13857:
Comet Tempel 1, in Context
Full Resolution:
TIFF
(5.798 MB)
JPEG
(122.7 kB)
2011-02-16
Tempel 1
StardustNExT
Medium Resolution Instrument (MRI)
1494x1114x3
PIA13858:
Deep Impact's Effect on Tempel 1
Full Resolution:
TIFF
(5.002 MB)
JPEG
(81.46 kB)
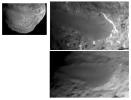
2011-02-16
Tempel 1
StardustNExT
Stardust Navigation Camera
1120x1220x1
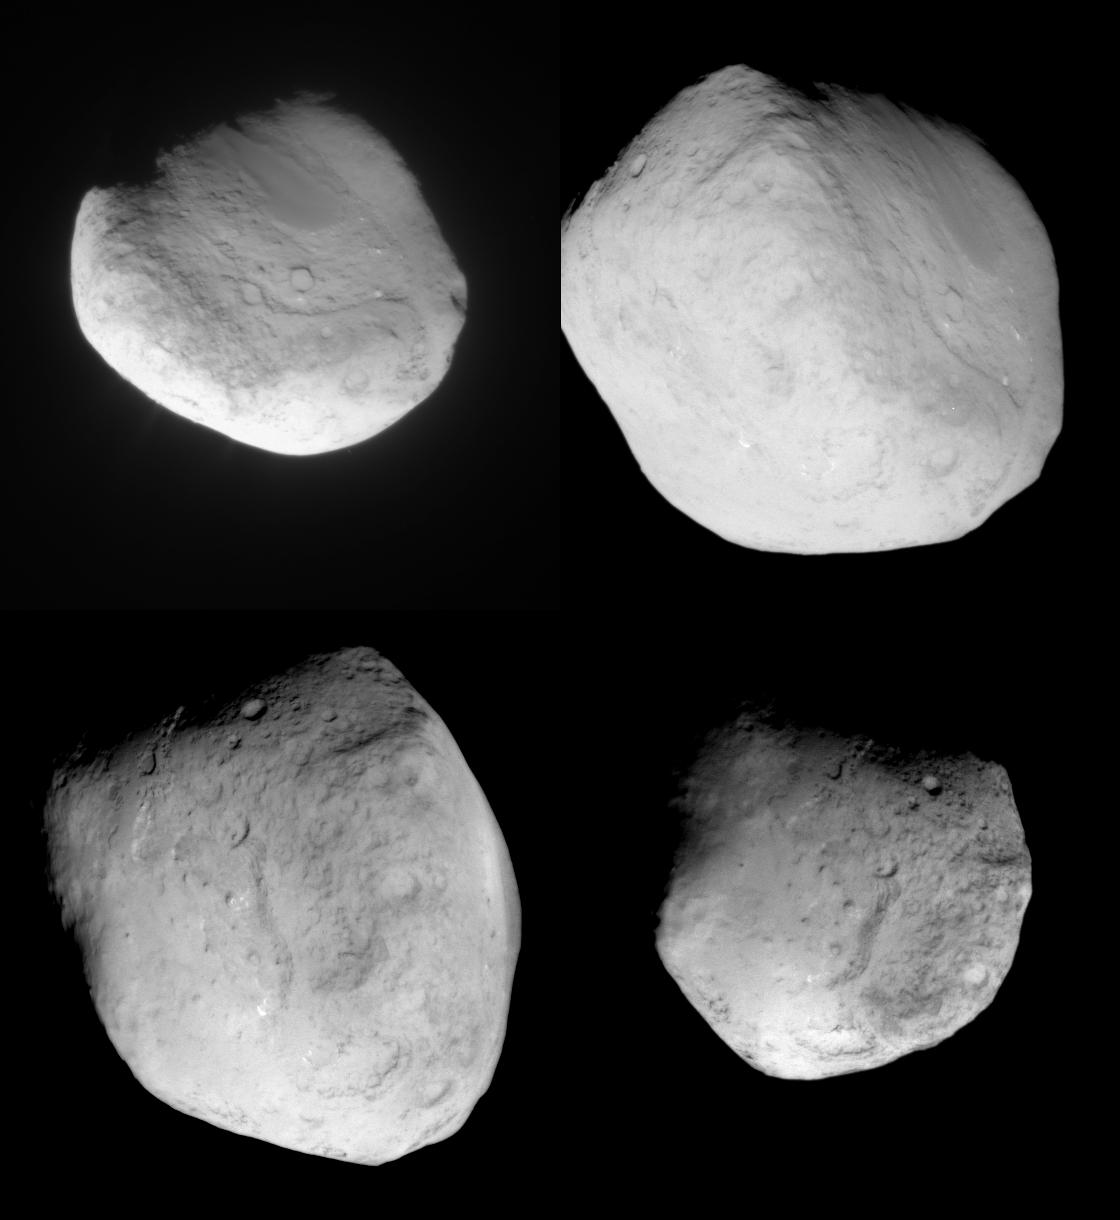
PIA13860:
Four Views of Comet Tempel 1
Full Resolution:
TIFF
(1.368 MB)
JPEG
(79.08 kB)
2011-02-16
Tempel 1
StardustNExT
Stardust Navigation Camera
1500x1125x1
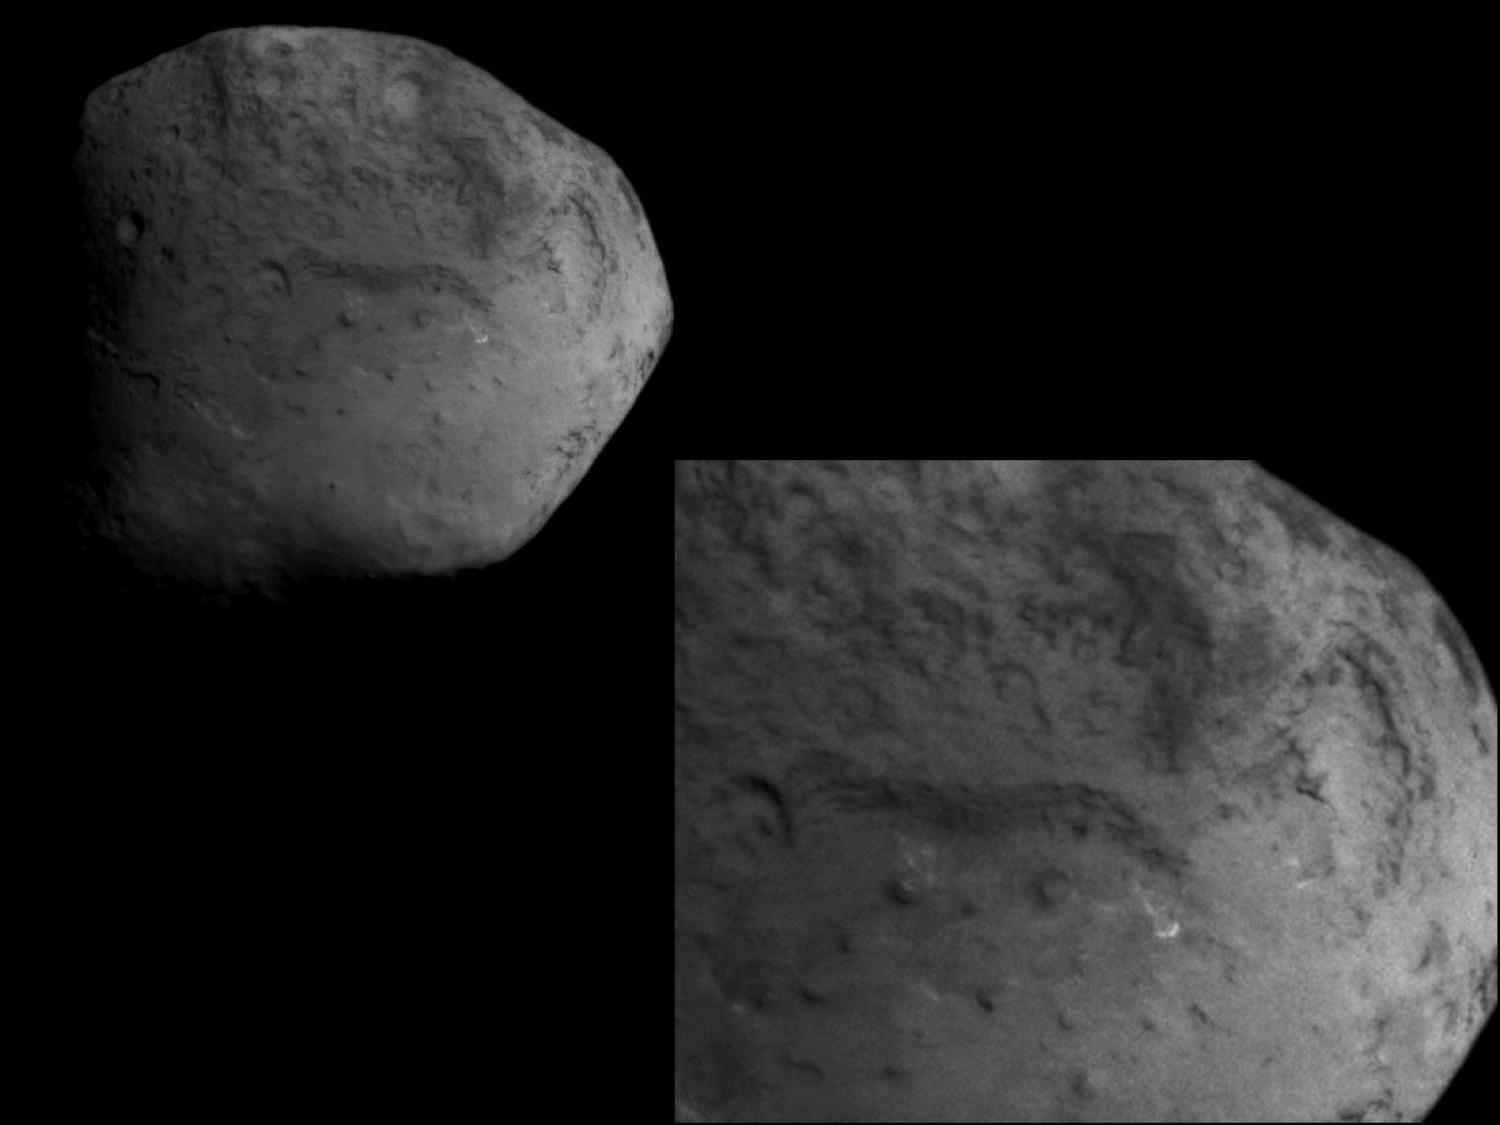
PIA13861:
New Territory on Tempel 1
Full Resolution:
TIFF
(1.69 MB)
JPEG
(77.51 kB)
2011-02-16
Tempel 1
StardustNExT
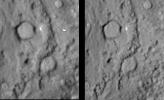
Medium Resolution Instrument (MRI)
Stardust Navigation Camera
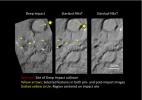
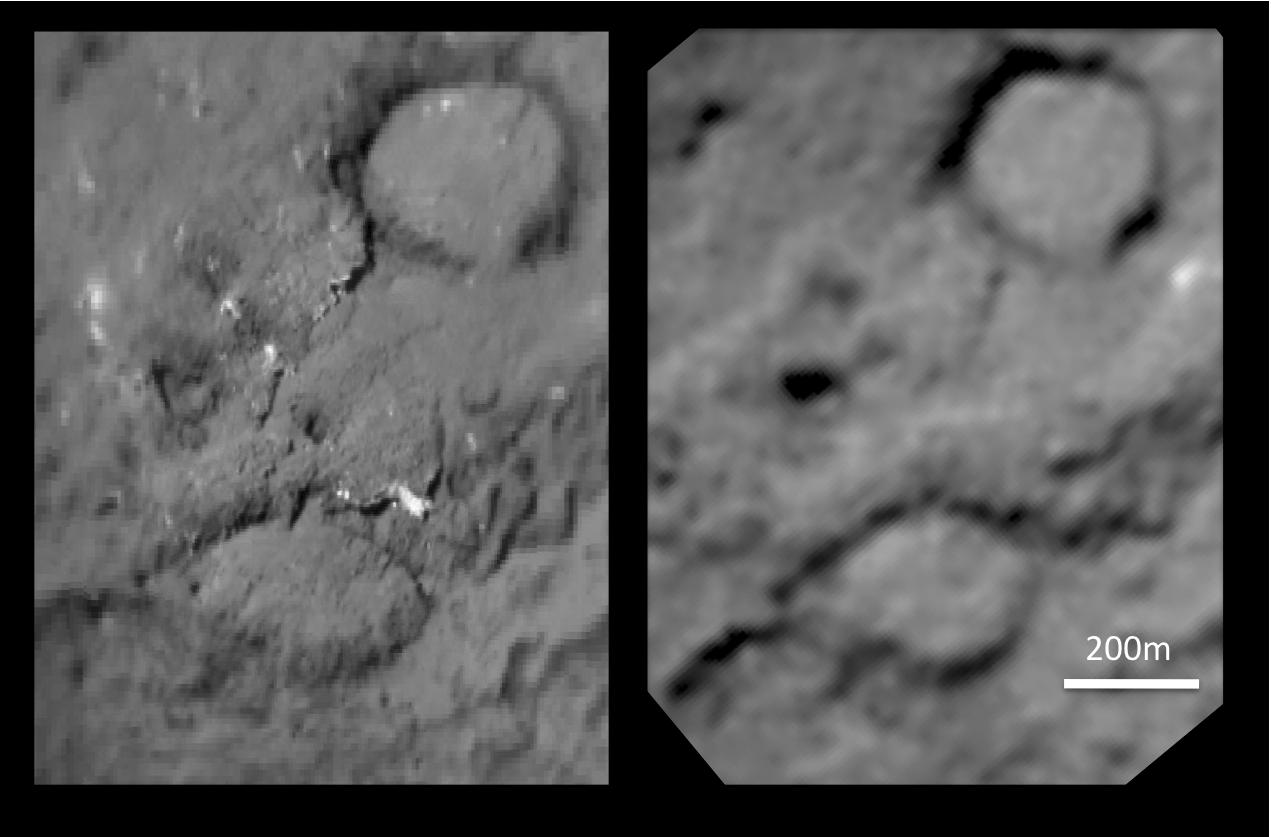
890x680x3
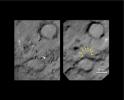
PIA13862:
Changes to Smooth Terrain (Annotated)
Full Resolution:
TIFF
(1.818 MB)
JPEG
(53.38 kB)
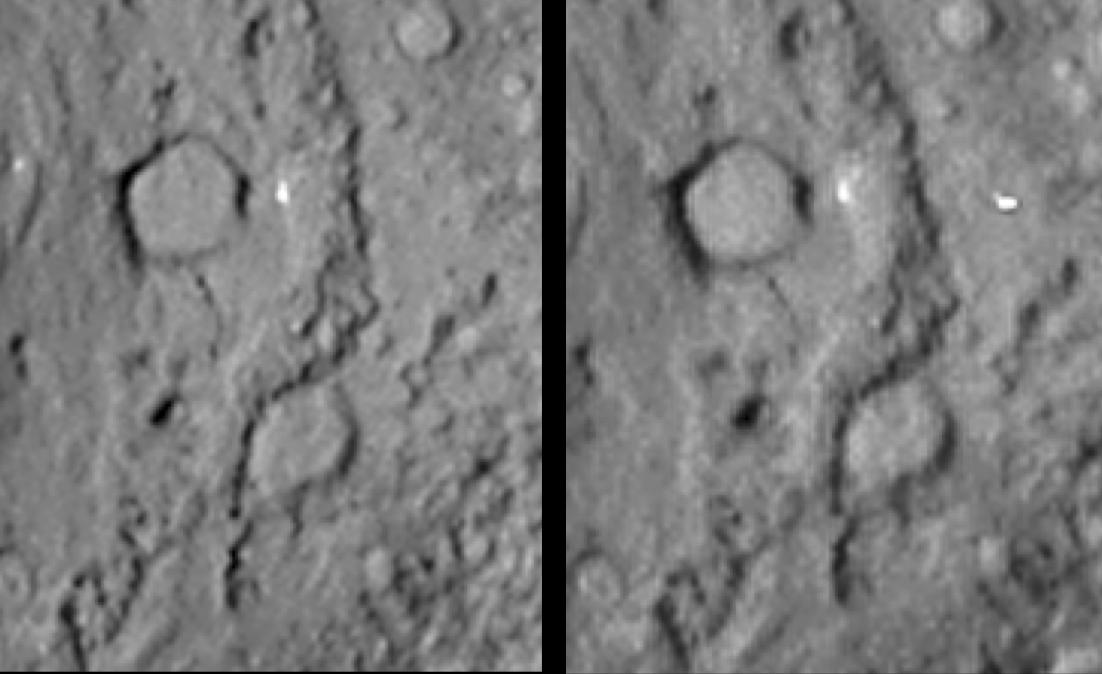
2011-02-16
Tempel 1
StardustNExT
Medium Resolution Instrument (MRI)
Stardust Navigation Camera
890x680x1
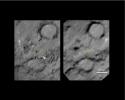
PIA13863:
Changes to Smooth Terrain (Unannotated)
Full Resolution:
TIFF
(606 kB)
JPEG
(43.76 kB)
2011-02-17
Tempel 1
StardustNExT
Stardust Navigation Camera
1276x716x1
PIA13867:
Stardust Swoops by Tempel 1
Full Resolution:
TIFF
(914.8 kB)
JPEG
(17.87 kB)
2011-02-18
Tempel 1
StardustNExT
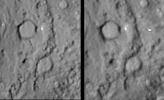
Stardust Navigation Camera
1487x1117x1
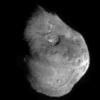
PIA13868:
Before the Deep Impact Collision
Full Resolution:
TIFF
(1.663 MB)
JPEG
(86.61 kB)
2011-02-18
Tempel 1
StardustNExT
Stardust Navigation Camera
1434x1012x3
PIA13869:
Comet Tempel 1 Six Years Later
Full Resolution:
TIFF
(4.362 MB)
JPEG
(113.8 kB)
2011-02-18
Tempel 1
StardustNExT
Stardust Navigation Camera
1102x674x1
PIA13870:
Comet Tempel 1 in Stereo (reversed)
Full Resolution:
TIFF
(743.8 kB)
JPEG
(58.37 kB)
2011-02-18
Tempel 1
StardustNExT
Stardust Navigation Camera
1121x683x1
PIA13871:
Comet Tempel 1 in Stereo
Full Resolution:
TIFF
(766.7 kB)
JPEG
(59.05 kB)
2011-02-18
Tempel 1
StardustNExT
Stardust Navigation Camera
942x947x3
PIA13872:
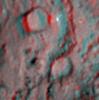
Deep Impact Site in 3-D
Full Resolution:
TIFF
(2.68 MB)
JPEG
(58.62 kB)
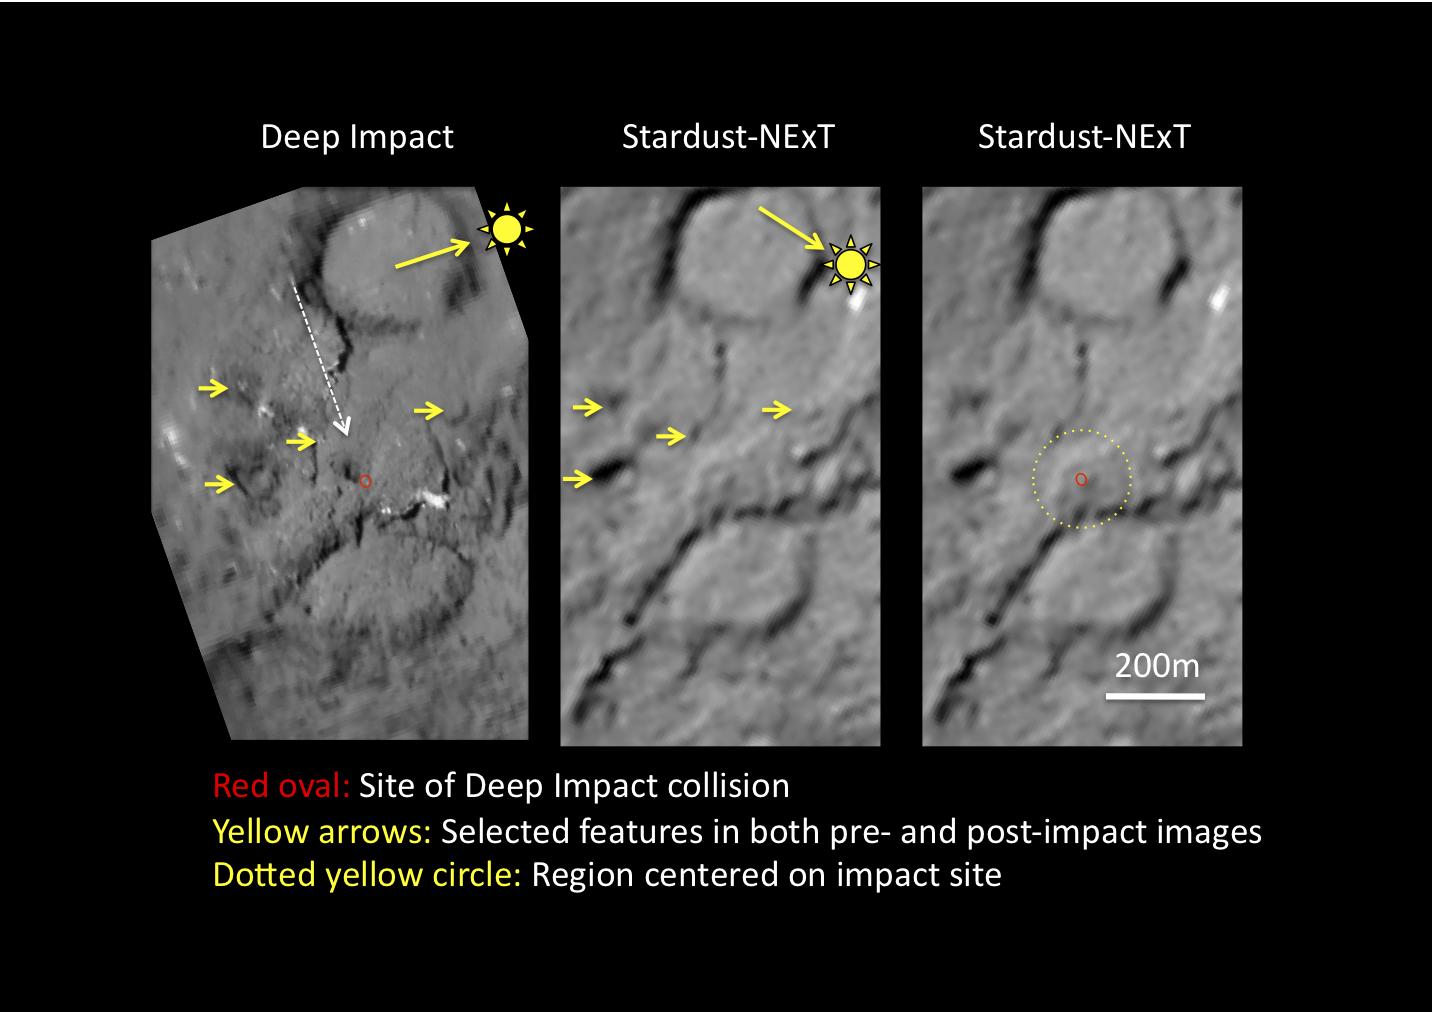
2011-02-18
Tempel 1
StardustNExT
Stardust Navigation Camera
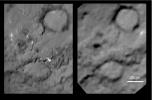
1271x837x1
PIA13873:
Tempel 1 Impact Site (unannotated)
Full Resolution:
TIFF
(1.065 MB)
JPEG
(75.39 kB)
2011-10-05
Tempel 1
EPOXI
Herschel Space Observatory
Medium Resolution Instrument (MRI)
3300x2550x3
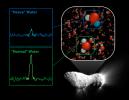
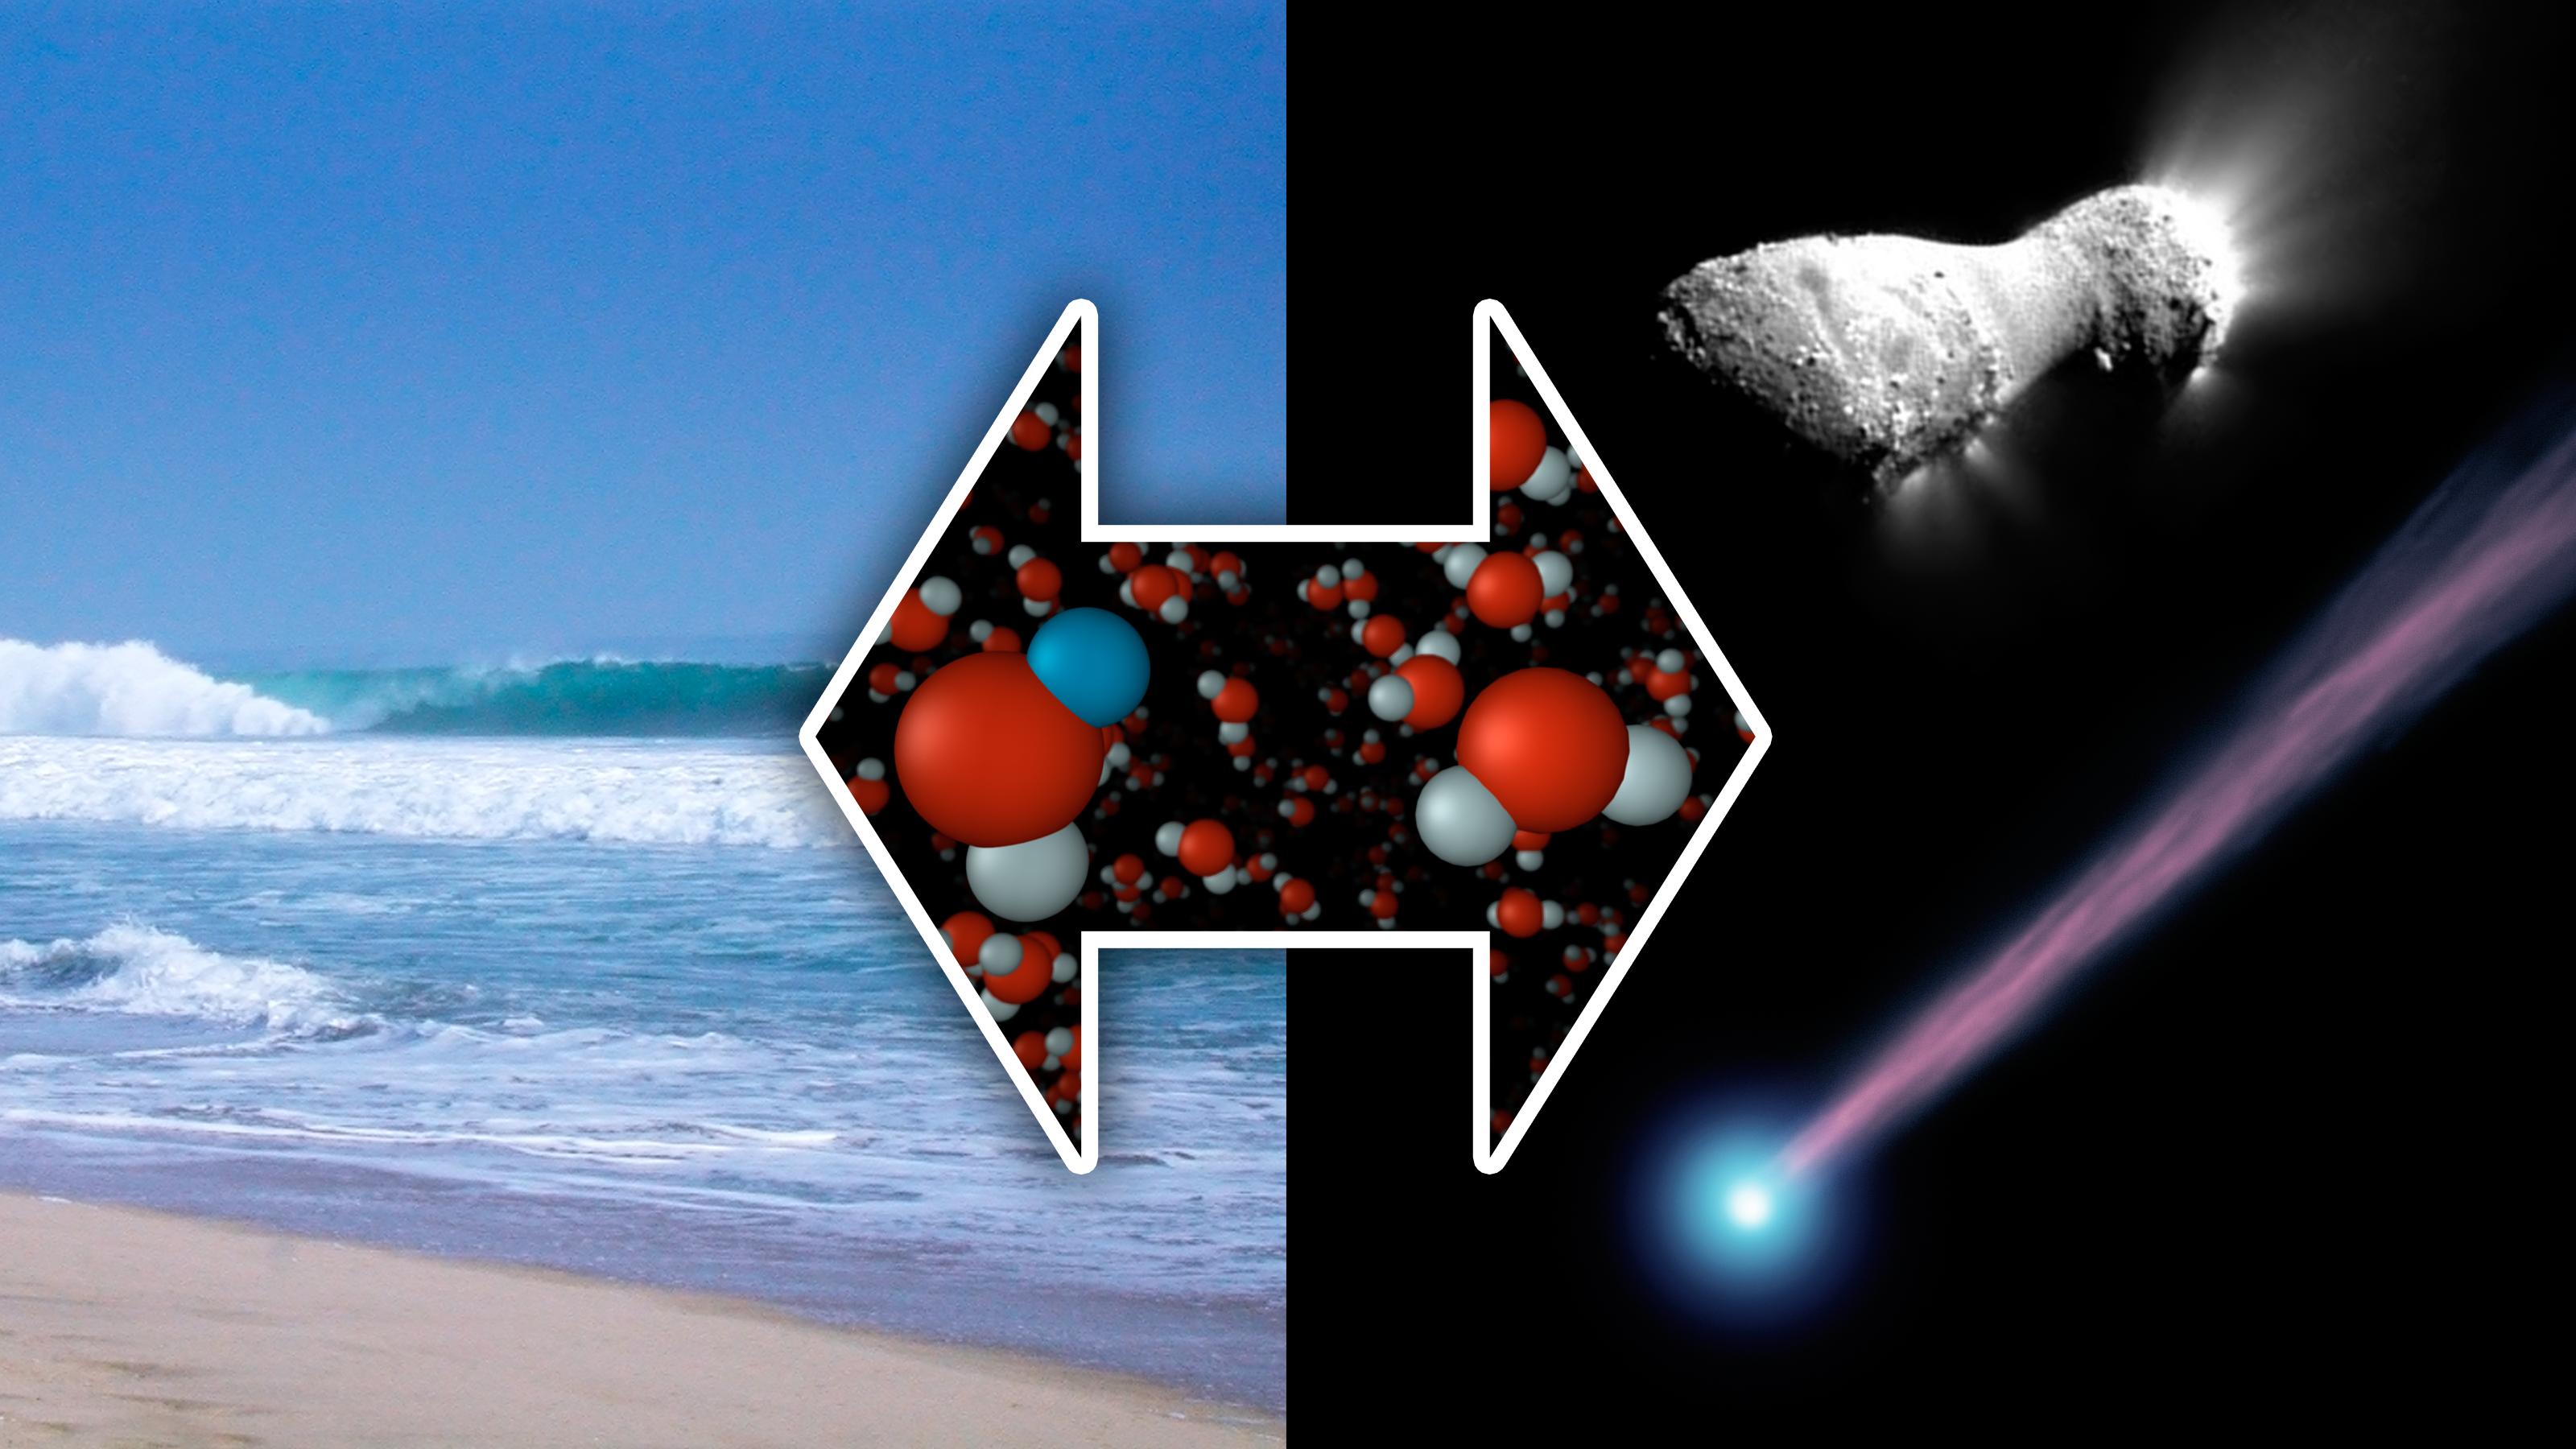
PIA14737:
Heavy and Light Just Right
Full Resolution:
TIFF
(25.25 MB)
JPEG
(397.7 kB)
2011-10-05
Tempel 1
EPOXI
Herschel Space Observatory
Medium Resolution Instrument (MRI)
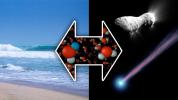
3200x1800x3
PIA14738:
The Same Here as There
Full Resolution:
TIFF
(17.28 MB)
JPEG
(389.3 kB)
2006-05-05
Schwassmann-Wachmann 3
Spitzer Space Telescope
MIPS
2947x2035x3
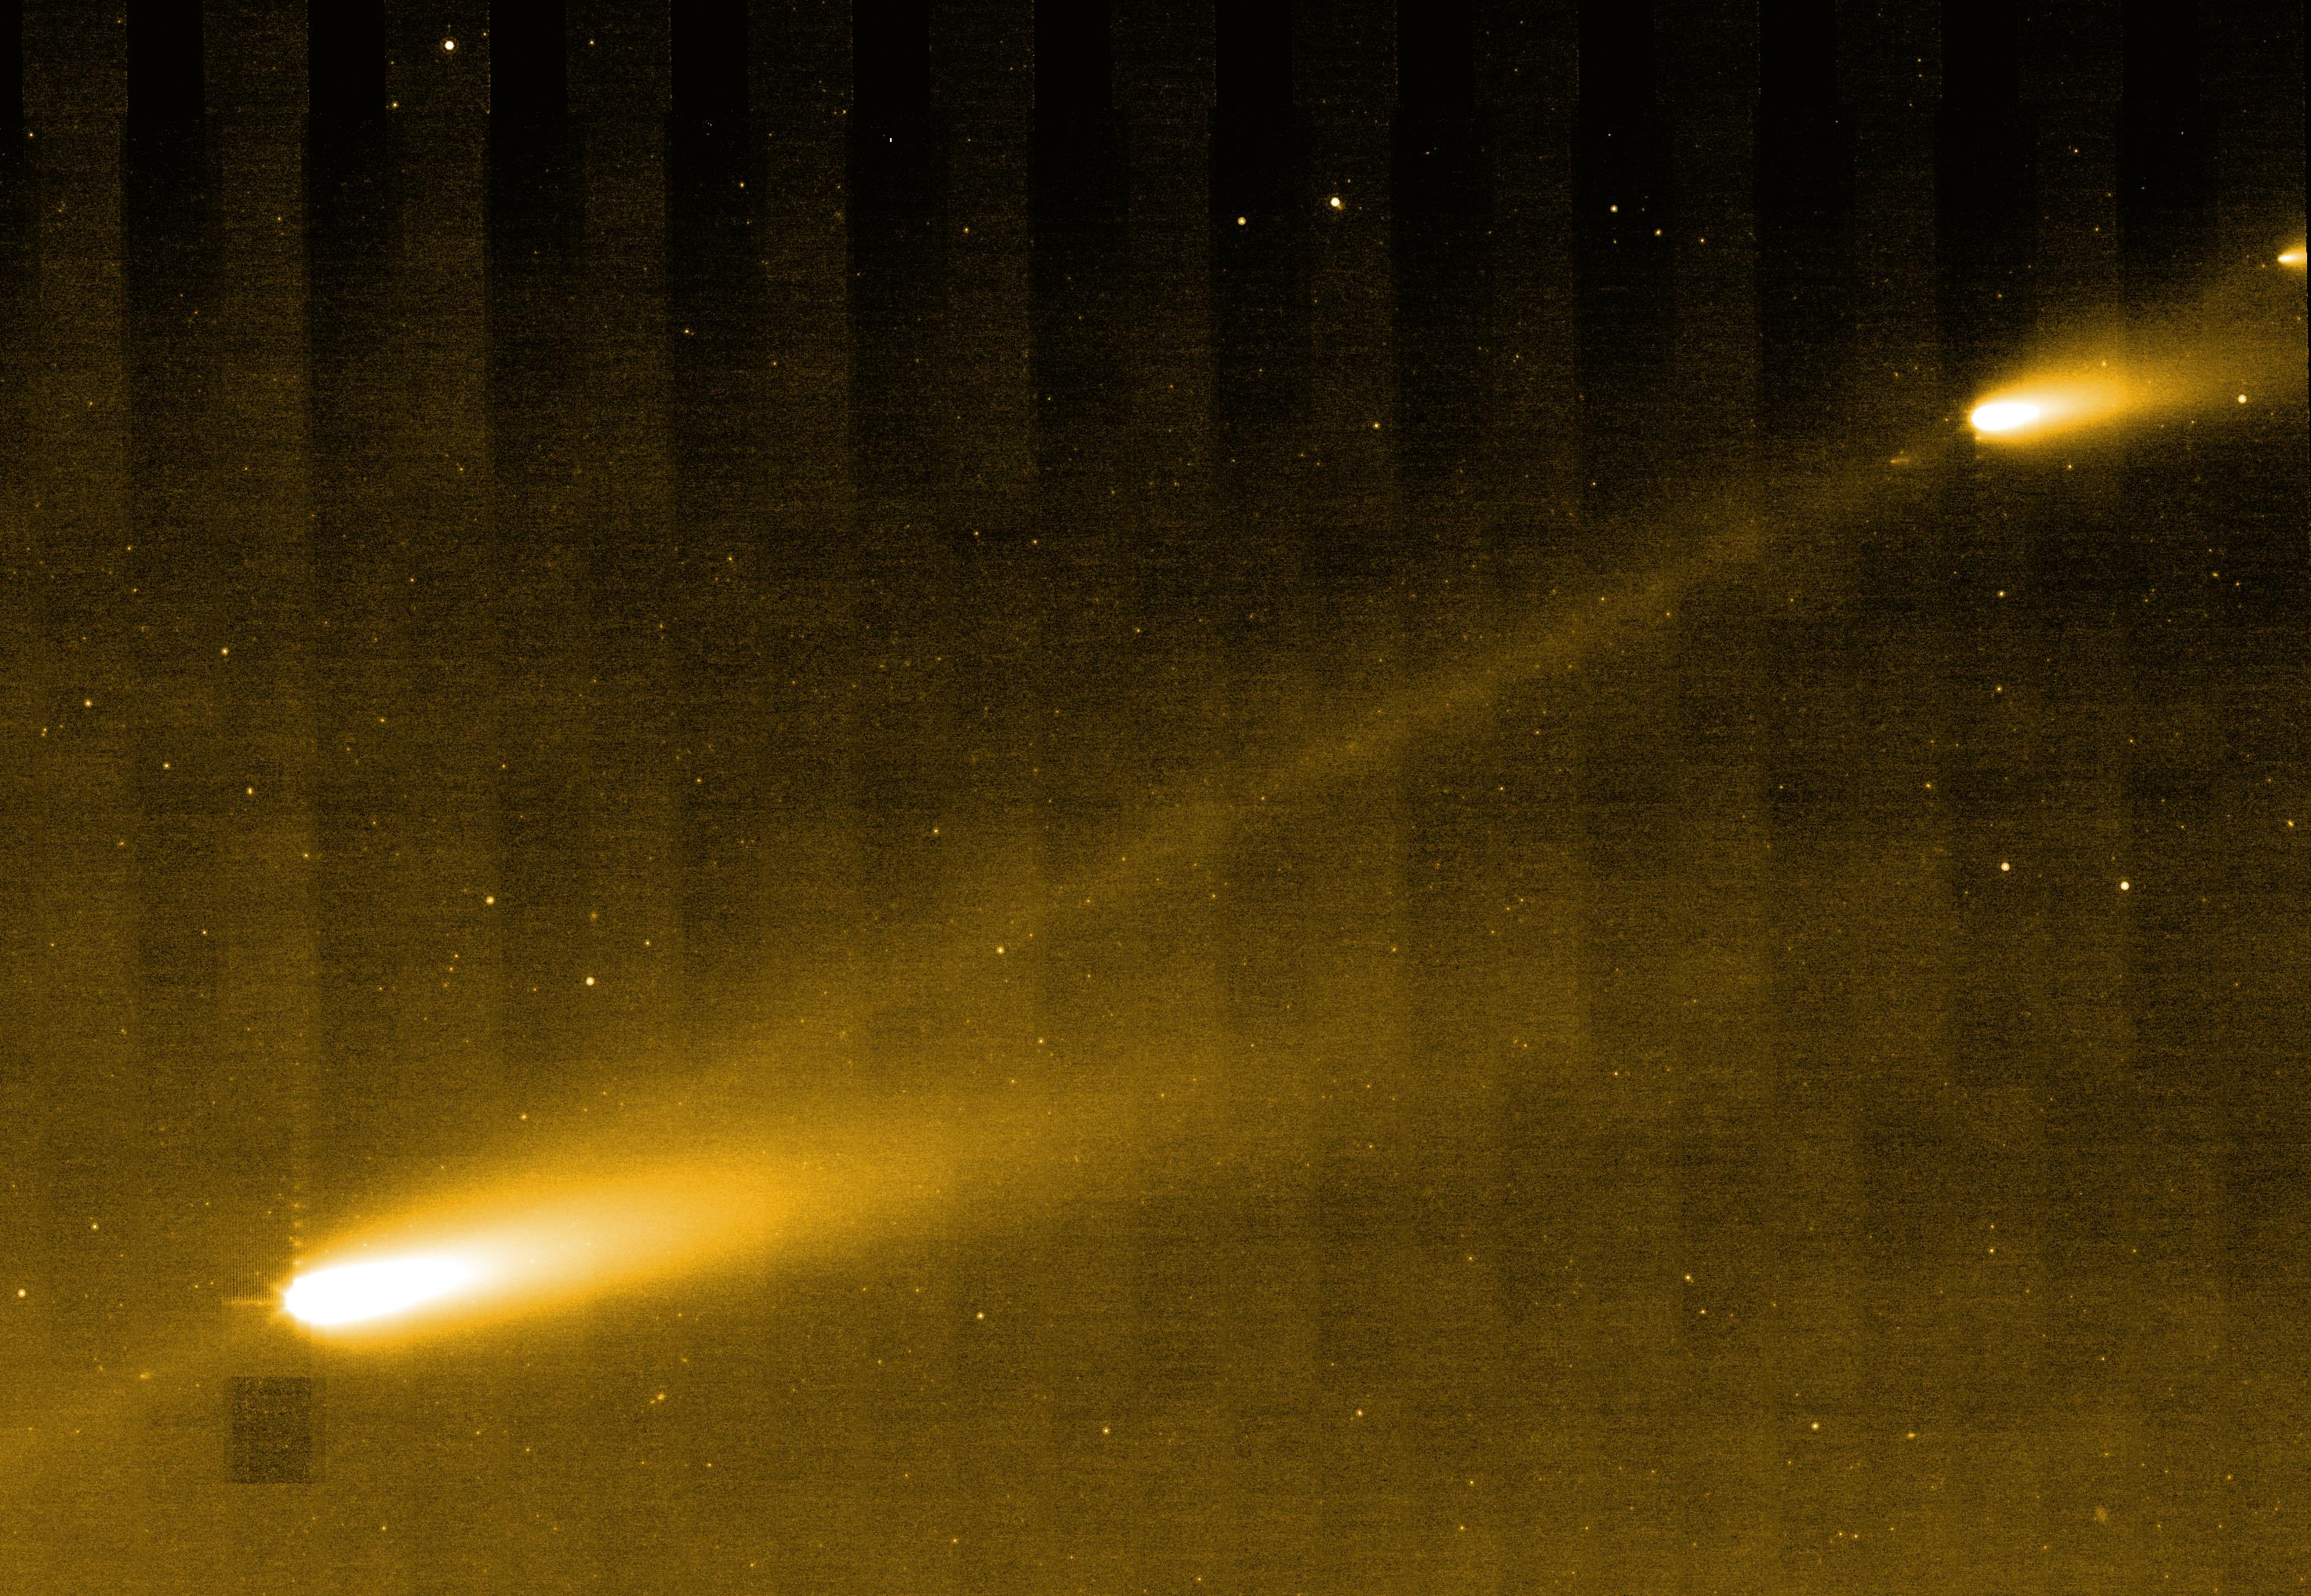
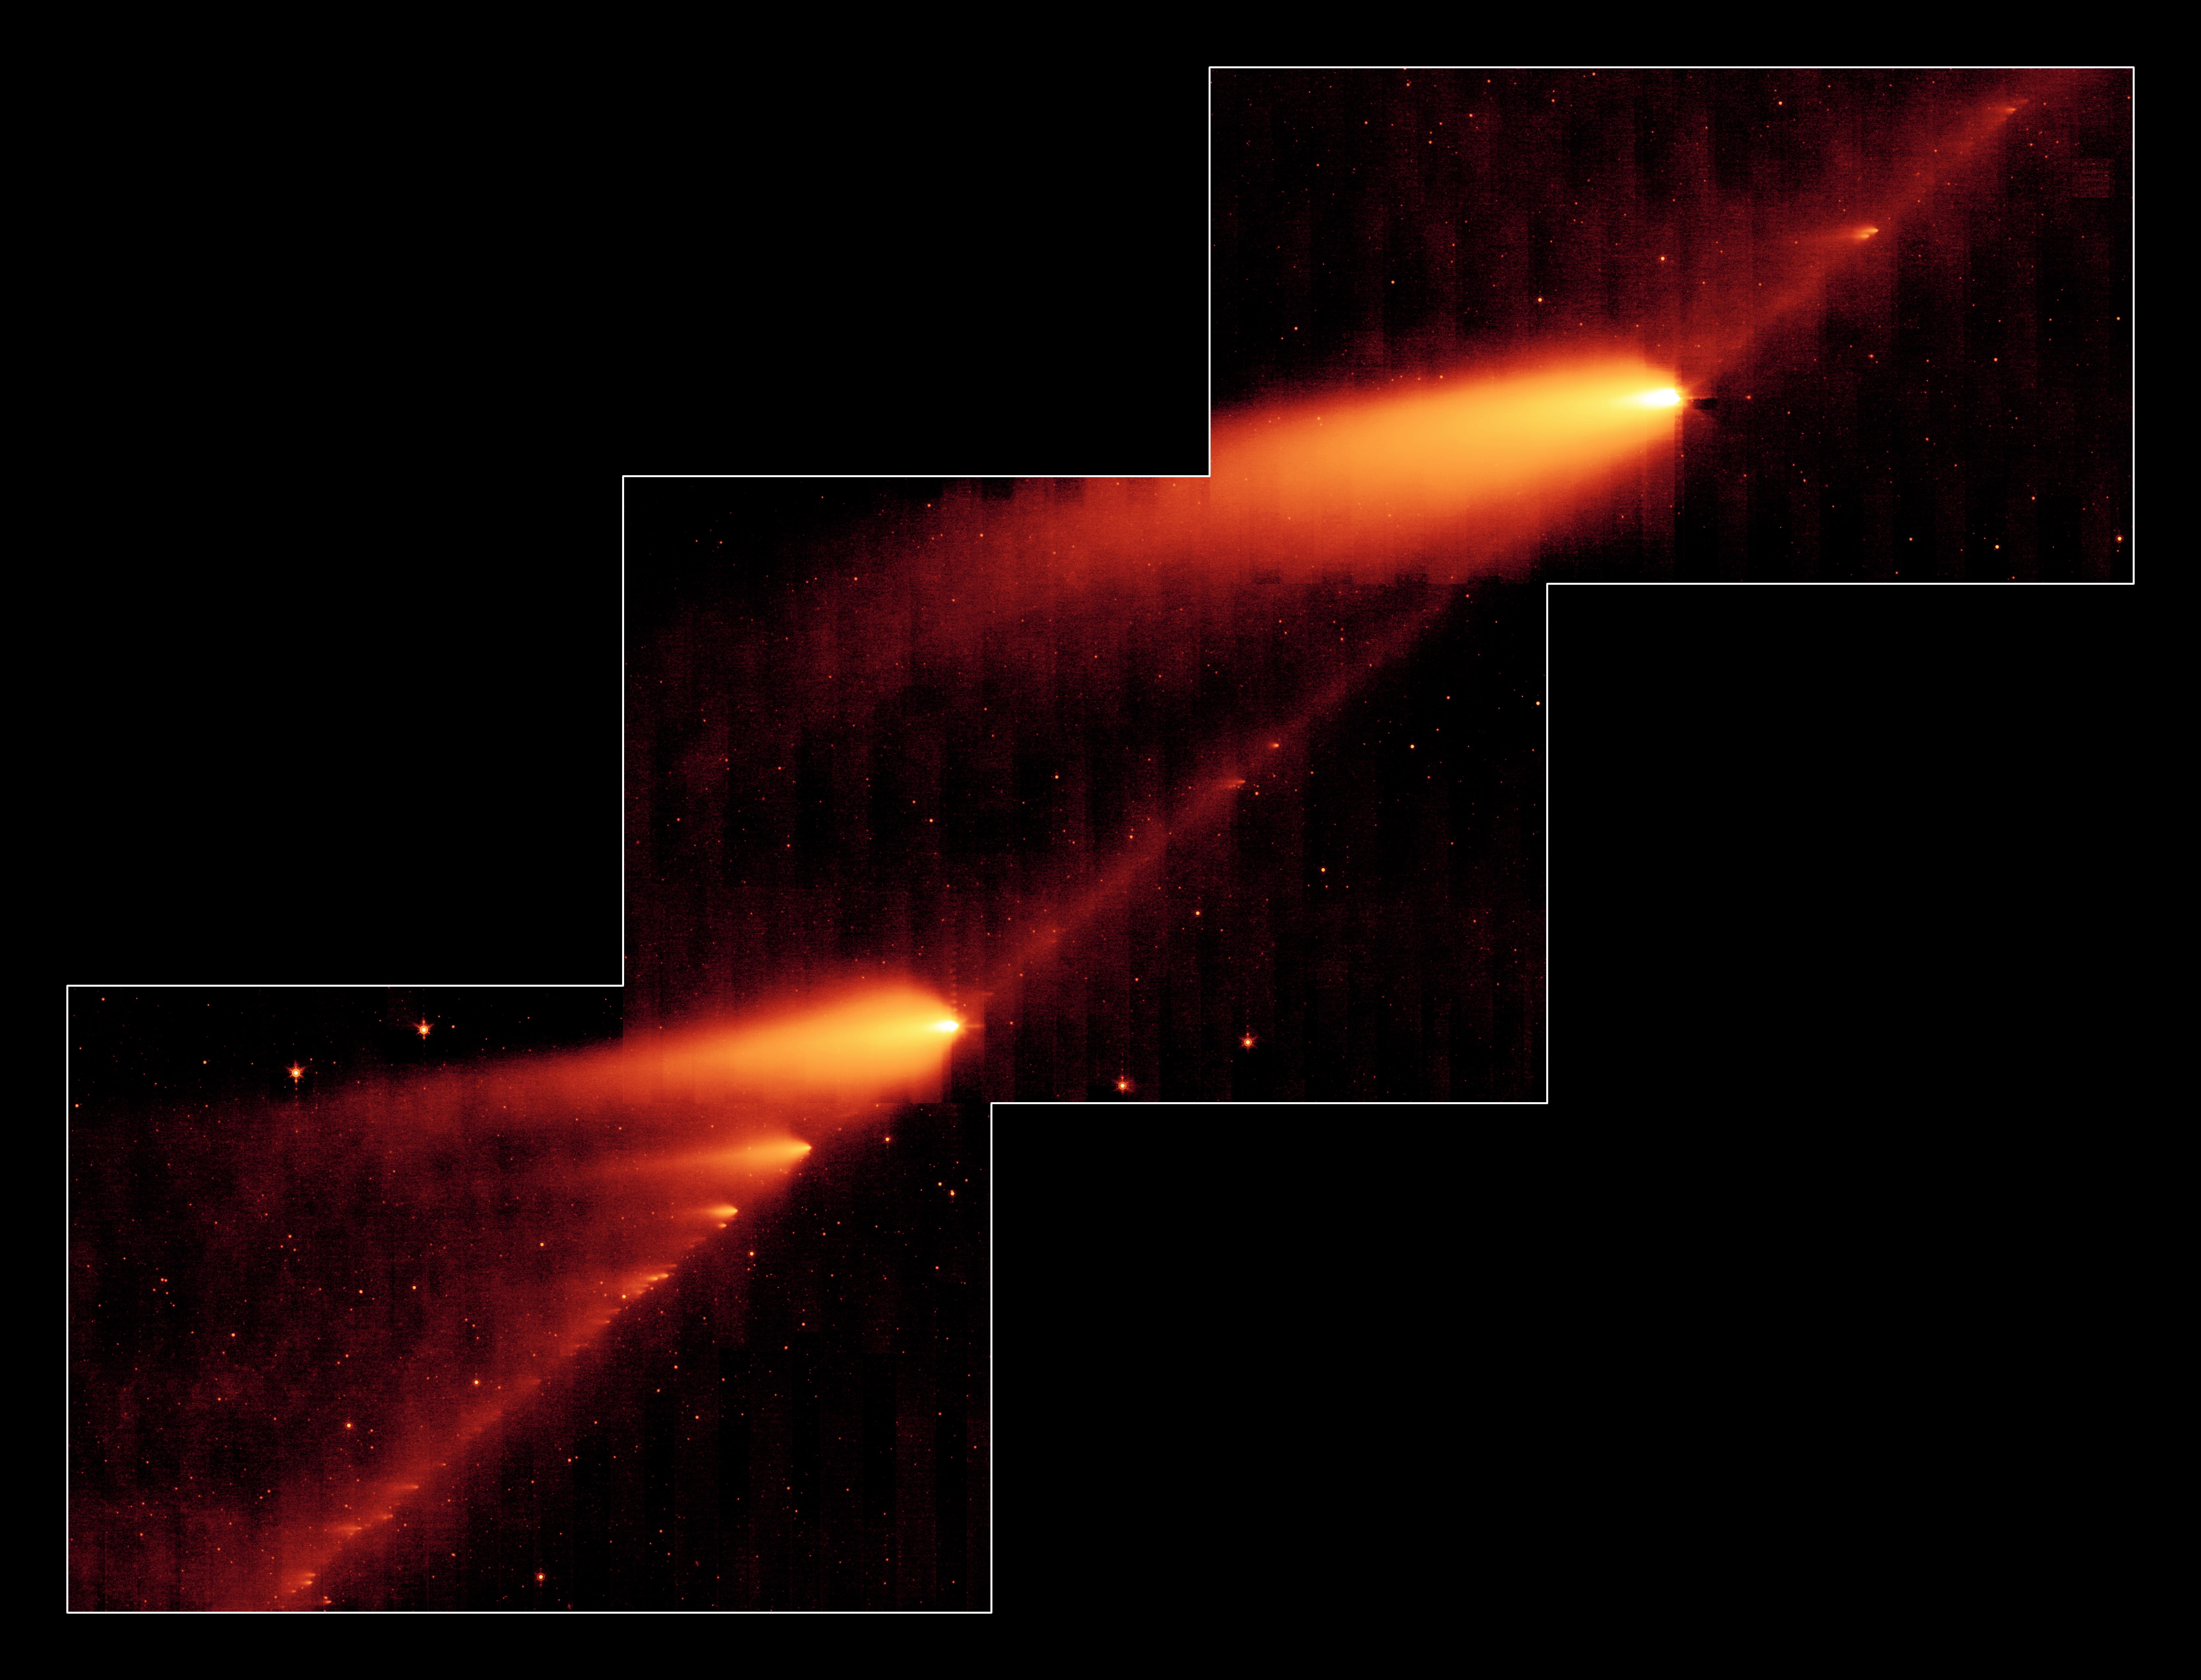
PIA08438:
Comet Stepping Stones
Full Resolution:
TIFF
(17.99 MB)
JPEG
(1.157 MB)
2006-05-10
Schwassmann-Wachmann 3
Spitzer Space Telescope
MIPS
6669x5091x3
PIA08452:
A Million Comet Pieces
Full Resolution:
TIFF
(33.99 MB)
JPEG
(1.795 MB)
2010-02-11
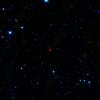
P/2010 B2 (WISE)
Wide-field Infrared Survey Explorer (WISE)
WISE Telescope
681x681x3
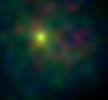
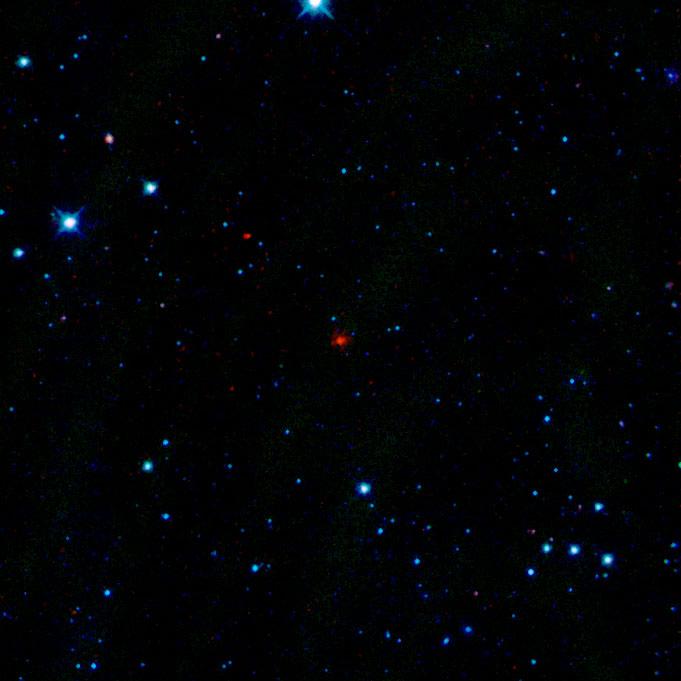
PIA12449:
First Comet Seen by WISE
Full Resolution:
TIFF
(1.393 MB)
JPEG
(33.48 kB)
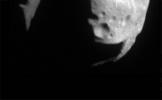
2000-05-07
Mathilde
NEAR Shoemaker
Multi-Spectral Imager
640x397x1
PIA02476:
First NEAR image of Mathilde
Full Resolution:
TIFF
(82.35 kB)
JPEG
(10.36 kB)
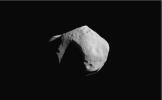
2000-05-07
Mathilde
NEAR Shoemaker
Multi-Spectral Imager
640x397x1
PIA02477:
Mosaic of Mathilde
Full Resolution:
TIFF
(34.1 kB)
JPEG
(9.134 kB)
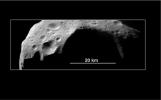
2000-05-07
Mathilde
NEAR Shoemaker
Multi-Spectral Imager
640x398x1
PIA02478:
Abundance of Very Large Impact Craters on Mathilde
Full Resolution:
TIFF
(54.42 kB)
JPEG
(16 kB)
2000-05-07
Mathilde
NEAR Shoemaker
Multi-Spectral Imager
640x398x1
PIA02479:
Two Views of Mathilde
Full Resolution:
TIFF
(37.39 kB)
JPEG
(7.837 kB)
2000-06-10
Mathilde
NEAR Shoemaker
Multi-Spectral Imager
562x329x1
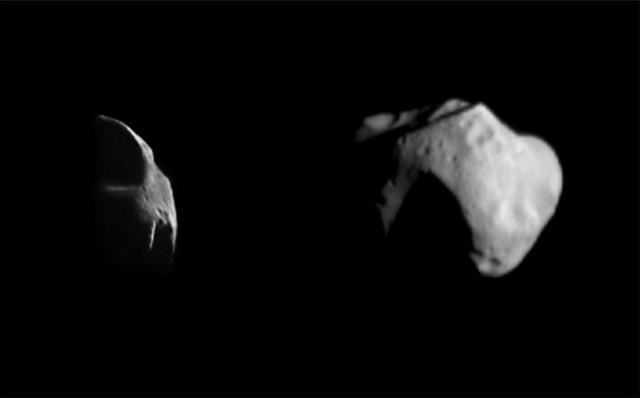
PIA02494:
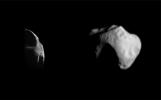
Two Very Different Asteroids
Full Resolution:
TIFF
(65.82 kB)
JPEG
(12.85 kB)
1996-01-29
Ida
Galileo
Solid-State Imaging
905x655x3
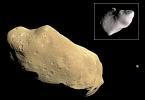
PIA00069:
Ida and Dactyl in Enhanced Color
Full Resolution:
TIFF
(228.1 kB)
JPEG
(20.58 kB)
1996-09-12
Ida
Galileo
Solid-State Imaging
2100x2130x1
PIA00135:
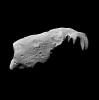
Asteroid Ida - Five Frame Mosaic
Full Resolution:
TIFF
(770.9 kB)
JPEG
(199.1 kB)
1996-02-01
Ida
Galileo
Solid-State Imaging
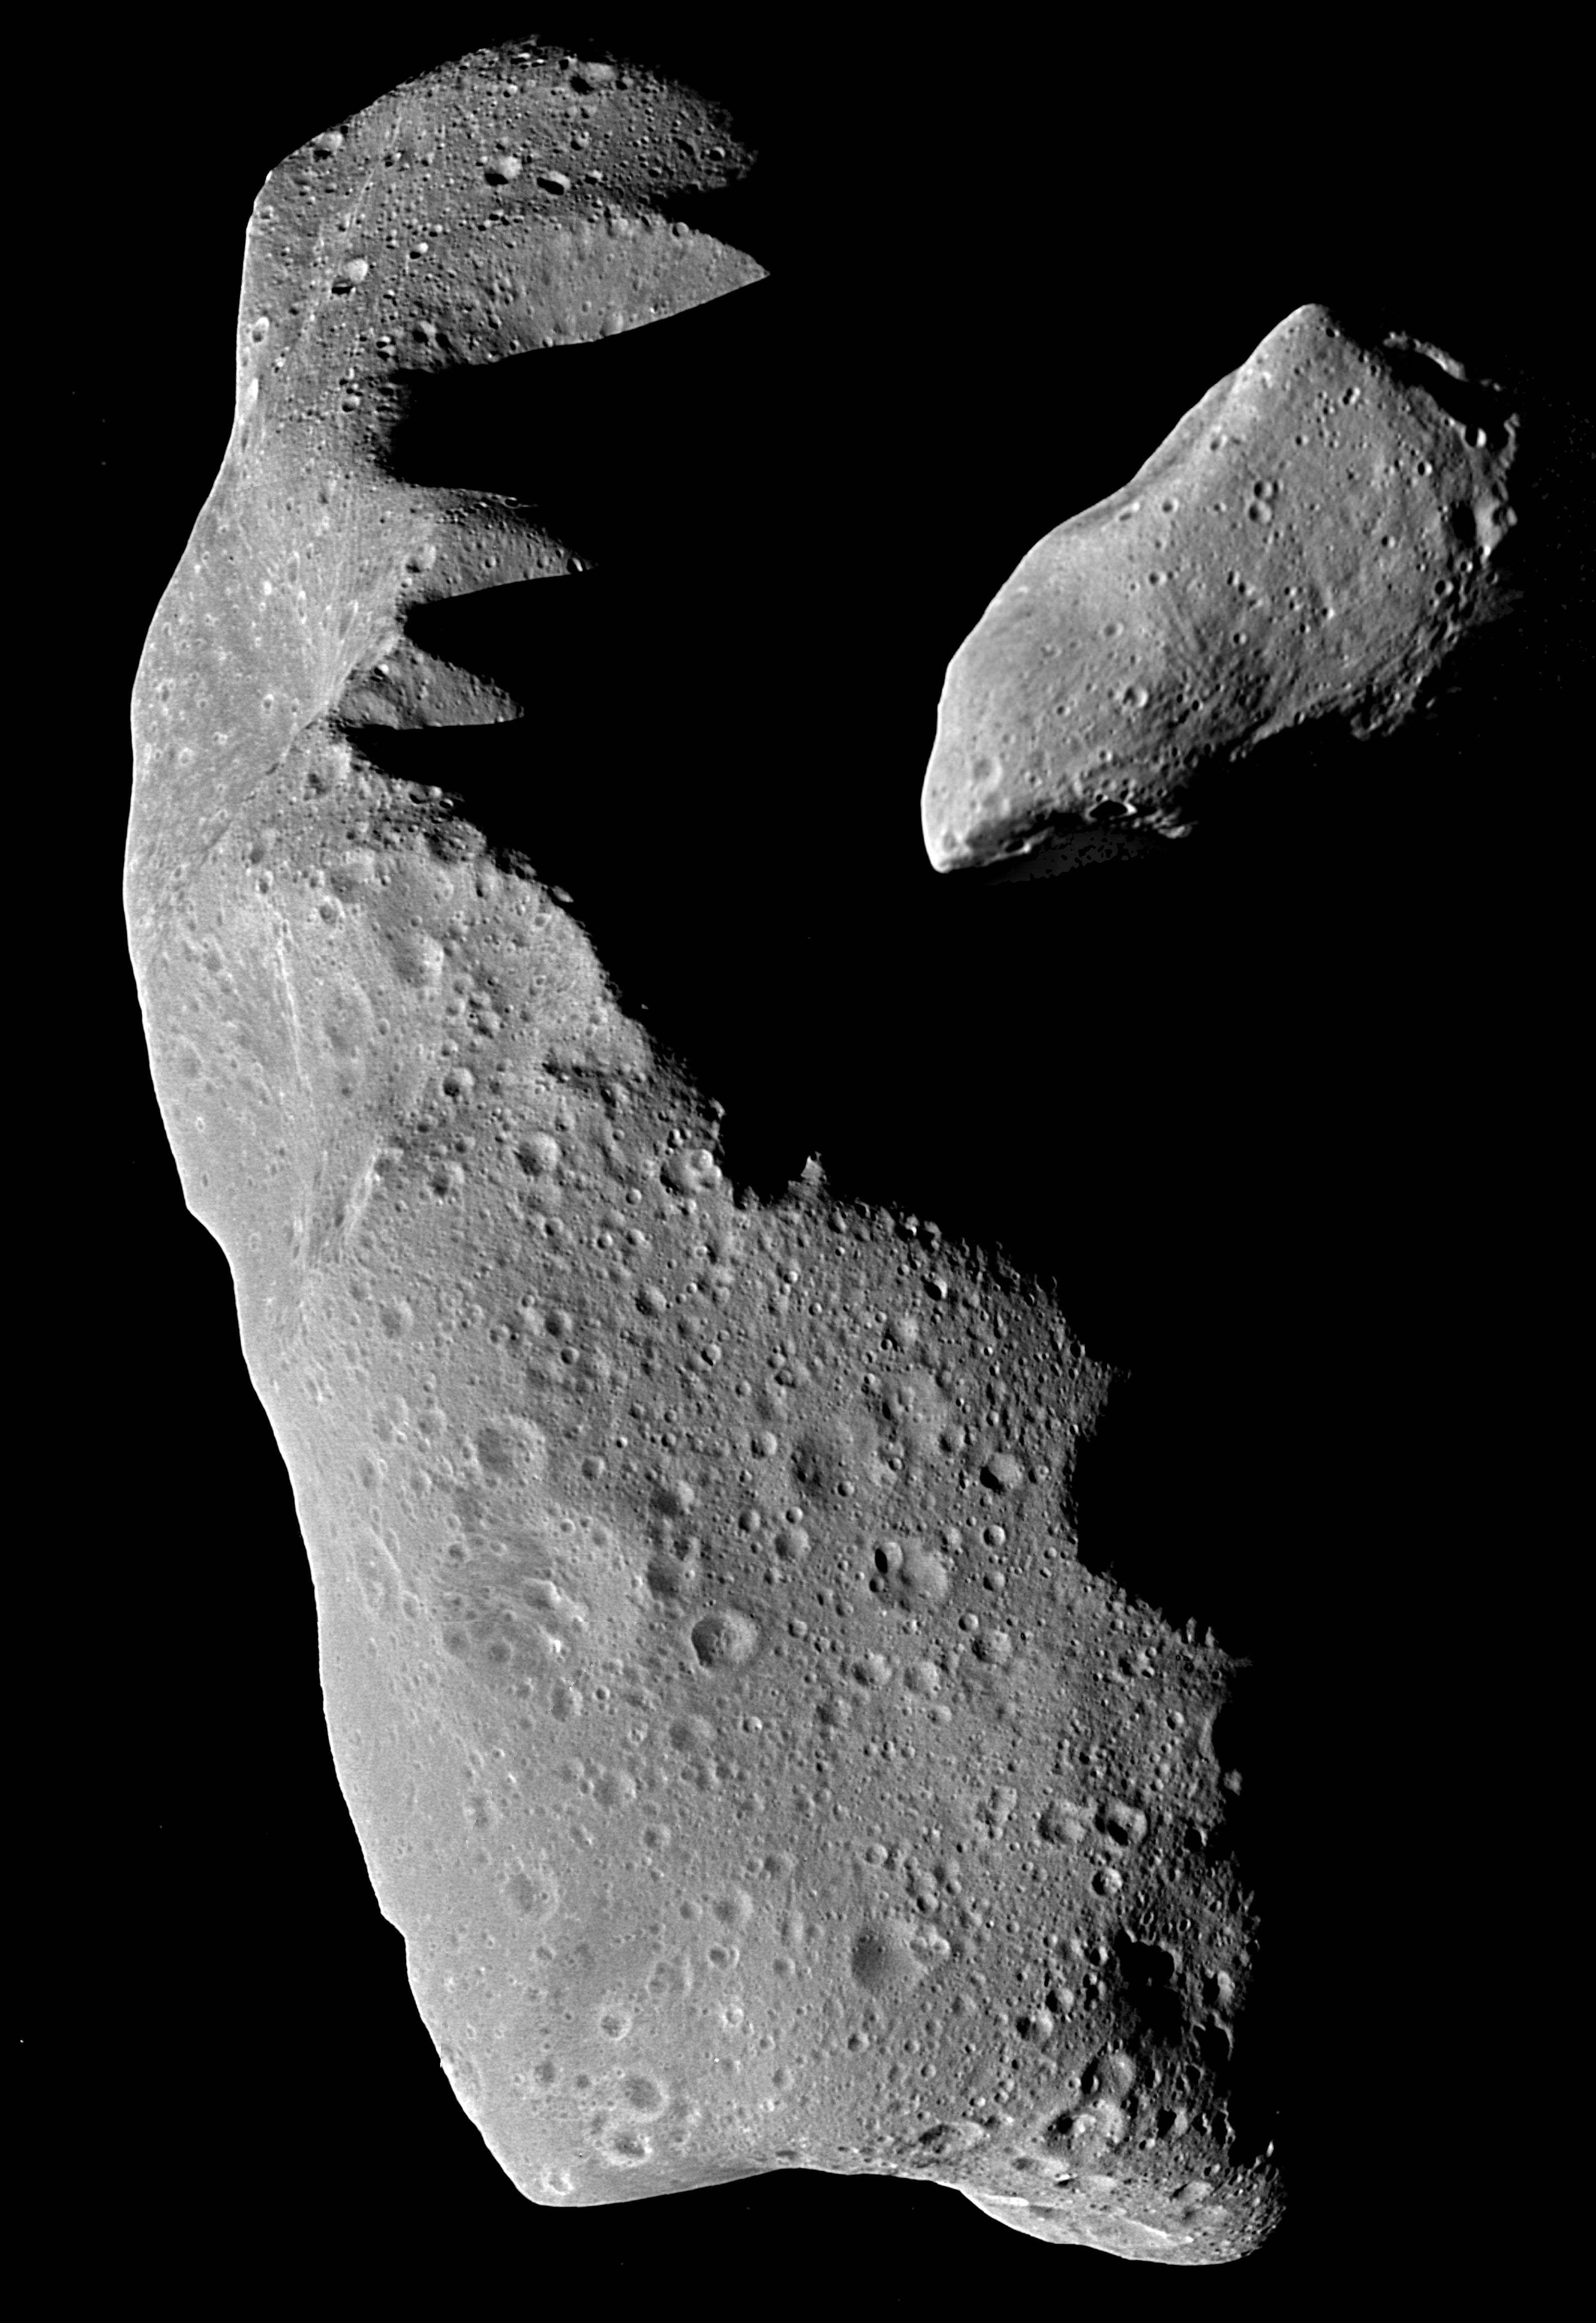
1700x1260x1
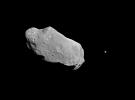
PIA00136:
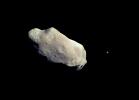
Asteroid Ida and Its Moon
Full Resolution:
TIFF
(277.7 kB)
JPEG
(56.8 kB)
1996-01-29
Ida
Galileo
Solid-State Imaging
1000x1024x1
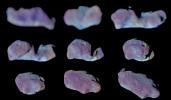
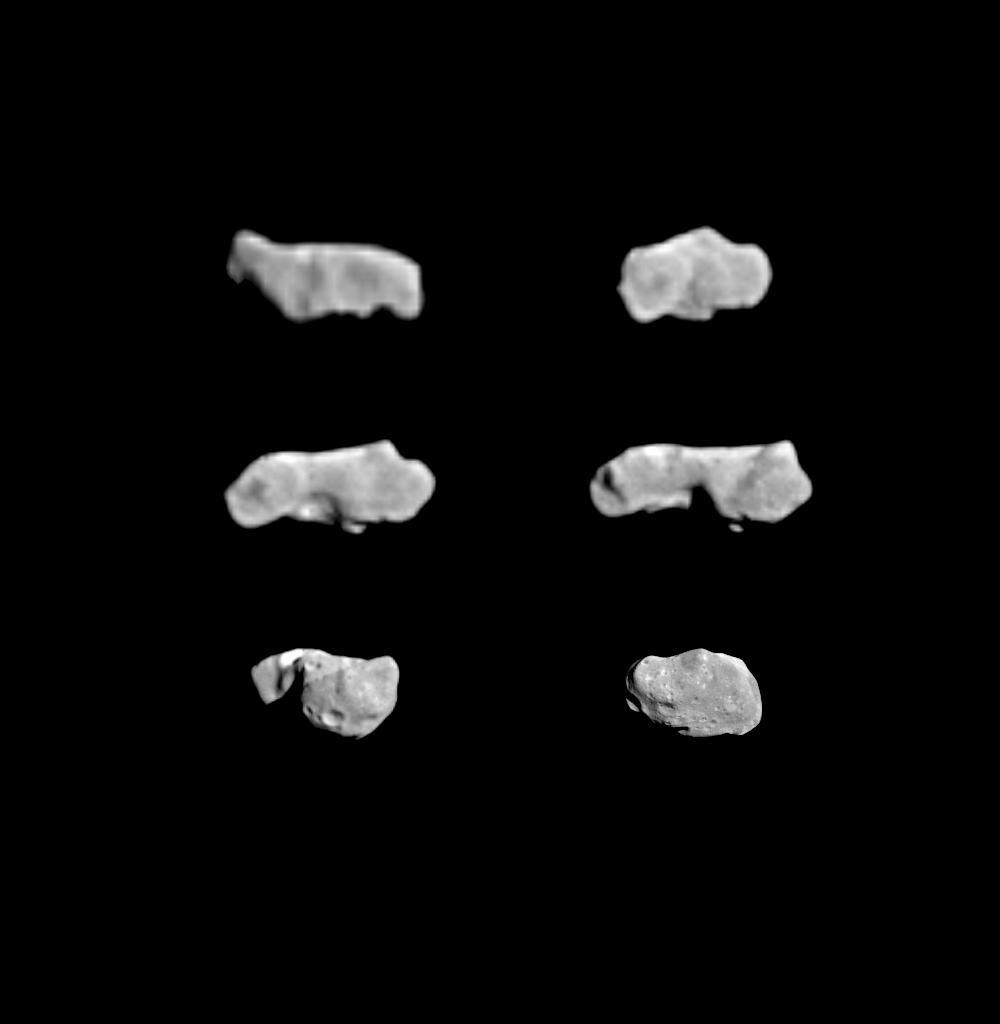
PIA00137:
Asteroid Ida - 6 Views Showing Rotation
Full Resolution:
TIFF
(87.64 kB)
JPEG
(23.32 kB)
1996-01-29
Ida
Galileo
Solid-State Imaging
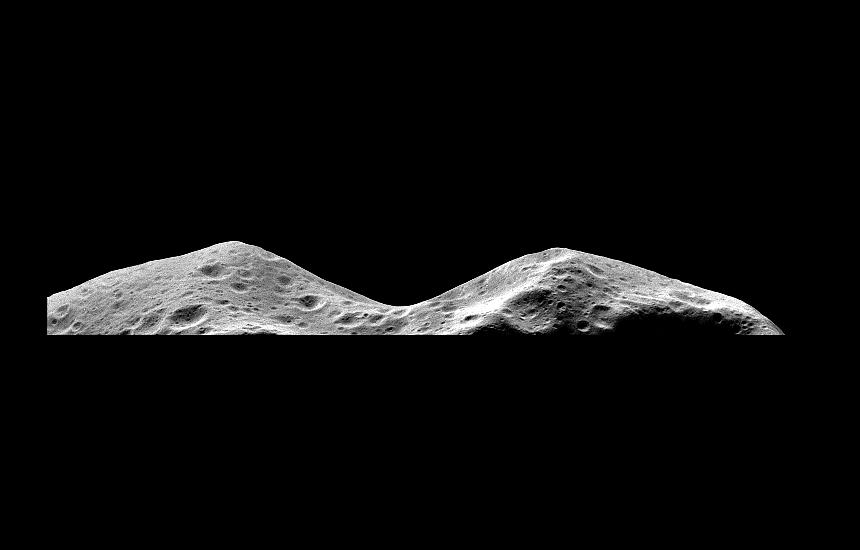
860x550x1
PIA00138:
Asteroid Ida - Limb at Closest Approach
Full Resolution:
TIFF
(57.91 kB)
JPEG
(22.93 kB)
1998-06-04
Ida
Galileo
Solid-State Imaging
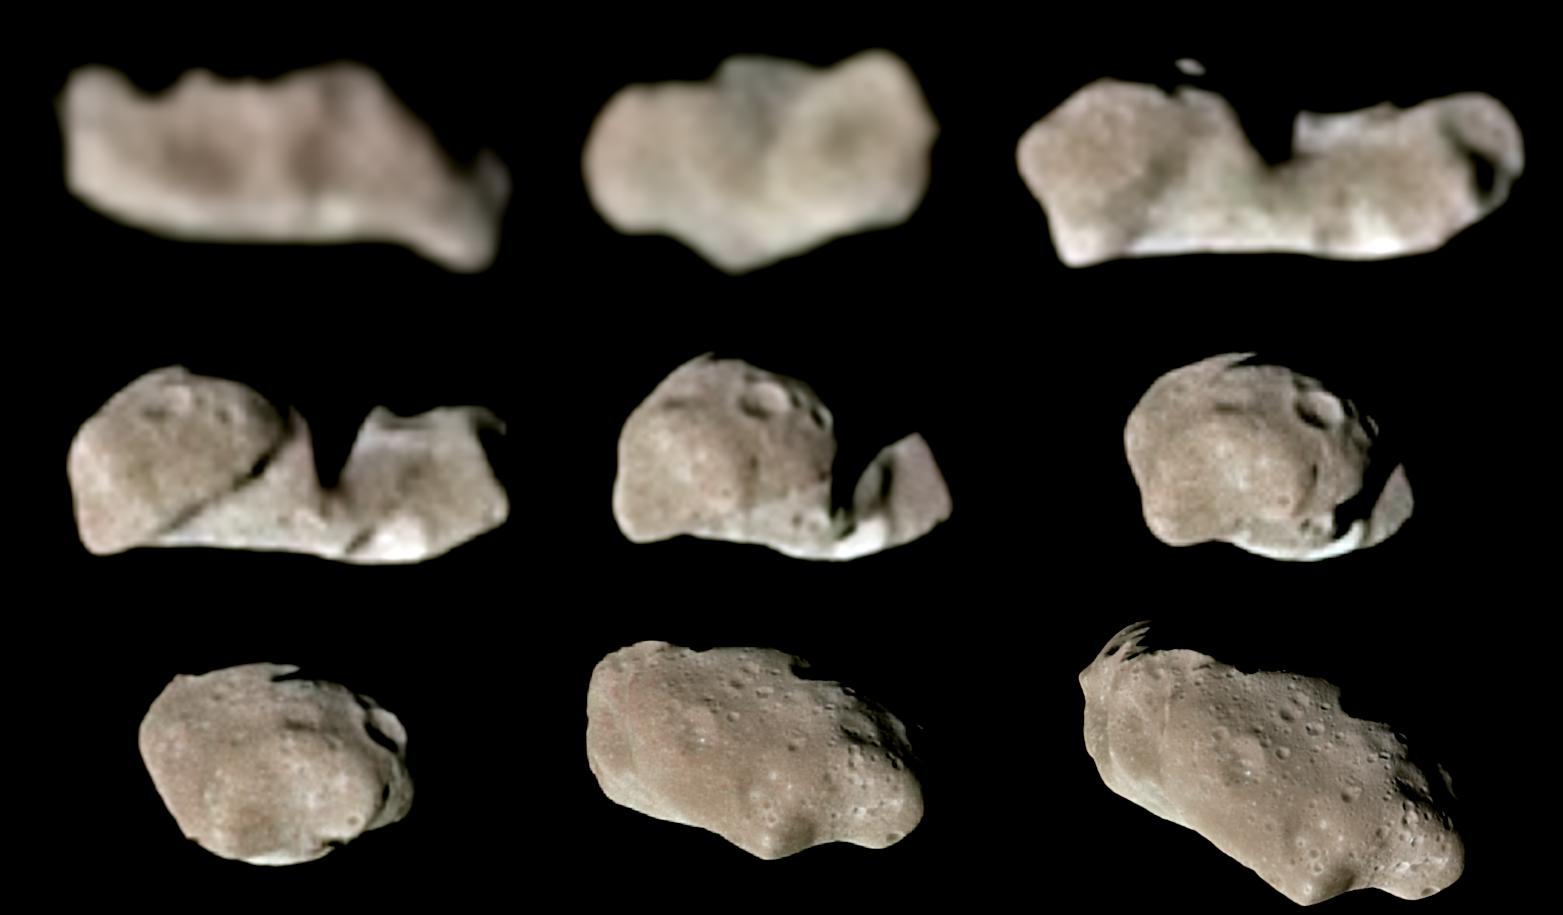
1563x915x3
PIA00330:
Nine Galileo Views in Natural Color of Main-Belt Asteroid Ida
Full Resolution:
TIFF
(1.692 MB)
JPEG
(75.18 kB)
1998-06-04
Ida
Galileo
Solid-State Imaging
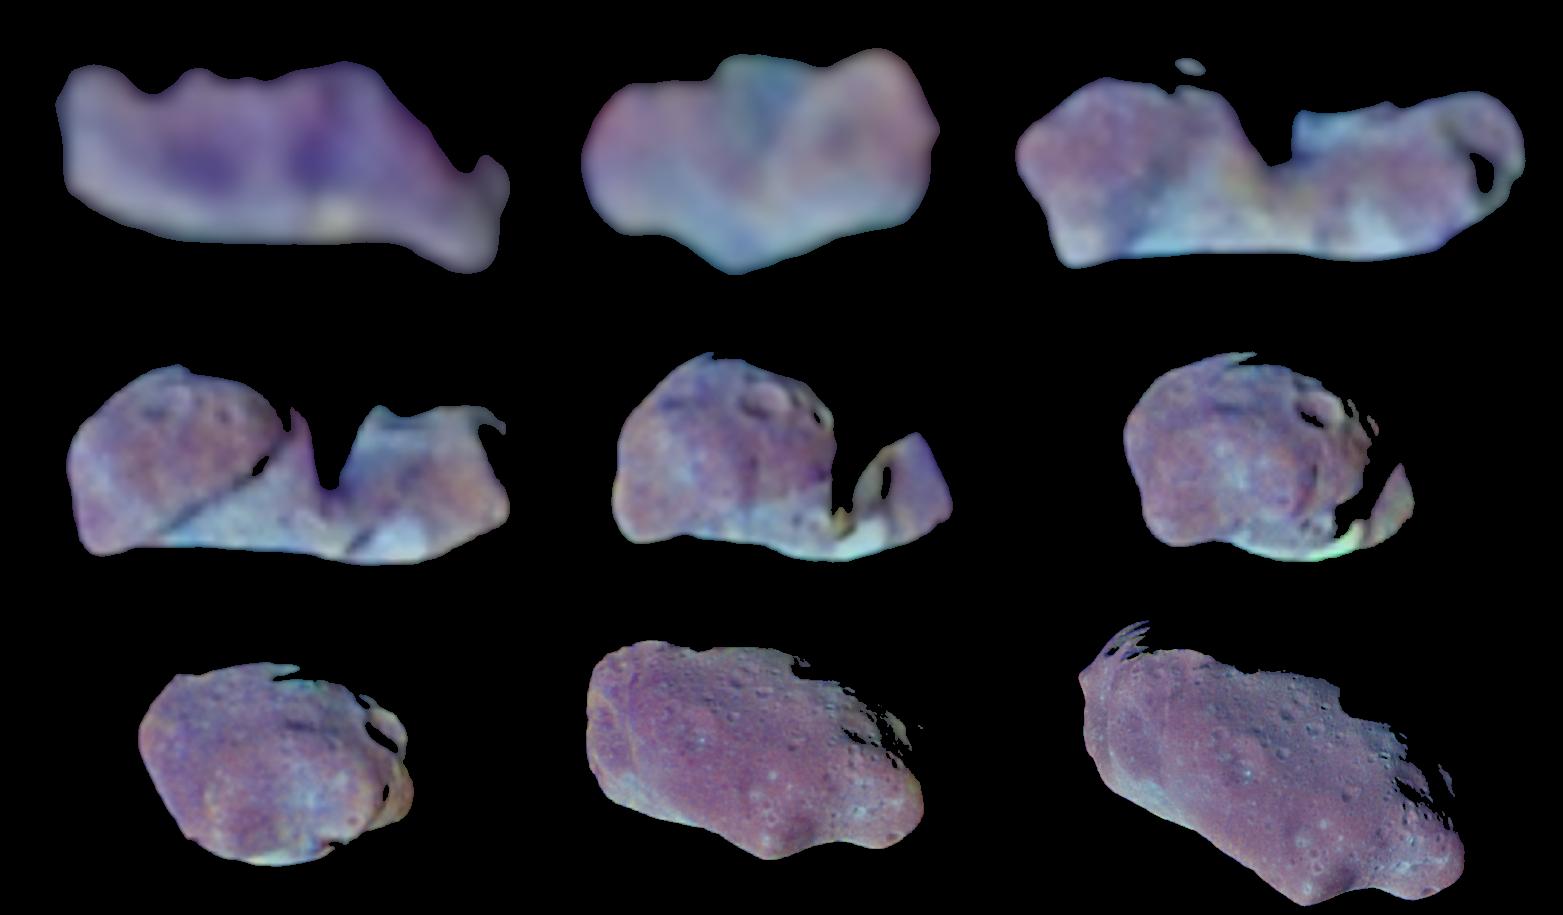
1563x915x3
PIA00331:
Nine Galileo Views in Exaggerated Color of Main-Belt Asteroid Ida
Full Resolution:
TIFF
(1.713 MB)
JPEG
(76.92 kB)
1998-06-04
Ida
Galileo
Solid-State Imaging
3195x4650x1
PIA00332:
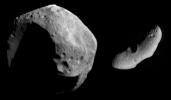
Ida and Gaspra
Full Resolution:
TIFF
(5.869 MB)
JPEG
(815 kB)
1998-11-03
Ida
Galileo
Solid-State Imaging
580x400x3
PIA00333:
Asteroid Ida and its Satellite Dactyl in Enhanced Color
Full Resolution:
TIFF
(254.4 kB)
JPEG
(19.73 kB)
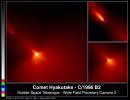
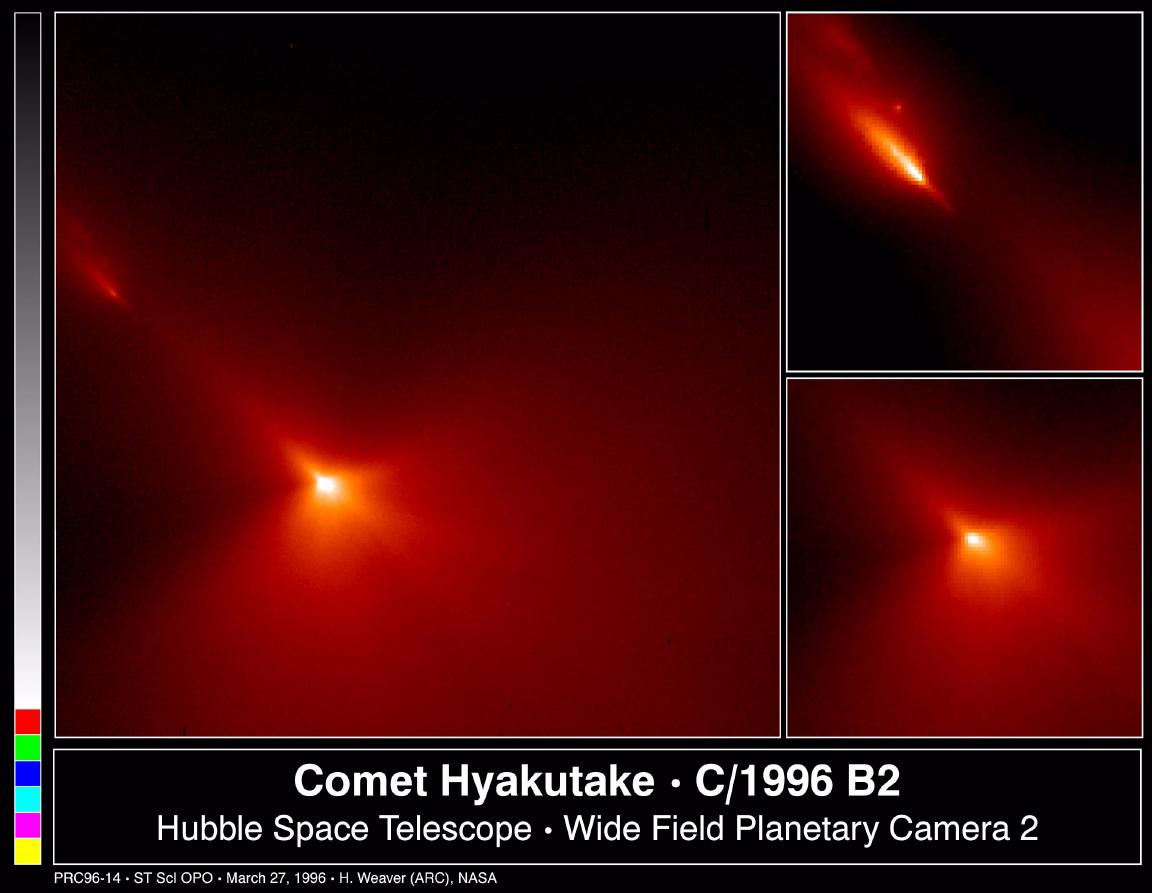
1998-08-02
Hyakutake
Hubble Space Telescope
WFPC2
991x486x3
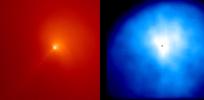
PIA01288:
Comet Hyakutake C/1996 B2
Full Resolution:
TIFF
(1.005 MB)
JPEG
(29.38 kB)
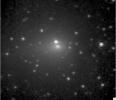
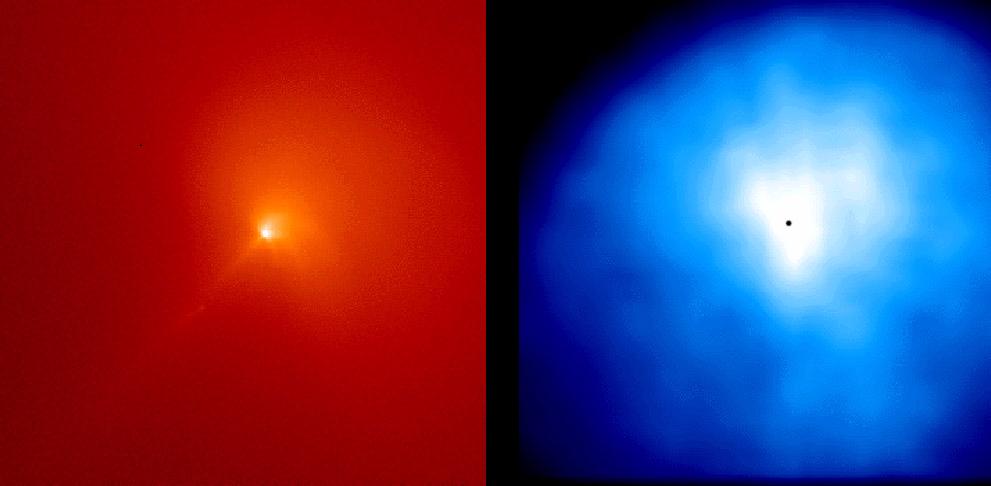
1998-08-03
Hyakutake
Hubble Space Telescope
WFPC2
1152x893x3
PIA01290:
Hubble Probes Inner Region of Comet Hyakutake
Full Resolution:
TIFF
(1.269 MB)
JPEG
(77.61 kB)
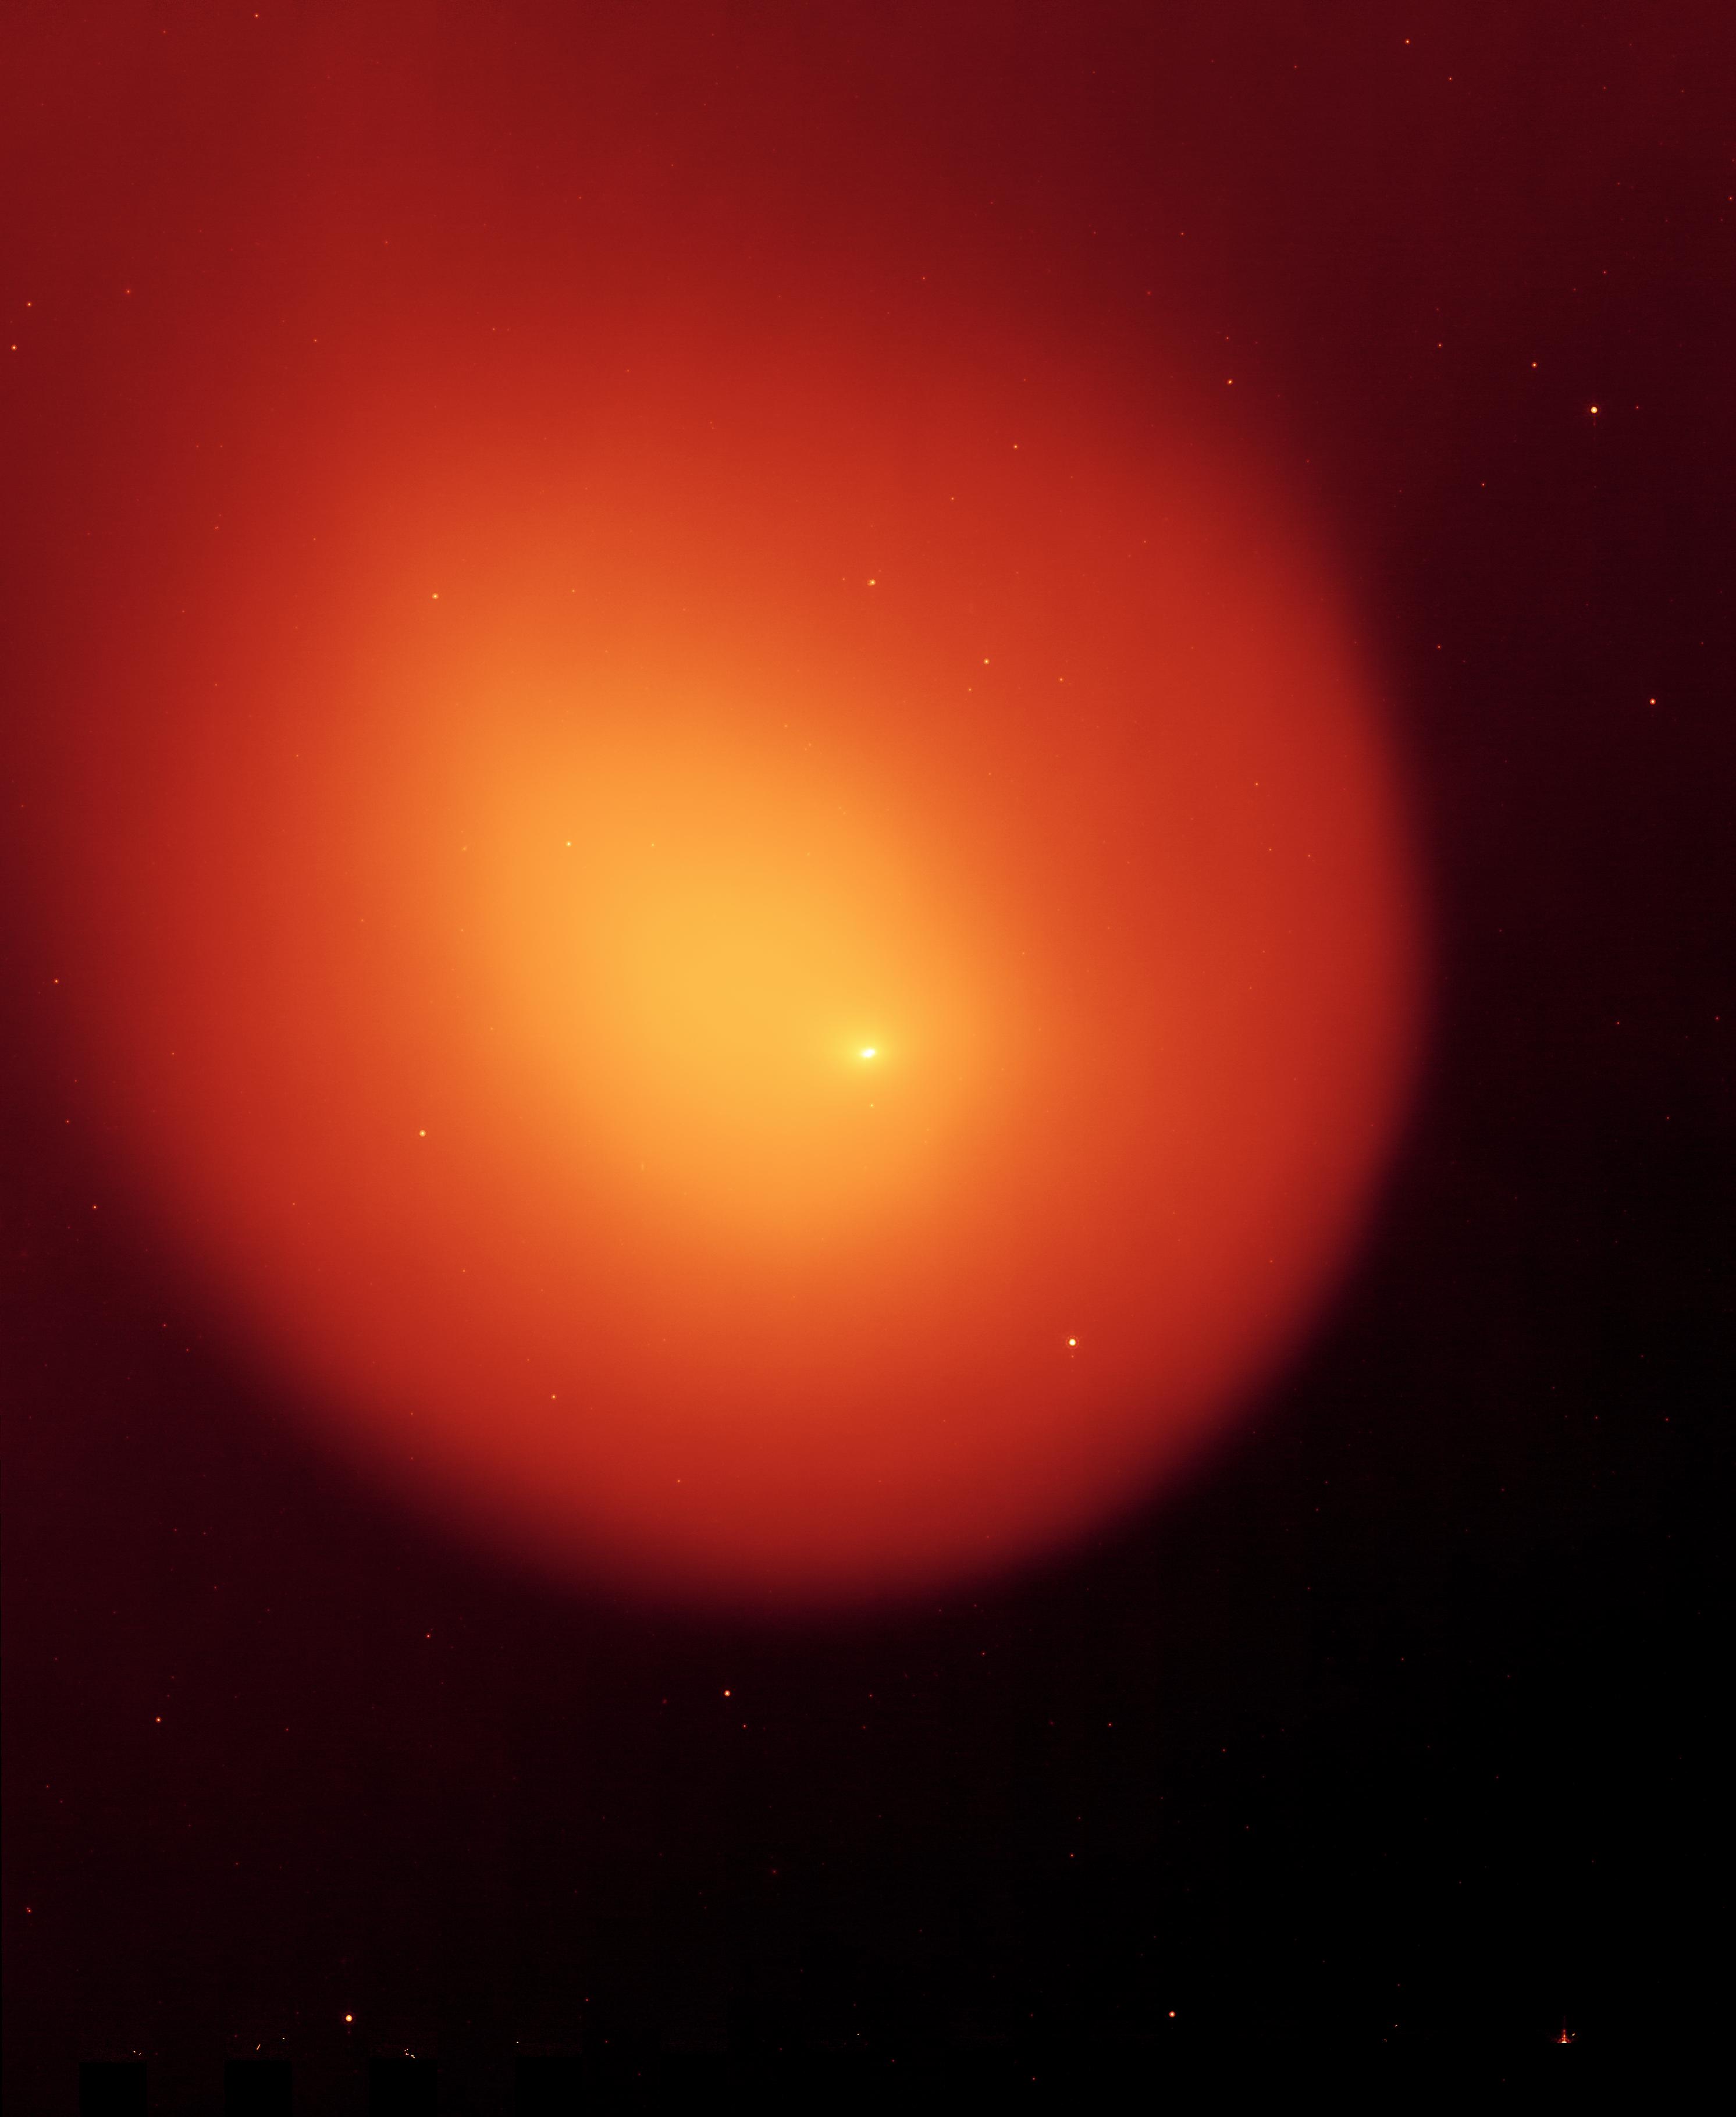
2008-10-13
Holmes
Spitzer Space Telescope
IRAC
MIPS
2984x3639x3
PIA11228:
Anatomy of a Busted Comet
Full Resolution:
TIFF
(32.58 MB)
JPEG
(326.3 kB)
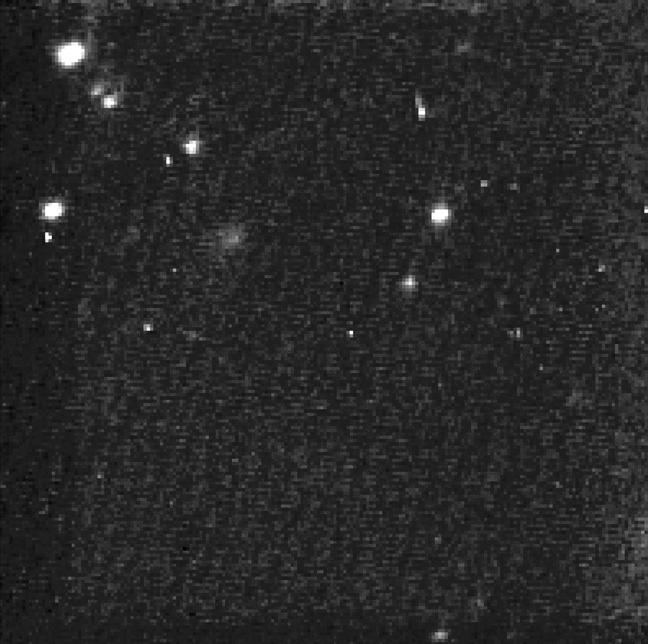
2010-09-08
Hartley 2
Deep Impact
Medium Resolution Instrument (MRI)
512x512x1
PIA13374:
Deep Impact Spacecraft's First Glimpse of Comet Hartley 2
Full Resolution:
TIFF
(262.6 kB)
JPEG
(50.98 kB)
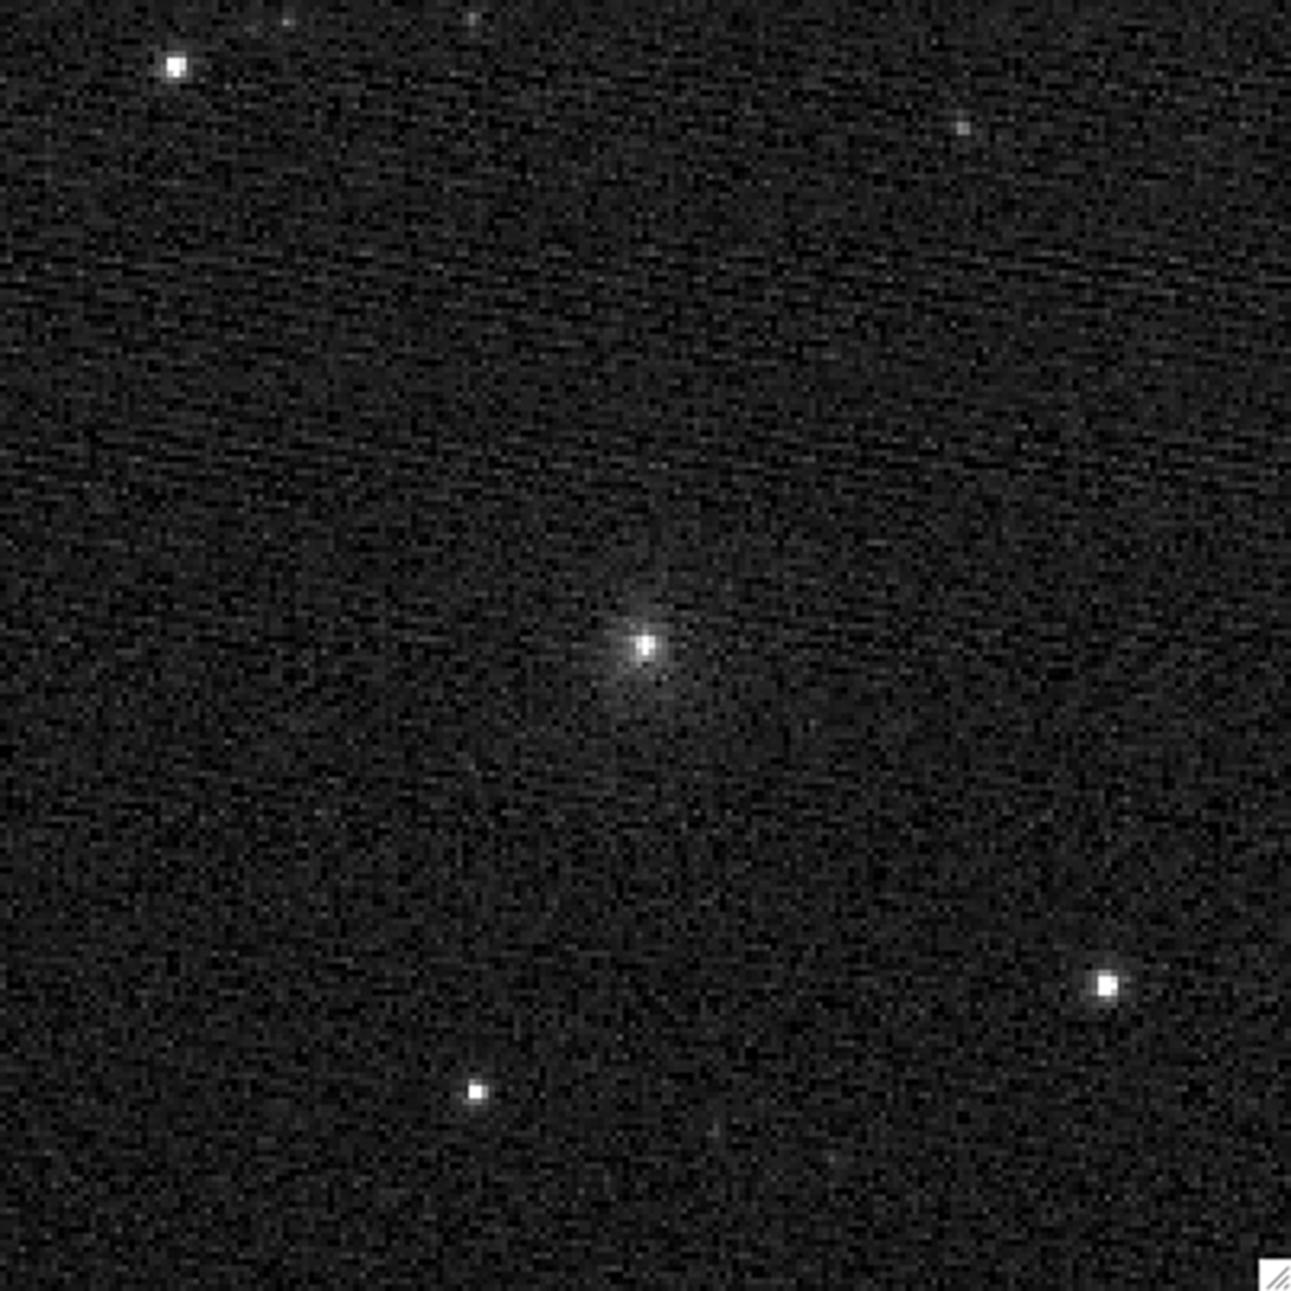
2010-10-26
Hartley 2
EPOXI
Medium Resolution Instrument (MRI)
642x552x1
PIA13547:
Hartley 2 on the Move
Full Resolution:
TIFF
(355 kB)
JPEG
(29.7 kB)
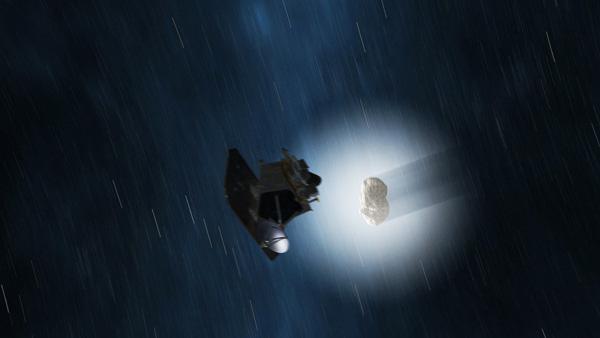
2010-10-26
Hartley 2
EPOXI
600x338x3
PIA13548:
Comet Hartley 2 Gets a Visitor (Artist Concept)
Full Resolution:
TIFF
(609.3 kB)
JPEG
(13.71 kB)
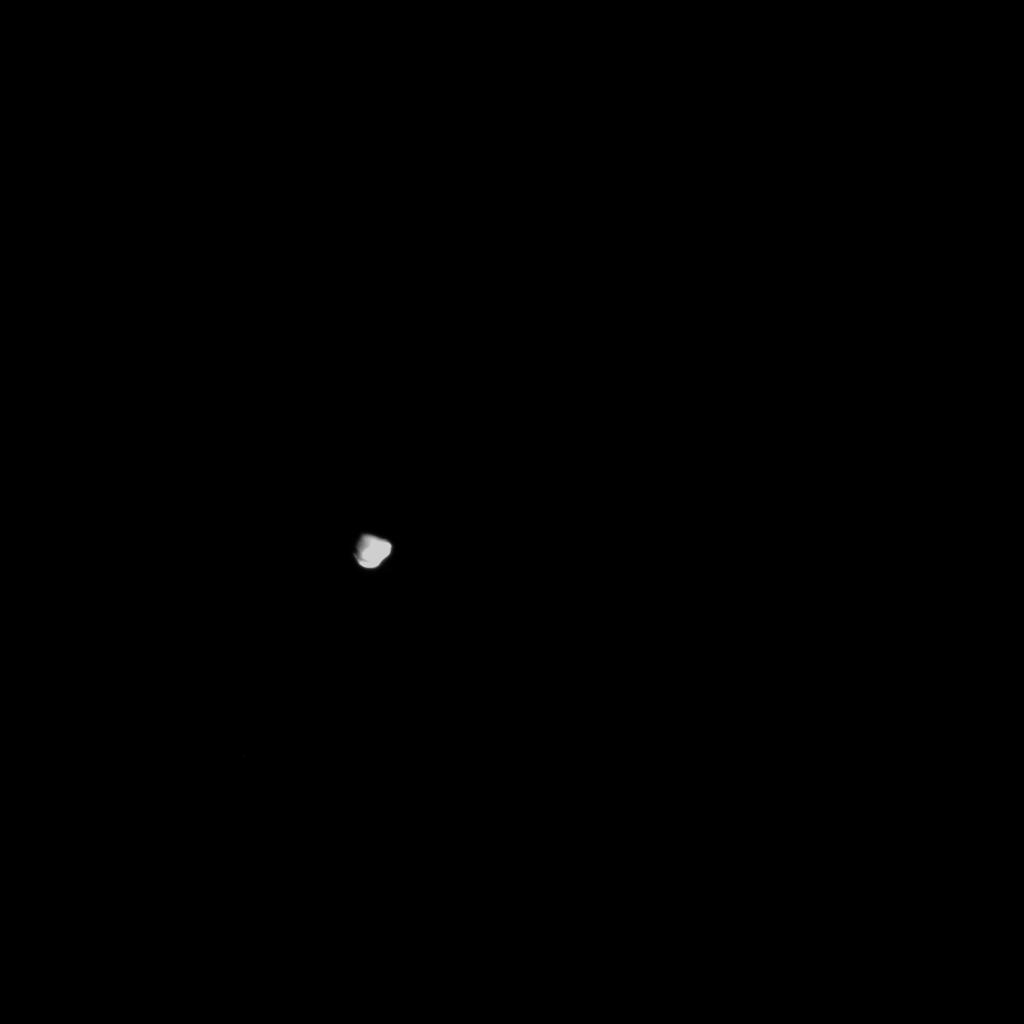
2010-11-03
Hartley 2
EPOXI
512x512x1
PIA13566:
Comet Hartley 2 Looms Large in the Sky
Full Resolution:
TIFF
(262.6 kB)
JPEG
(21.42 kB)
2010-11-04
Hartley 2
EPOXI
High Resolution Instrument (HRI)
Medium Resolution Instrument (MRI)
1274x535x1
PIA13568:
Spacecraft Images Comet Target's Jets
Full Resolution:
TIFF
(682.5 kB)
JPEG
(57.09 kB)
2010-11-04
Hartley 2
EPOXI
Medium Resolution Instrument (MRI)
501x501x1
PIA13570:
Introducing Comet Hartley 2
Full Resolution:
TIFF
(251.5 kB)
JPEG
(9.679 kB)
2010-11-04
Hartley 2
EPOXI
High Resolution Instrument (HRI)
Medium Resolution Instrument (MRI)
680x548x3
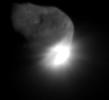
PIA13572:
Evidence for a First-of-Its-Kind Comet Jet
Full Resolution:
TIFF
(1.119 MB)
JPEG
(35.8 kB)
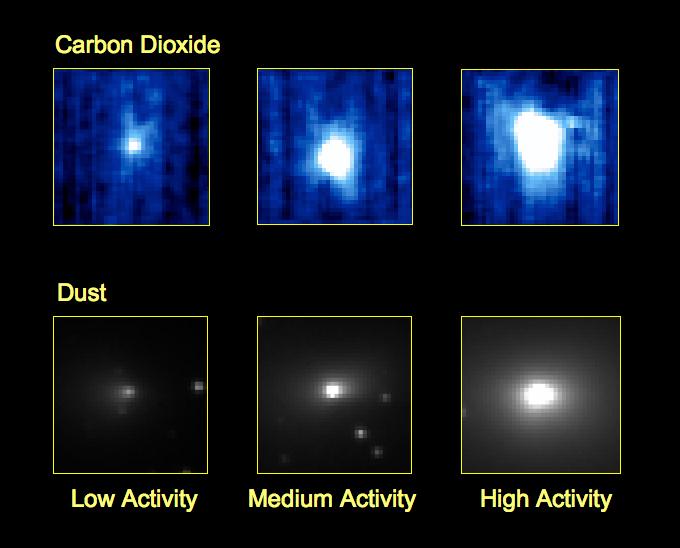
2010-11-04
Hartley 2
EPOXI
High Resolution Instrument (HRI)
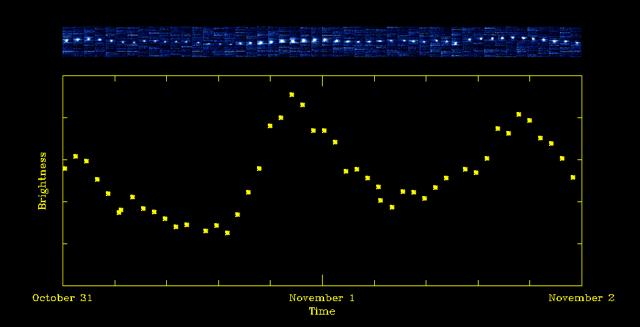
640x327x3
PIA13573:
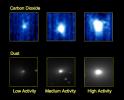
Carbon Dioxide Fluctuations in Comet Hartley 2
Full Resolution:
TIFF
(628.7 kB)
JPEG
(18.46 kB)
2010-11-04
Hartley 2
EPOXI
Medium Resolution Instrument (MRI)
2999x2249x3
PIA13574:
Jets Galore
Full Resolution:
TIFF
(6.754 MB)
JPEG
(199.9 kB)
2010-11-04
Hartley 2
EPOXI
Medium Resolution Instrument (MRI)
2999x2249x3
PIA13575:
Up Close and Personal with Hartley 2
Full Resolution:
TIFF
(20.23 MB)
JPEG
(204.6 kB)
2010-11-04
Hartley 2
EPOXI
2999x2249x1
PIA13576:
Fab Five
Full Resolution:
TIFF
(6.754 MB)
JPEG
(265.1 kB)
2010-11-04
Hartley 2
EPOXI
Medium Resolution Instrument (MRI)
2999x2249x1
PIA13577:
Flying Under Comet Hartley 2
Full Resolution:
TIFF
(6.754 MB)
JPEG
(172.1 kB)
2010-11-05
Hartley 2
EPOXI
Medium Resolution Instrument (MRI)
501x501x1
PIA13579:
Almost There at Comet Hartley 2
Full Resolution:
TIFF
(251.5 kB)
JPEG
(8.066 kB)
2010-11-05
Hartley 2
EPOXI
Medium Resolution Instrument (MRI)
501x501x1
PIA13578:
Closing in on Comet Hartley 2
Full Resolution:
TIFF
(251.5 kB)
JPEG
(5.171 kB)
2010-11-05
Hartley 2
EPOXI
Medium Resolution Instrument (MRI)
501x501x1
PIA13600:
Slipping By Comet Hartley 2
Full Resolution:
TIFF
(251.5 kB)
JPEG
(7.469 kB)
2010-11-05
Hartley 2
EPOXI
Medium Resolution Instrument (MRI)
501x501x1
PIA13601:
Leaving Comet Hartley 2
Full Resolution:
TIFF
(251.5 kB)
JPEG
(5.035 kB)
2010-11-05
Hartley 2
EPOXI
Medium Resolution Instrument (MRI)
513x448x1
PIA13602:
Flight of the Comet
Full Resolution:
TIFF
(230.3 kB)
JPEG
(9.195 kB)
2010-11-18
Hartley 2
EPOXI
High Resolution Instrument (HRI)
928x496x1
PIA13622:
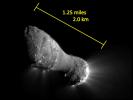
Hartley 2, Close Up
Full Resolution:
TIFF
(461 kB)
JPEG
(36.85 kB)
2010-11-18
Hartley 2
EPOXI
High Resolution Instrument (HRI)
920x920x1
PIA13623:
Cometary Flurries
Full Resolution:
TIFF
(847.6 kB)
JPEG
(255.6 kB)
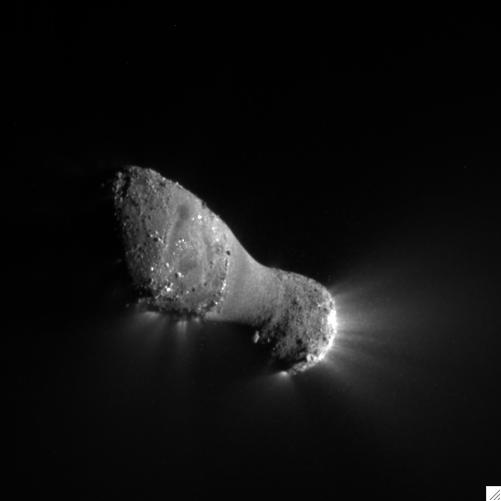
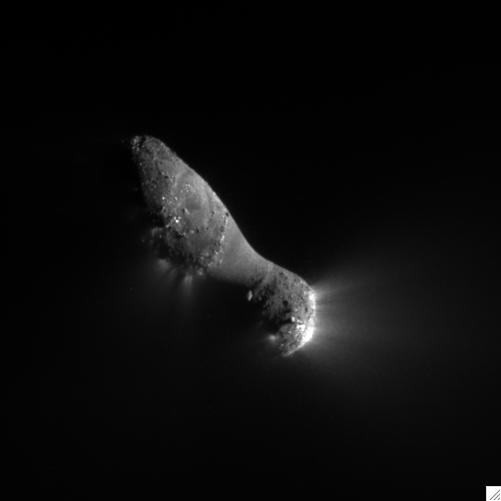
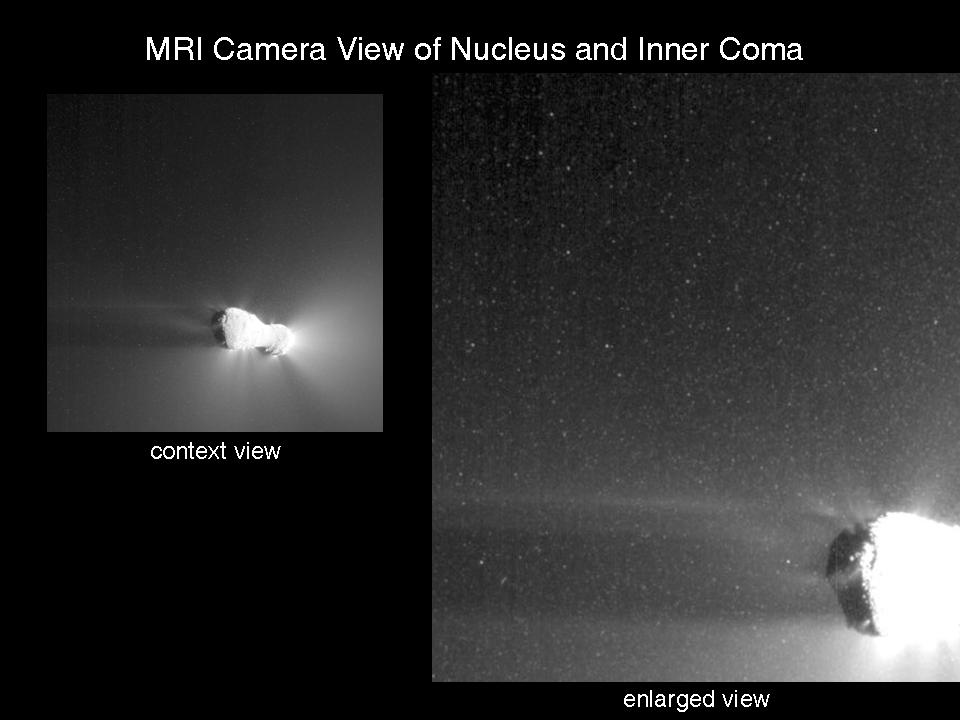
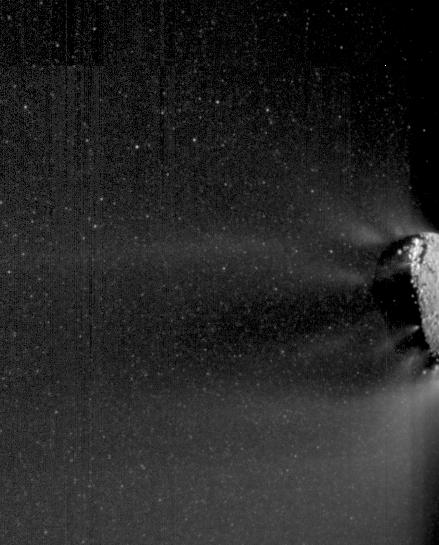
2010-11-18
Hartley 2
EPOXI
Medium Resolution Instrument (MRI)
960x720x1
PIA13624:
Views of Hartley 2 Nucleus and Inner Coma
Full Resolution:
TIFF
(692.2 kB)
JPEG
(56.47 kB)
2010-11-18
Hartley 2
EPOXI
High Resolution Instrument (HRI)
529x400x1
PIA13628:
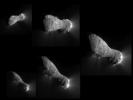
The Many Faces of Hartley 2
Full Resolution:
TIFF
(212 kB)
JPEG
(12.67 kB)
2010-11-18
Hartley 2
EPOXI
Medium Resolution Instrument (MRI)
439x545x1
PIA13625:
Icy Particle Spray
Full Resolution:
TIFF
(239.7 kB)
JPEG
(37.32 kB)
1-100
101-200
201-300
301-400
401-500
501-600
601-700
701-800
801-900
901-1000
Currently displaying images:
501 - 600
of 957


