Your search criteria found
957
images
Target is Asteroid and Comets
Go to PIAxxxxx:
Refine this list of images by:
Target:
2002 JF56
2010 AB78
Annefrank
Asteroid
Borrelly
Braille
C/2007 Q3 (Siding Spring)
C/2008 Q3 (Garradd)
Comet
Dactyl
Eros
Gaspra
Hale-Bopp
Hartley 2
Holmes
Hyakutake
Ida
Mathilde
P/2010 B2 (WISE)
Schwassmann-Wachmann 3
Tempel 1
Toutatis
Vesta
Wild 2
Mission:
Astronomical Observatory of Mallorca
Catalina Sky Survey (CSS)
Dawn
Deep Impact
Deep Space 1 (DS1)
Deep Space Network (DSN)
Double Asteroid Redirect Test (DART)
Double Asteroid Redirection Test (DART)
EPOXI
Galileo
Gingin Observatory
Goldstone Deep Space Network (DSN)
Hubble Space Telescope
MESSENGER
NEAR
NEAR Shoemaker
NEO Surveyor
NEOWISE
NEOWISE Project
New Horizons
OSIRIS-REx
Psyche
Rosetta
Samford Valley Observatory
Siding Spring Observatory
Spitzer Space Telescope
Stardust
StardustNExT
Wide-field Infrared Survey Explorer (WISE)
Spacecraft:
DART
Dawn
Deep Impact
Deep Impact (DIXI)
Deep Space 1
Galileo Orbiter
Goldstone Antenna
MESSENGER
NEAR Shoemaker
NEO Surveyor
New Horizons
Philae Lander
Psyche
Rosetta
Stardust
WISE
Instrument:
Advanced Camera for Surveys
Arecibo Observatory
Arecibo Radar Data
Autonomous Navigation System
Chandra X-ray Telescope
Comet Infrared and Visible Analyser (CIVA)
Deep Space Network
Framing Camera
Gamma Ray and Neutron Spectrometer (GRNS)
Gamma Ray/Neutron Spectrometer (GRNS)
Goldstone Solar System Radar
Hale Telescope 200-inch
High Resolution Instrument (HRI)
Hubble Space Telescope
Impactor Targeting Sensor (ITS)
Infrared Array Camera (IRAC)
Infrared Spectrometer (IRS)
Ion Engine
Kitt Peak National Observatory's 2.1 m Telescope
La Sagra Sky Survey
Laser Rangefinder
MIRO
Magnetometer
Medium Resolution Instrument (MRI)
Mercury Dual Imaging System - Wide Angle
Miniature Integrated Camera Spectrometer
Multi-Spectral Imager
Multiband Imaging Photometer (MIPS)
Multispectral Visible Imaging Camera (MVIC)
NEOWISE Telescope
Near Infrared Spectrometer
OSIRIS
ROsetta Lander Imaging System (ROLIS)
Rosetta NAVCAM
Solid-State Imaging
Star Tracker
Stardust Navigation Camera
Very Large Telescope (VLT)
Visible and Infrared Spectrometer (VIR)
Visible and Infrared Spectrometer (VIR)
WISE Telescope
Wide Field Camera 3
Wide Field Planetary Camera 2
ZTF
Click on an image for detailed information
Click on a column heading to sort in ascending or descending order
My
List
Addition Date
Target
Mission
Instrument
Size
2005-06-24
Tempel 1
Deep Impact
Medium Resolution Instrument (MRI)
512x512x1
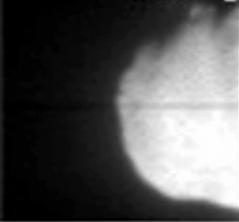
PIA02101:
Capturing the Coma
Full Resolution:
TIFF
(262.6 kB)
JPEG
(15.99 kB)
2005-06-25
Tempel 1
Deep Impact
Medium Resolution Instrument (MRI)
512x512x1
PIA02102:
I Spy a Comet!
Full Resolution:
TIFF
(262.6 kB)
JPEG
(11.89 kB)
2005-06-26
Tempel 1
Deep Impact
Medium Resolution Instrument (MRI)
512x512x1
PIA02103:
Comet Dead Ahead
Full Resolution:
TIFF
(262.6 kB)
JPEG
(11.86 kB)
2005-06-27
Tempel 1
Deep Impact
Medium Resolution Instrument (MRI)
512x512x1
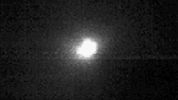
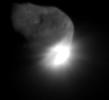
PIA02104:
On Course for a Comet
Full Resolution:
TIFF
(262.6 kB)
JPEG
(23.18 kB)
2005-06-28
Tempel 1
Deep Impact
Medium Resolution Instrument (MRI)
480x150x1
PIA02105:
Cometary 'Sneeze'
Full Resolution:
TIFF
(72.3 kB)
JPEG
(8.569 kB)
2005-06-29
Tempel 1
Deep Impact
Medium Resolution Instrument (MRI)
512x512x1
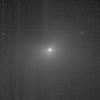
PIA02112:
Closing in on a Comet
Full Resolution:
TIFF
(262.6 kB)
JPEG
(16.22 kB)
2005-07-01
Tempel 1
Deep Impact
Medium Resolution Instrument (MRI)
720x169x3
PIA02111:
Analyzing a Cometary 'Sneeze'
Full Resolution:
TIFF
(365.7 kB)
JPEG
(18.19 kB)
2005-06-30
Tempel 1
Deep Impact
Medium Resolution Instrument (MRI)
512x512x1
PIA02113:
Headed Toward the Light
Full Resolution:
TIFF
(262.6 kB)
JPEG
(15.74 kB)
2005-07-01
Tempel 1
Deep Impact
Medium Resolution Instrument (MRI)
512x512x1
PIA02114:
Less Than Three Days Away!
Full Resolution:
TIFF
(262.6 kB)
JPEG
(17.8 kB)
2005-07-04
Tempel 1
Deep Impact
Medium Resolution Instrument (MRI)
516x499x1
PIA02115:
Separation Anxiety Over for Deep Impact
Full Resolution:
TIFF
(258 kB)
JPEG
(12.95 kB)
2005-07-04
Tempel 1
Deep Impact
Medium Resolution Instrument (MRI)
516x290x1
PIA02117:
Journey to a Comet (Animation)
Full Resolution:
TIFF
(150 kB)
JPEG
(14.68 kB)
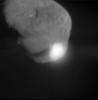
2005-07-04
Tempel 1
Deep Impact
Medium Resolution Instrument (MRI)
484x444x1
PIA02121:
Bull's Eye!
Full Resolution:
TIFF
(215.4 kB)
JPEG
(7.146 kB)
2005-07-04
Tempel 1
Deep Impact
Medium Resolution Instrument (MRI)
239x222x1
PIA02130:
Impactor No More (Animation)
Full Resolution:
TIFF
(53.34 kB)
JPEG
(3.669 kB)
2005-11-28
Tempel 1
Deep Impact
Medium Resolution Instrument (MRI)
2608x1950x3
PIA02144:
Tempel 1 Mission Update
Full Resolution:
TIFF
(15.27 MB)
JPEG
(225.4 kB)
2010-09-08
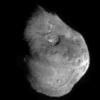
Hartley 2
Deep Impact
Medium Resolution Instrument (MRI)
512x512x1
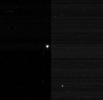
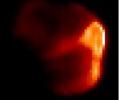
PIA13374:
Deep Impact Spacecraft's First Glimpse of Comet Hartley 2
Full Resolution:
TIFF
(262.6 kB)
JPEG
(50.98 kB)
2010-10-26
Hartley 2
EPOXI
Medium Resolution Instrument (MRI)
642x552x1
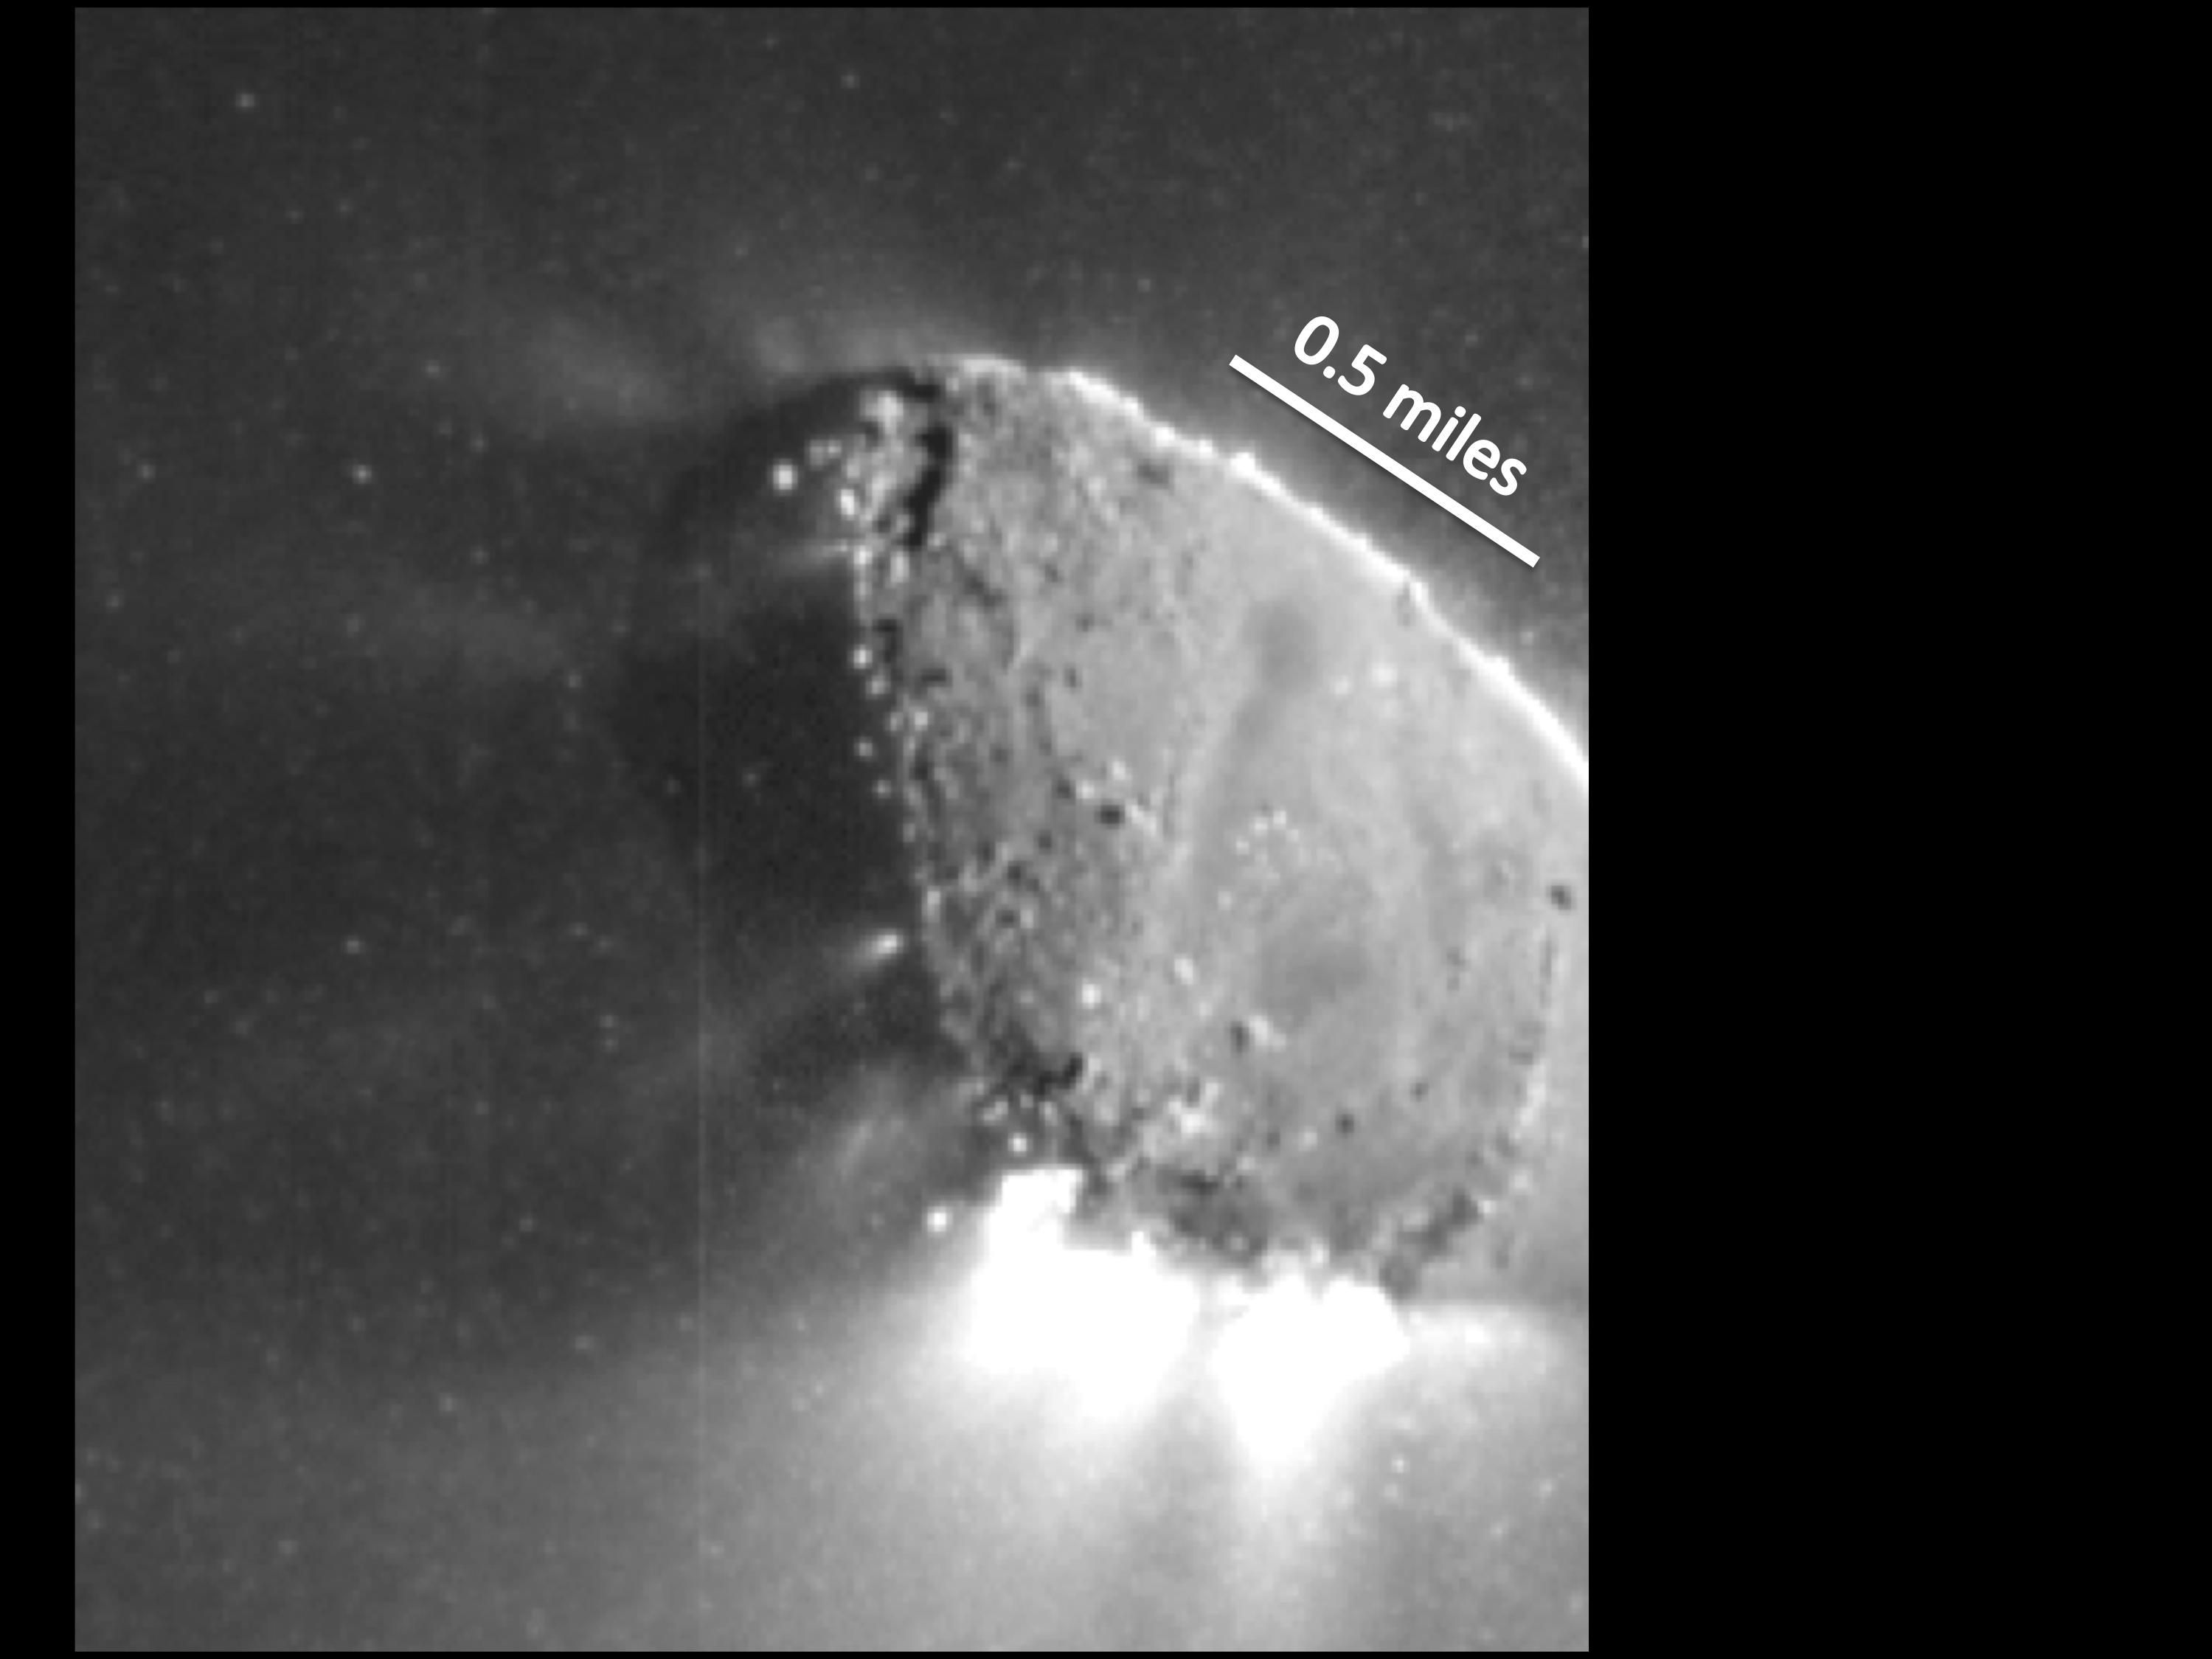
PIA13547:
Hartley 2 on the Move
Full Resolution:
TIFF
(355 kB)
JPEG
(29.7 kB)
2010-11-04
Hartley 2
EPOXI
Medium Resolution Instrument (MRI)
501x501x1
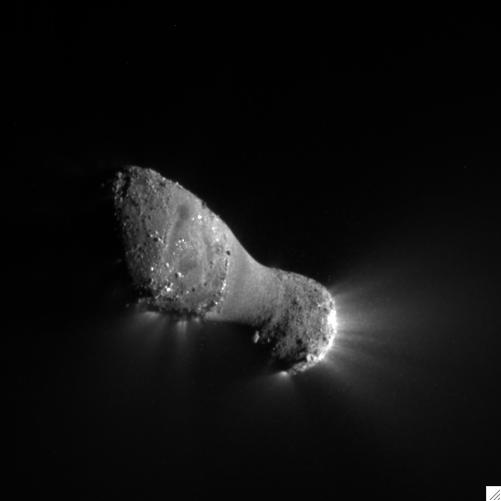
PIA13570:
Introducing Comet Hartley 2
Full Resolution:
TIFF
(251.5 kB)
JPEG
(9.679 kB)
2010-11-04
Hartley 2
EPOXI
Medium Resolution Instrument (MRI)
2999x2249x3
PIA13574:
Jets Galore
Full Resolution:
TIFF
(6.754 MB)
JPEG
(199.9 kB)
2010-11-04
Hartley 2
EPOXI
Medium Resolution Instrument (MRI)
2999x2249x3
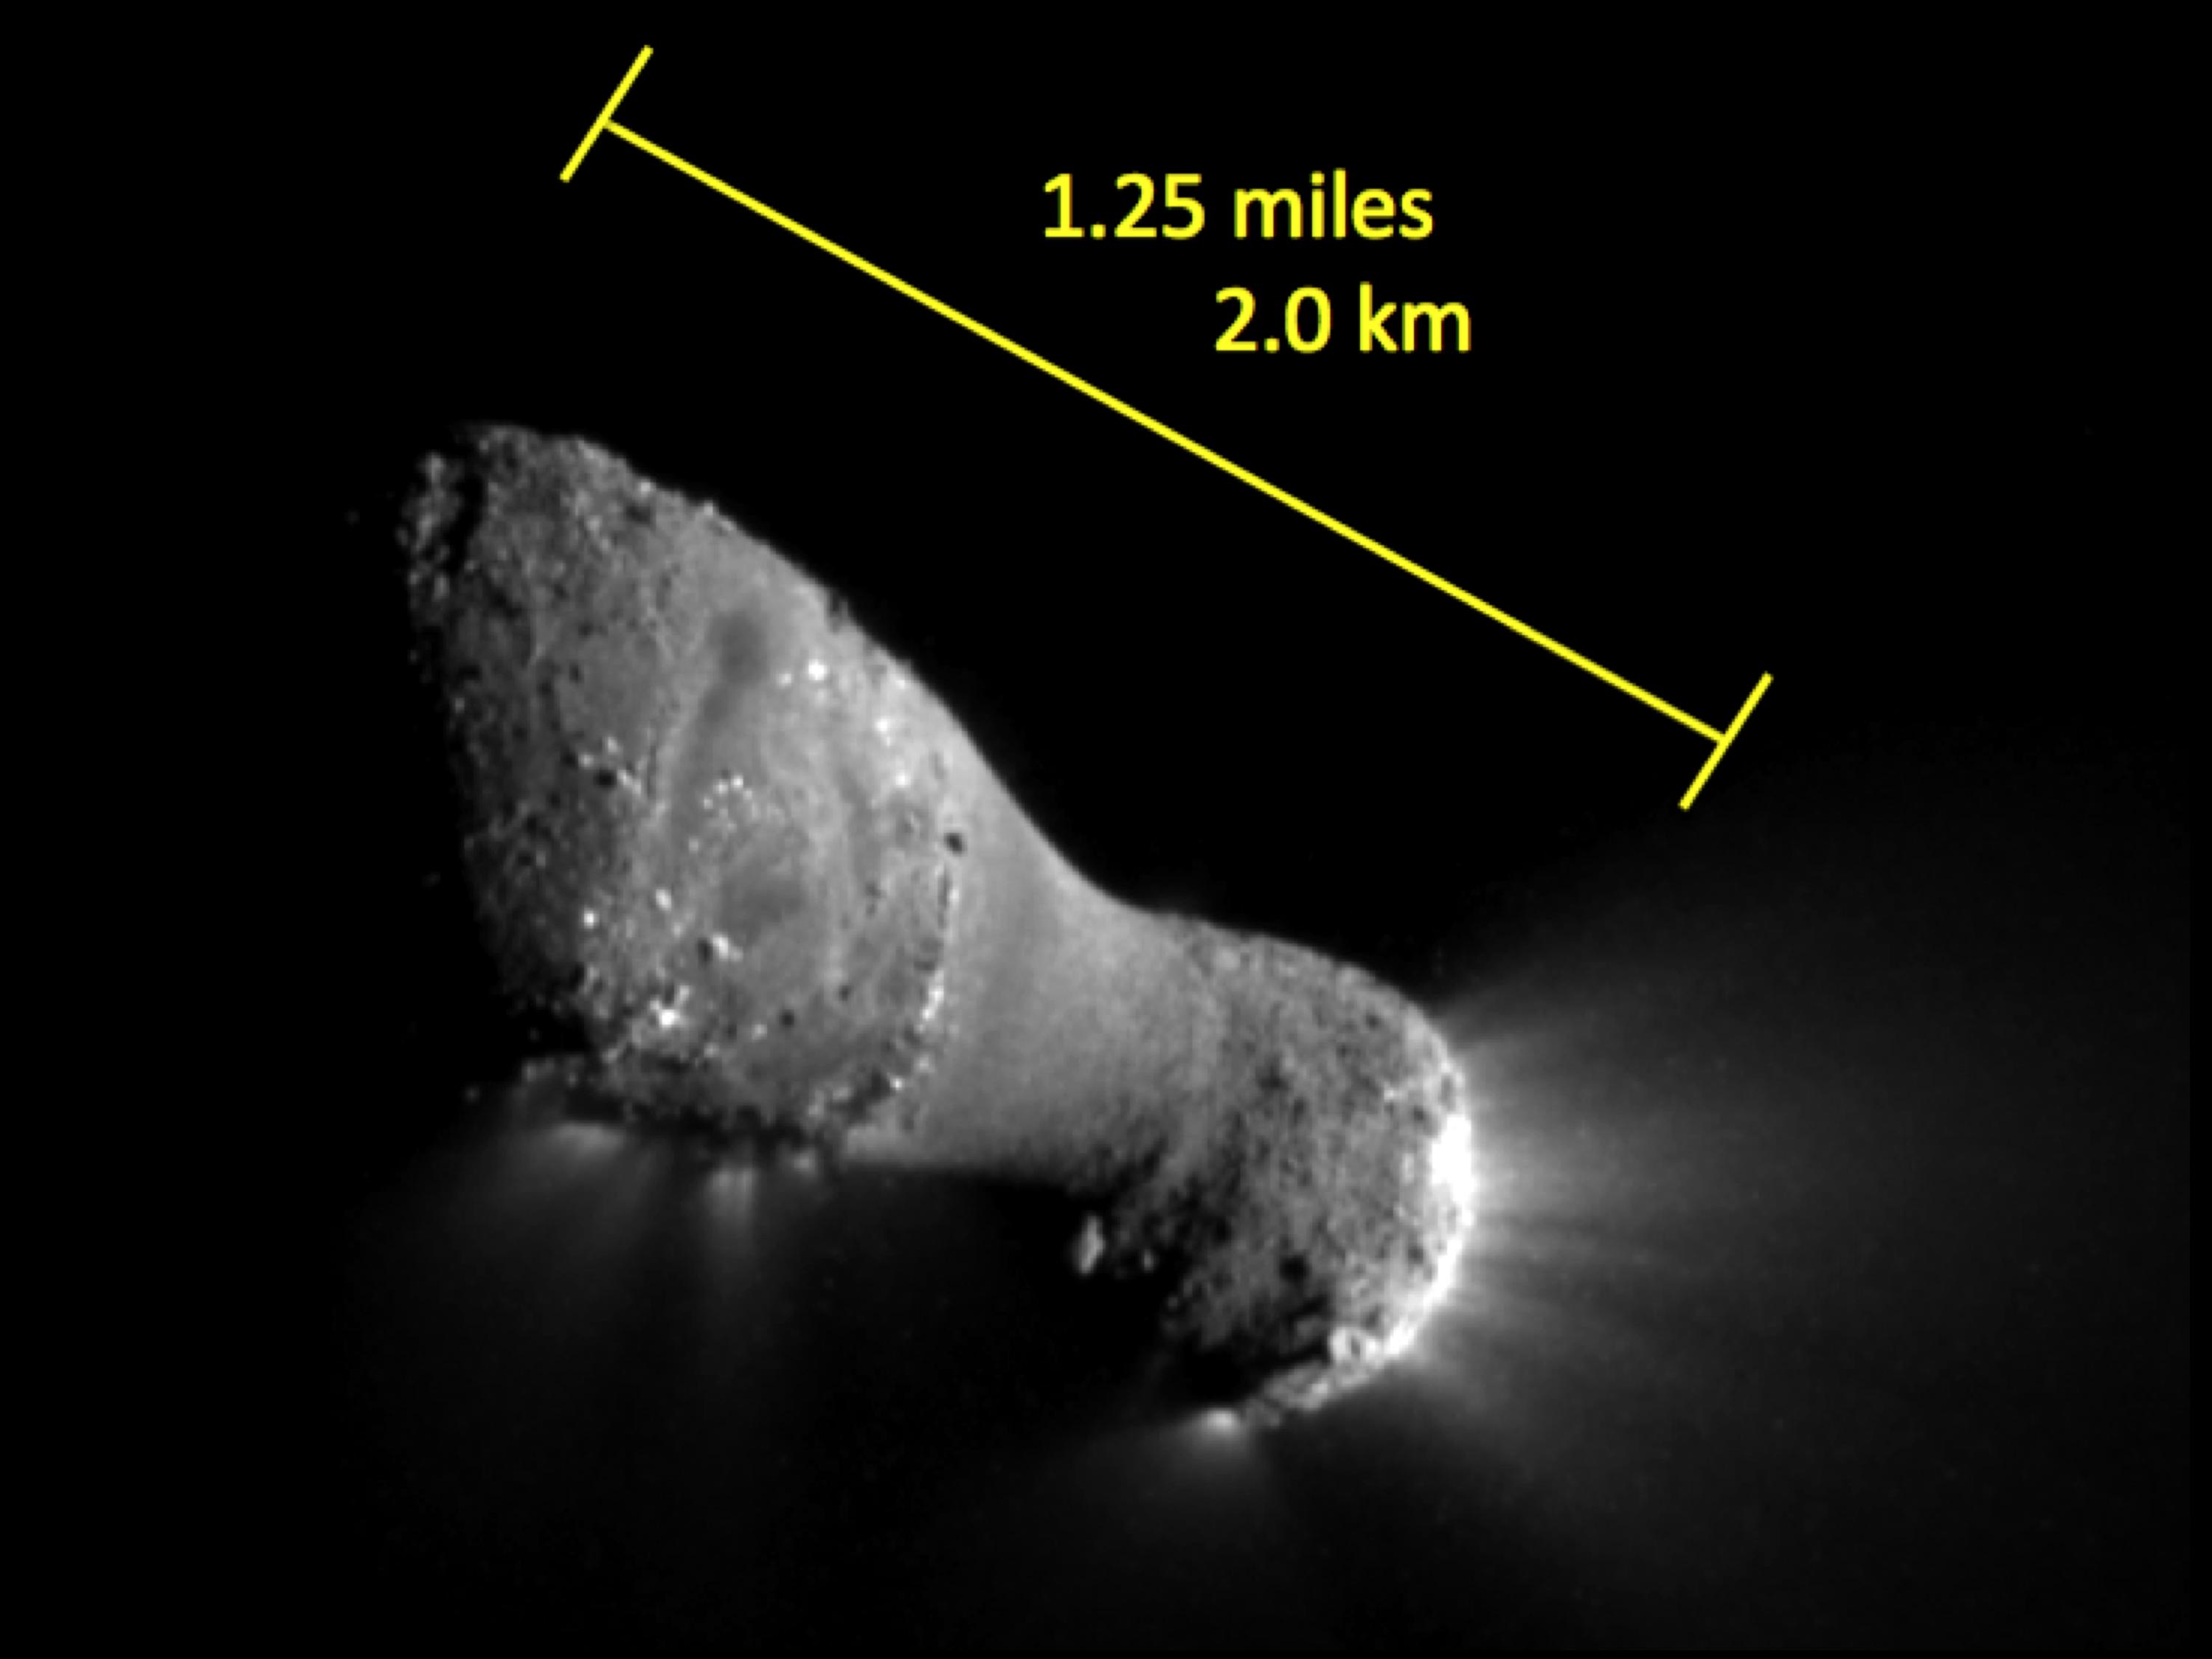
PIA13575:
Up Close and Personal with Hartley 2
Full Resolution:
TIFF
(20.23 MB)
JPEG
(204.6 kB)
2010-11-04
Hartley 2
EPOXI
Medium Resolution Instrument (MRI)
2999x2249x1
PIA13577:
Flying Under Comet Hartley 2
Full Resolution:
TIFF
(6.754 MB)
JPEG
(172.1 kB)
2010-11-05
Hartley 2
EPOXI
Medium Resolution Instrument (MRI)
501x501x1
PIA13579:
Almost There at Comet Hartley 2
Full Resolution:
TIFF
(251.5 kB)
JPEG
(8.066 kB)
2010-11-05
Hartley 2
EPOXI
Medium Resolution Instrument (MRI)
501x501x1
PIA13578:
Closing in on Comet Hartley 2
Full Resolution:
TIFF
(251.5 kB)
JPEG
(5.171 kB)
2010-11-05
Hartley 2
EPOXI
Medium Resolution Instrument (MRI)
501x501x1
PIA13600:
Slipping By Comet Hartley 2
Full Resolution:
TIFF
(251.5 kB)
JPEG
(7.469 kB)
2010-11-05
Hartley 2
EPOXI
Medium Resolution Instrument (MRI)
501x501x1
PIA13601:
Leaving Comet Hartley 2
Full Resolution:
TIFF
(251.5 kB)
JPEG
(5.035 kB)
2010-11-05
Hartley 2
EPOXI
Medium Resolution Instrument (MRI)
513x448x1
PIA13602:
Flight of the Comet
Full Resolution:
TIFF
(230.3 kB)
JPEG
(9.195 kB)
2010-11-18
Hartley 2
EPOXI
Medium Resolution Instrument (MRI)
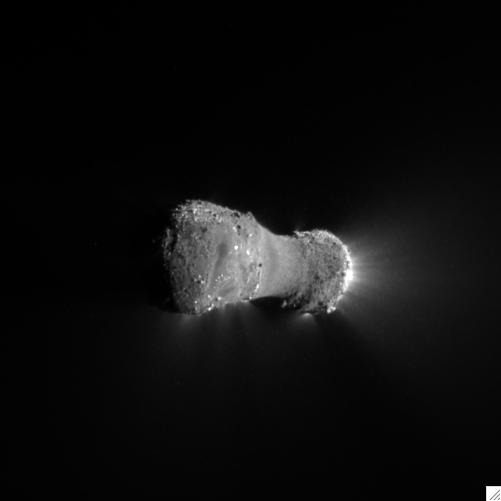
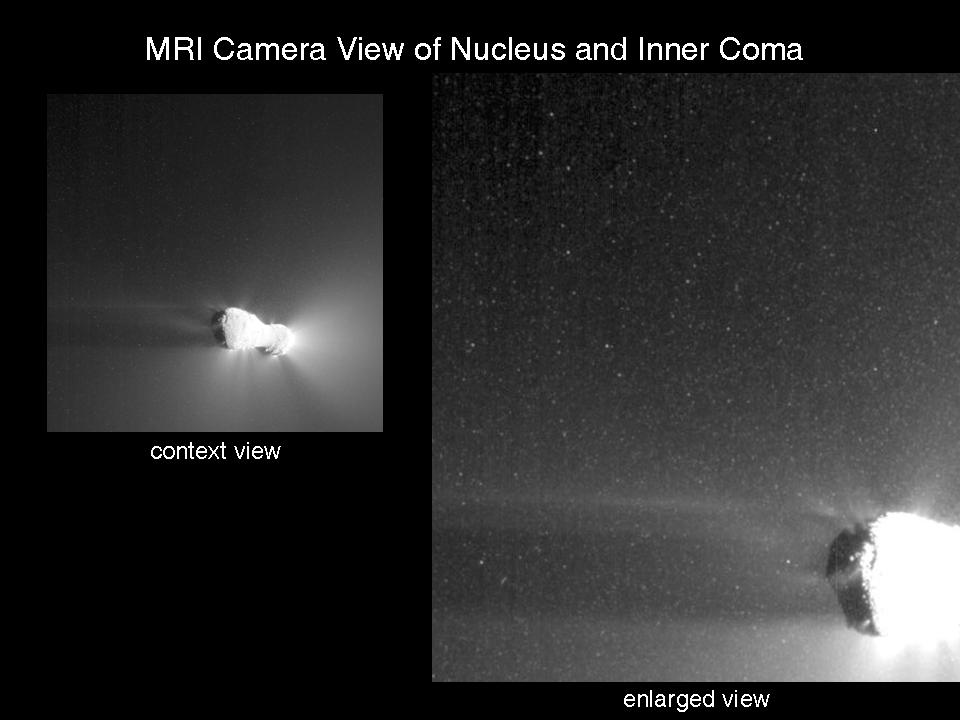
960x720x1
PIA13624:
Views of Hartley 2 Nucleus and Inner Coma
Full Resolution:
TIFF
(692.2 kB)
JPEG
(56.47 kB)
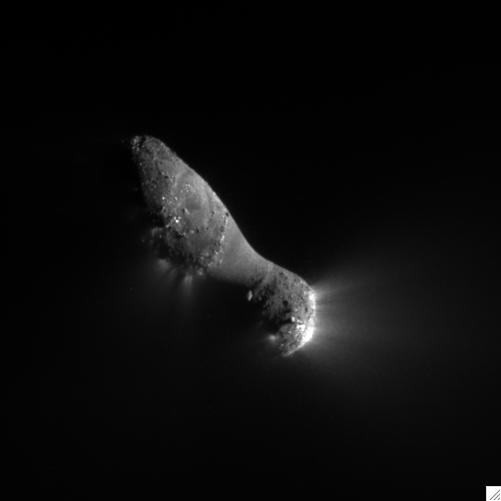
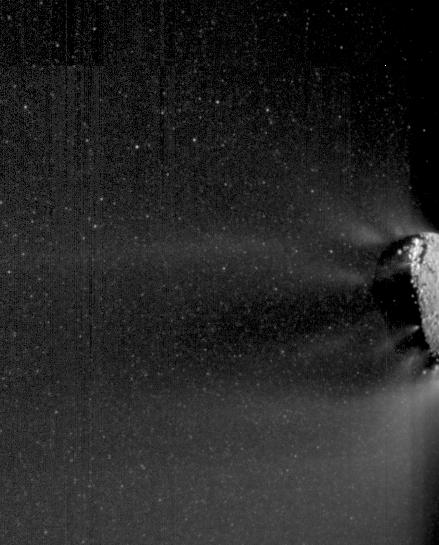
2010-11-18
Hartley 2
EPOXI
Medium Resolution Instrument (MRI)
439x545x1
PIA13625:
Icy Particle Spray
Full Resolution:
TIFF
(239.7 kB)
JPEG
(37.32 kB)
2010-11-18
Hartley 2
EPOXI
Medium Resolution Instrument (MRI)
864x625x1
PIA13626:
Tracking "Snowballs"
Full Resolution:
TIFF
(540.8 kB)
JPEG
(48.6 kB)
2010-11-18
Hartley 2
EPOXI
Medium Resolution Instrument (MRI)
456x722x3
PIA13627:
Hartley 2 in 3-D
Full Resolution:
TIFF
(989.1 kB)
JPEG
(25.46 kB)
2010-11-18
Tempel 1
EPOXI
Medium Resolution Instrument (MRI)
1280x720x1
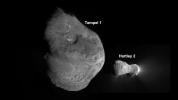
PIA13629:
Tempel 1 and Hartley 2
Full Resolution:
TIFF
(922.8 kB)
JPEG
(39.88 kB)
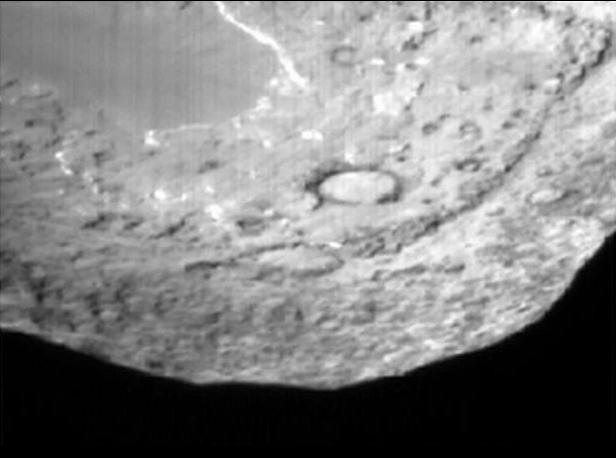
2011-02-16
Tempel 1
StardustNExT
Medium Resolution Instrument (MRI)
1489x1117x3
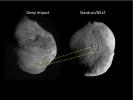
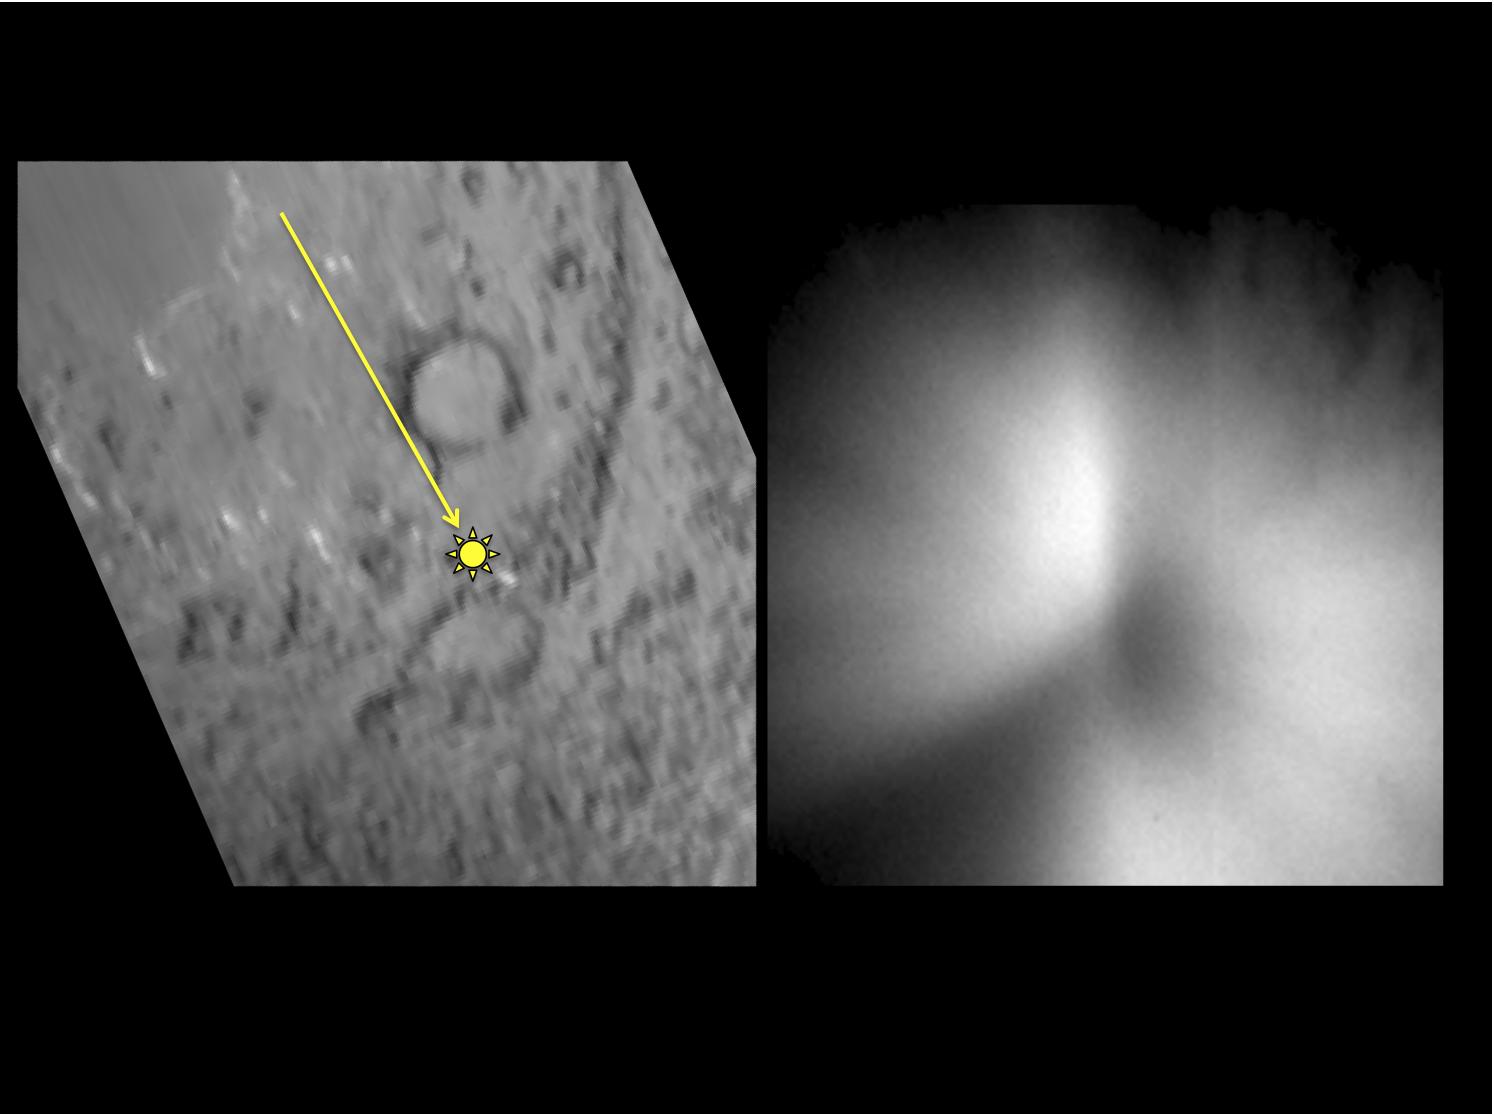
PIA13859:
Tempel 1, as Seen by Two Spacecraft
Full Resolution:
TIFF
(4.999 MB)
JPEG
(88.61 kB)
2011-02-16
Tempel 1
StardustNExT
Medium Resolution Instrument (MRI)
1566x1232x3
PIA13857:
Comet Tempel 1, in Context
Full Resolution:
TIFF
(5.798 MB)
JPEG
(122.7 kB)
2011-02-16
Tempel 1
StardustNExT
Medium Resolution Instrument (MRI)
1494x1114x3
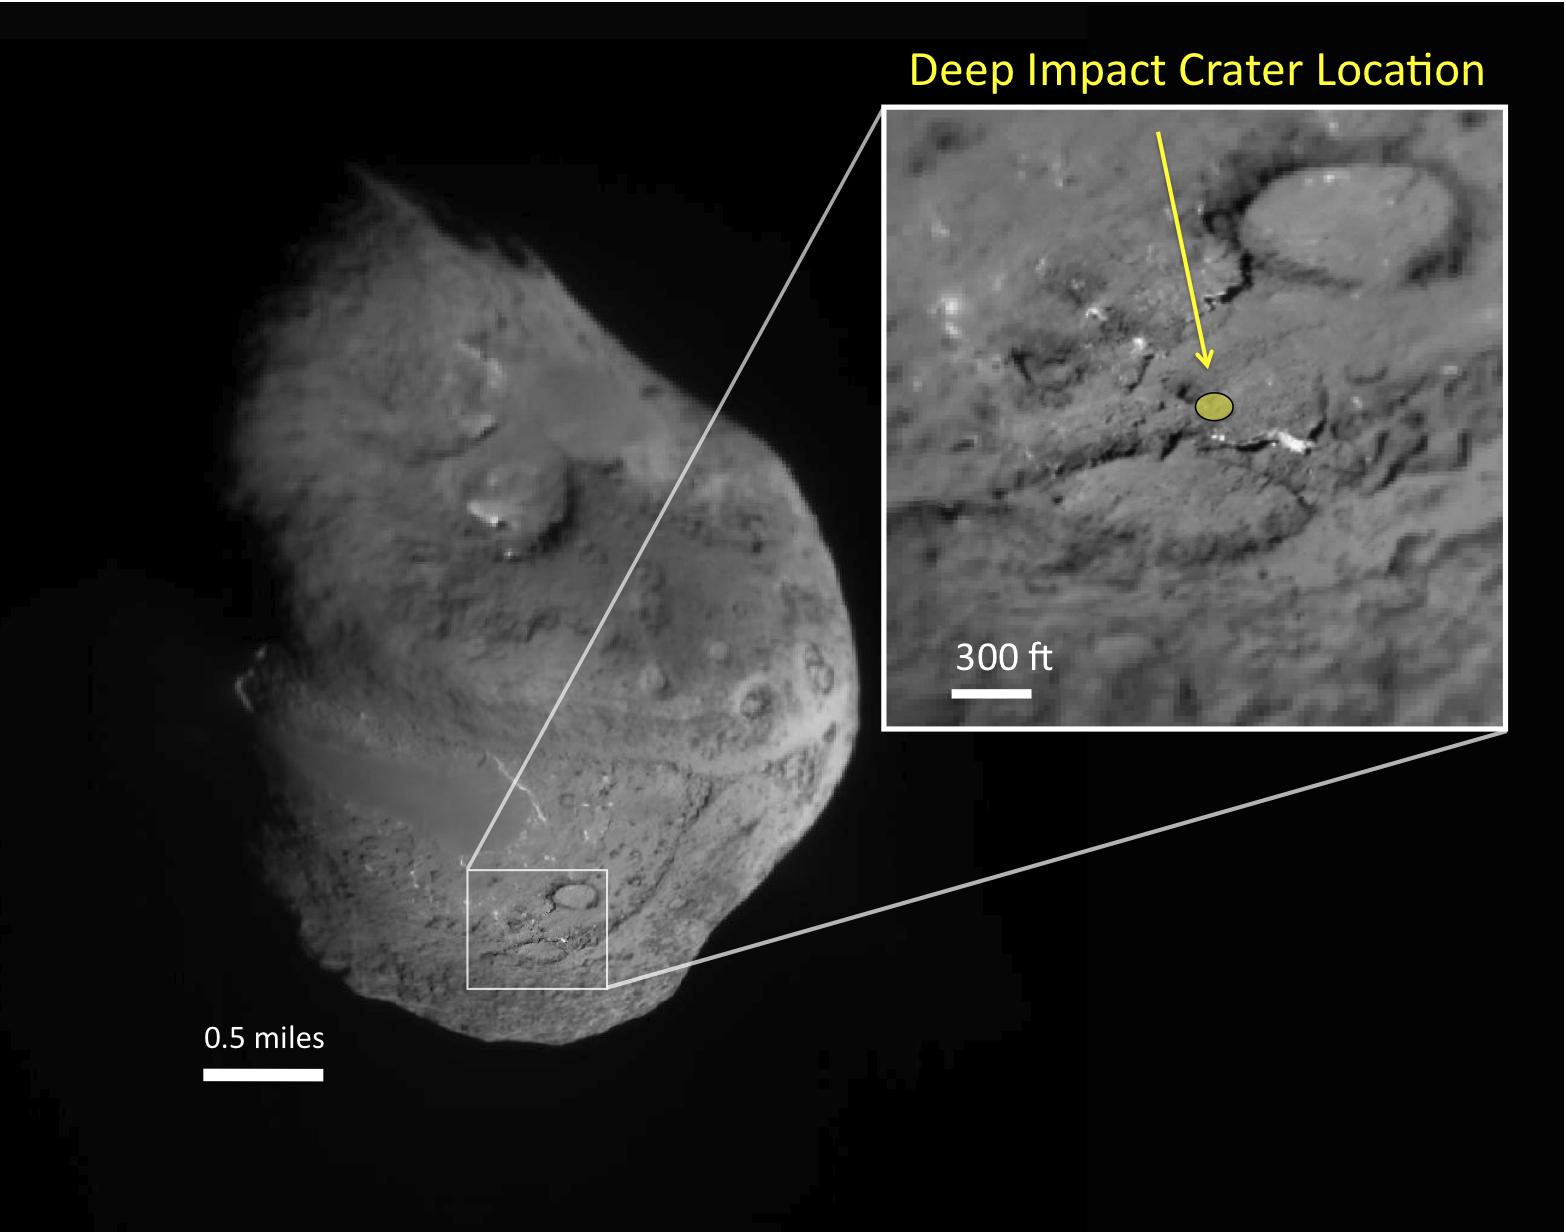
PIA13858:
Deep Impact's Effect on Tempel 1
Full Resolution:
TIFF
(5.002 MB)
JPEG
(81.46 kB)
2011-10-05
Tempel 1
EPOXI
Herschel Space Observatory
Medium Resolution Instrument (MRI)
3300x2550x3
PIA14737:
Heavy and Light Just Right
Full Resolution:
TIFF
(25.25 MB)
JPEG
(397.7 kB)
2011-10-05
Tempel 1
EPOXI
Herschel Space Observatory
Medium Resolution Instrument (MRI)
3200x1800x3
PIA14738:
The Same Here as There
Full Resolution:
TIFF
(17.28 MB)
JPEG
(389.3 kB)
2021-10-04
Asteroid
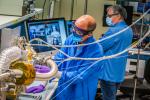
Psyche
Magnetometer
8256x5504x3
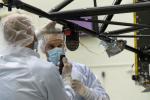
PIA24893:
Psyche's Magnetometer Integration
Full Resolution:
TIFF
(104 MB)
JPEG
(7.266 MB)
2000-06-10
Eros
NEAR Shoemaker
Laser Rangefinder
800x600x3
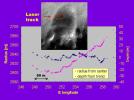
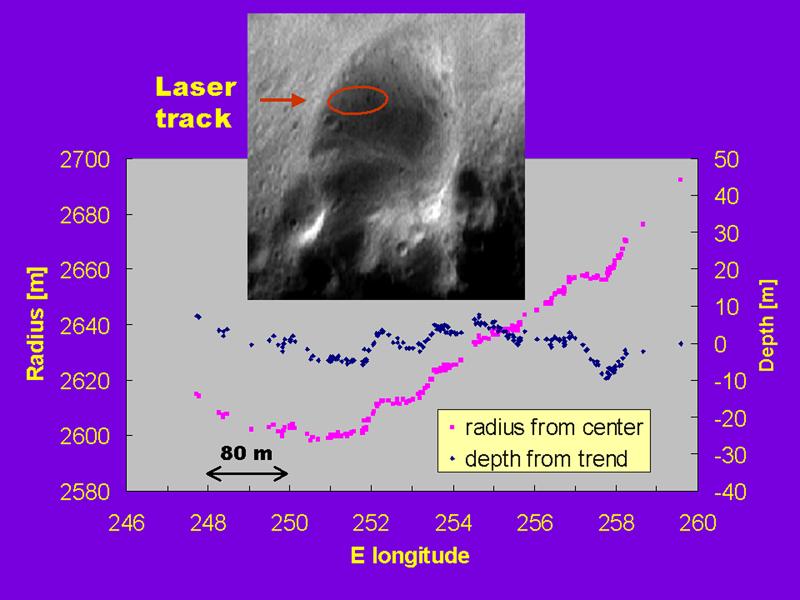
PIA02486:
Topographic Profiles from the NEAR Laser Rangefinder
Full Resolution:
TIFF
(287.9 kB)
JPEG
(56.64 kB)
2013-02-15
Asteroid
Astronomical Observatory of Mallorca
La Sagra Sky Survey
880x717x1
PIA16738:
Outbound Near-Earth Asteroid, as Seen from Spain
Full Resolution:
TIFF
(631.8 kB)
JPEG
(38.38 kB)
2005-05-16
Tempel 1
Kitt Peak National Observatory's 2.1 m Telescope
801x701x3
PIA07881:
Kitt Peak Observes Comet
Full Resolution:
TIFF
(563.8 kB)
JPEG
(28.49 kB)
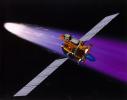
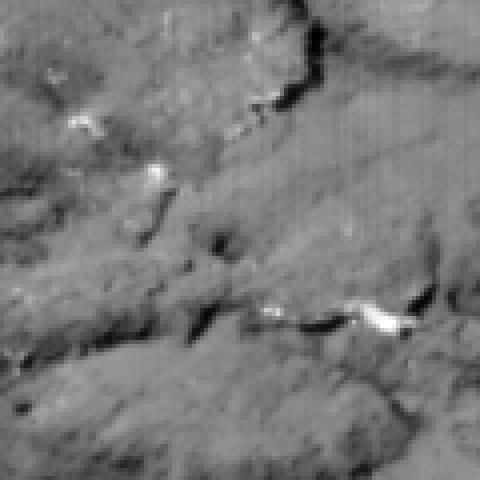
2003-07-02
Borrelly
Deep Space 1 (DS1)
Ion Engine
1418x1112x3
PIA04604:
Deep Space 1 Using its Ion Engine (Artist's Concept)
Full Resolution:
TIFF
(3.989 MB)
JPEG
(140.6 kB)
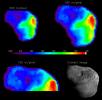
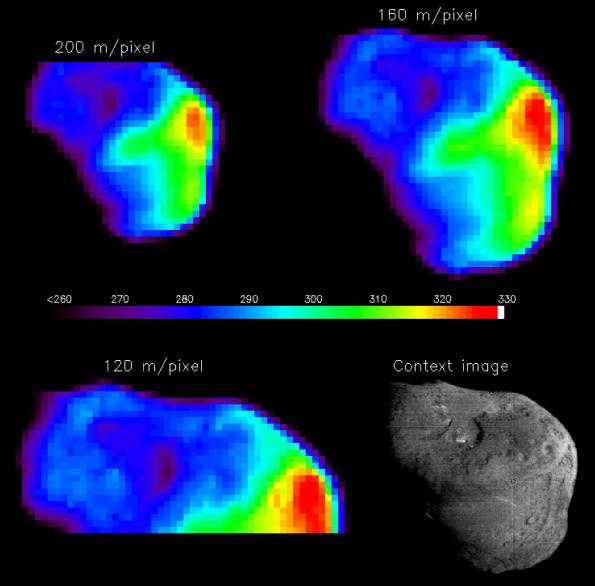
2005-10-20
Tempel 1
Deep Impact
Infrared Spectrometer (IRS)
595x586x3
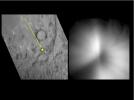
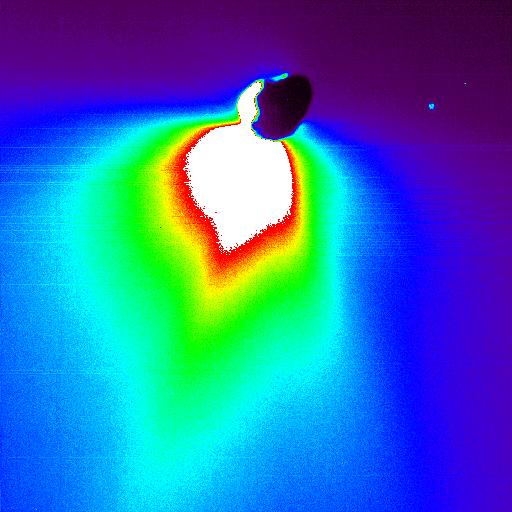
PIA02143:
Temperature Map of Tempel 1
Full Resolution:
TIFF
(1.047 MB)
JPEG
(36.92 kB)
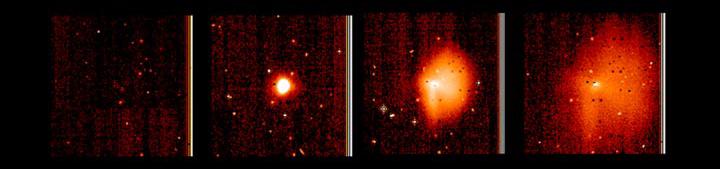
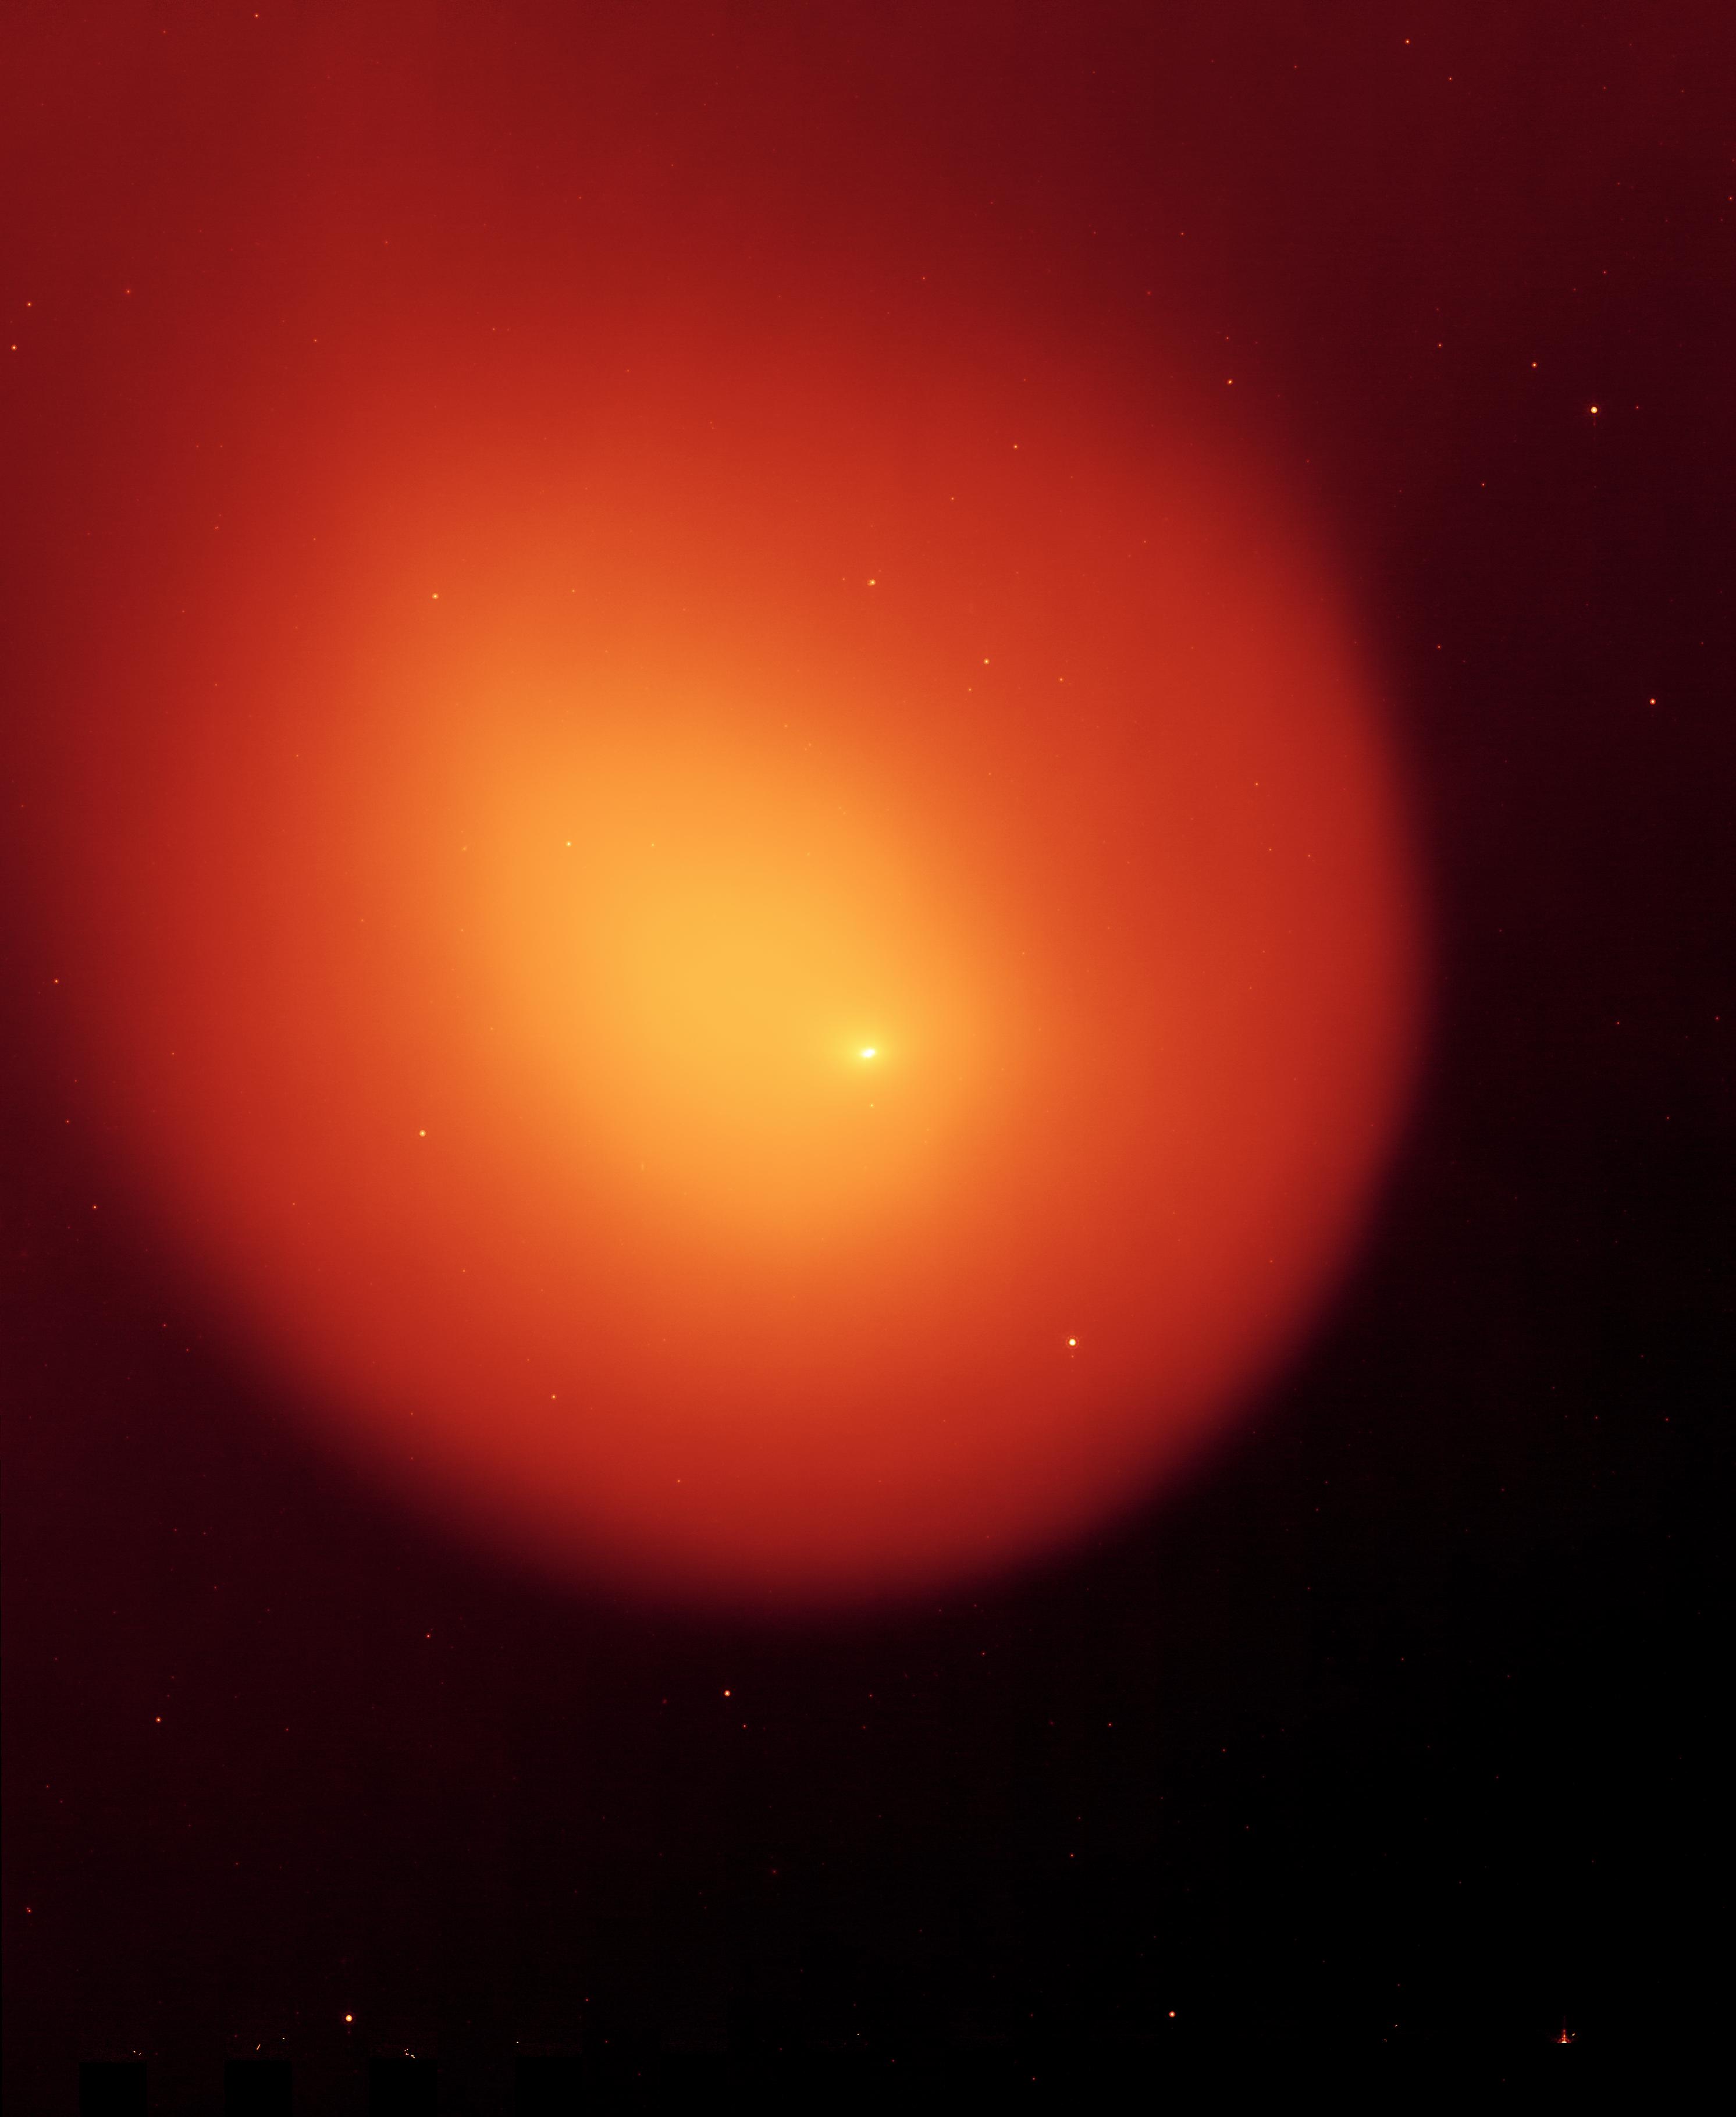
2008-10-13
Holmes
Spitzer Space Telescope
IRAC
MIPS
2984x3639x3
PIA11228:
Anatomy of a Busted Comet
Full Resolution:
TIFF
(32.58 MB)
JPEG
(326.3 kB)
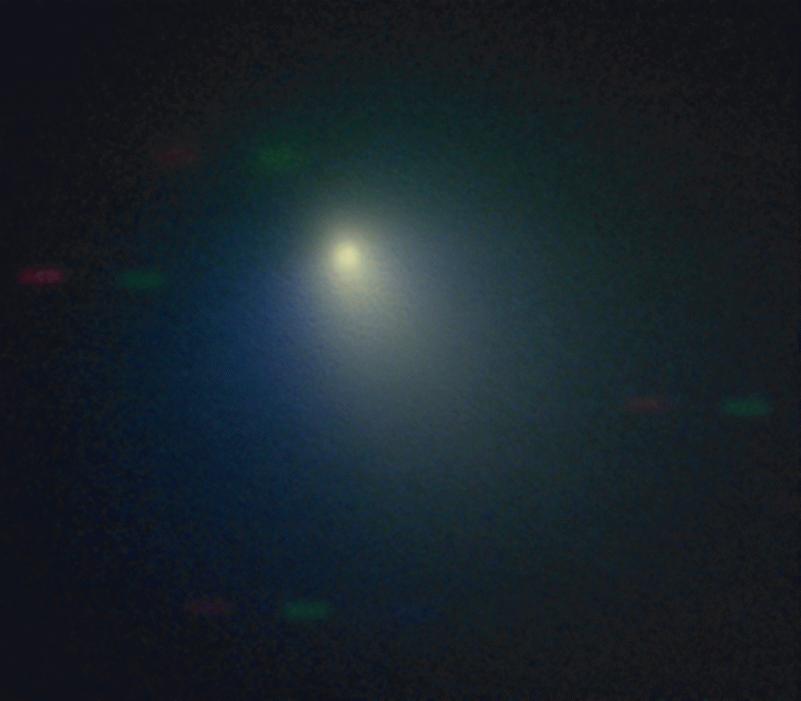
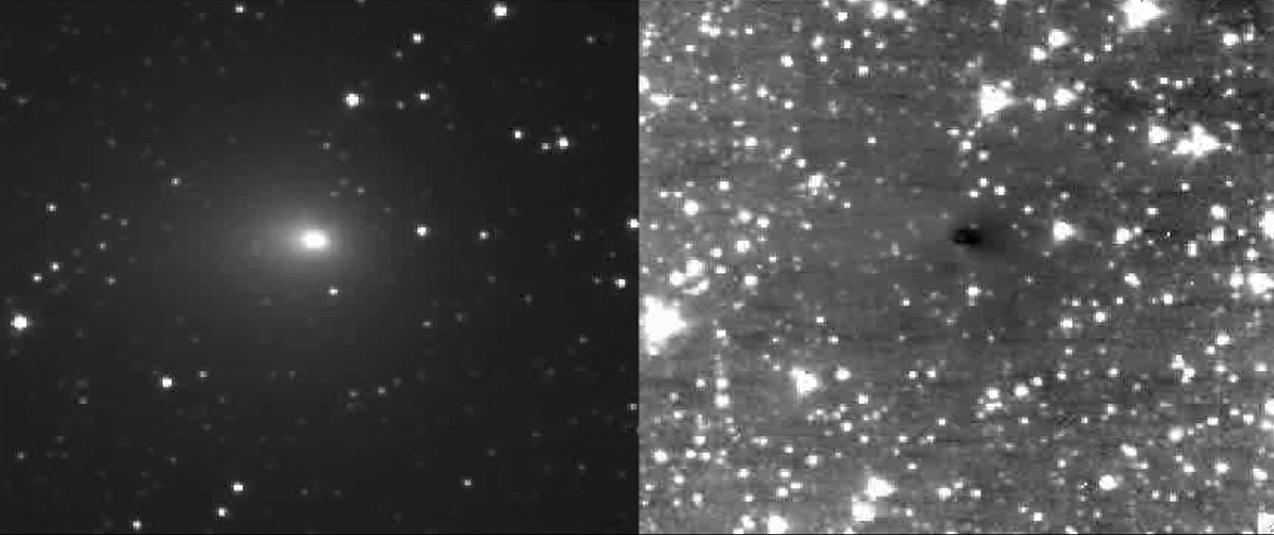
2013-09-10
Comet
Spitzer Space Telescope
IRAC
2400x2400x3
PIA17443:
Spitzer Spies a Comet Coma and Tail
Full Resolution:
TIFF
(17.29 MB)
JPEG
(189.8 kB)
2014-06-19
Asteroid
Spitzer Space Telescope
IRAC
1120x1120x3
PIA18453:
I Spy a Little Asteroid With My Infrared Eye
Full Resolution:
TIFF
(3.765 MB)
JPEG
(42.88 kB)
2005-04-27
Tempel 1
Deep Impact
Impactor Targeting Sensor (ITS)
872x714x1
PIA07880:
Tempel 1 First Op-Nav
Full Resolution:
TIFF
(623.5 kB)
JPEG
(58.06 kB)
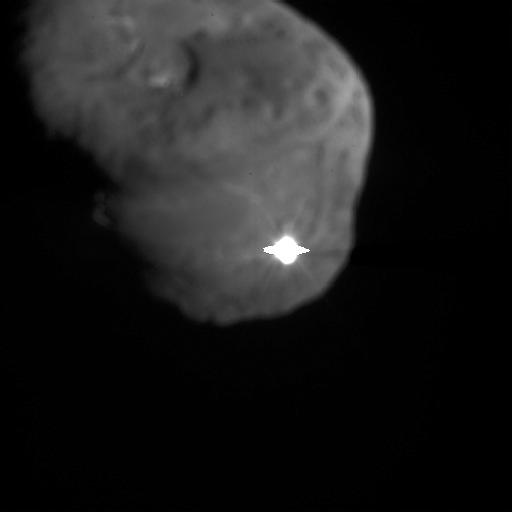
2005-07-04
Tempel 1
Deep Impact
Impactor Targeting Sensor (ITS)
512x512x1
PIA02116:
Impactor Eyes Comet Target
Full Resolution:
TIFF
(262.6 kB)
JPEG
(3.756 kB)
2005-07-04
Tempel 1
Deep Impact
Impactor Targeting Sensor (ITS)
247x240x1
PIA02120:
Face-to-Face With a Comet
Full Resolution:
TIFF
(59.57 kB)
JPEG
(5.865 kB)
2005-07-04
Tempel 1
Deep Impact
Impactor Targeting Sensor (ITS)
256x256x1
PIA02124:
Before the Crash
Full Resolution:
TIFF
(65.83 kB)
JPEG
(4.034 kB)
2005-07-04
Tempel 1
Deep Impact
Impactor Targeting Sensor (ITS)
256x256x1
PIA02125:
We're Going In!
Full Resolution:
TIFF
(65.83 kB)
JPEG
(4.034 kB)
2005-07-04
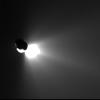
Tempel 1
Deep Impact
Impactor Targeting Sensor (ITS)
494x494x1
PIA02126:
Blinded by the Jets
Full Resolution:
TIFF
(244.5 kB)
JPEG
(13.57 kB)
2005-07-04
Tempel 1
Deep Impact
Impactor Targeting Sensor (ITS)
500x500x1
PIA02127:
Hit Me With Your Best Shot
Full Resolution:
TIFF
(250.5 kB)
JPEG
(13.7 kB)
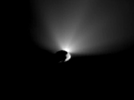
2005-07-04
Tempel 1
Deep Impact
Impactor Targeting Sensor (ITS)
494x494x1
PIA02128:
So Close You Can Almost Touch It
Full Resolution:
TIFF
(244.5 kB)
JPEG
(21.56 kB)
2005-07-04
Tempel 1
Deep Impact
Impactor Targeting Sensor (ITS)
480x480x1
PIA02129:
Untouched Tempel
Full Resolution:
TIFF
(230.9 kB)
JPEG
(18.74 kB)
2005-07-04
Tempel 1
Deep Impact
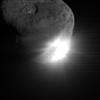
Impactor Targeting Sensor (ITS)
1000x1016x1
PIA02131:
Moment of Impact
Full Resolution:
TIFF
(1.017 MB)
JPEG
(39.3 kB)
2005-07-04
Tempel 1
Deep Impact
Impactor Targeting Sensor (ITS)
616x458x1
PIA02135:
One-Way Trip to Tempel
Full Resolution:
TIFF
(282.6 kB)
JPEG
(27.03 kB)
2005-07-06
Tempel 1
Deep Impact
Impactor Targeting Sensor (ITS)
247x241x1
PIA02138:
Wipe Out
Full Resolution:
TIFF
(59.82 kB)
JPEG
(6.405 kB)
2005-09-06
Tempel 1
Deep Impact
Impactor Targeting Sensor (ITS)
2048x2048x1
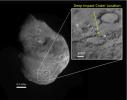
PIA02142:
Tempel 1 Composite Map
Full Resolution:
TIFF
(4.199 MB)
JPEG
(121.6 kB)
2005-07-04
Tempel 1
Hubble Space Telescope
Hubble Space Telescope
800x350x1
PIA02122:
Hubble Witnesses Comet Crash
Full Resolution:
TIFF
(280.5 kB)
JPEG
(22.82 kB)
2010-11-04
Hartley 2
EPOXI
High Resolution Instrument (HRI)
Medium Resolution Instrument (MRI)
1274x535x1
PIA13568:
Spacecraft Images Comet Target's Jets
Full Resolution:
TIFF
(682.5 kB)
JPEG
(57.09 kB)
2010-11-04
Hartley 2
EPOXI
High Resolution Instrument (HRI)
Medium Resolution Instrument (MRI)
680x548x3
PIA13572:
Evidence for a First-of-Its-Kind Comet Jet
Full Resolution:
TIFF
(1.119 MB)
JPEG
(35.8 kB)
2005-07-04
Tempel 1
Deep Impact
High Resolution Instrument (HRI)
Infrared Spectrometer
275x232x3
PIA02132:
Sunny Side of a Comet
Full Resolution:
TIFF
(191.8 kB)
JPEG
(4.867 kB)
2005-07-04
Tempel 1
Deep Impact
High Resolution Instrument (HRI)
516x402x1
PIA02119:
Tempel 1 Nucleus
Full Resolution:
TIFF
(207.9 kB)
JPEG
(10.41 kB)
2005-07-04
Tempel 1
Deep Impact
High Resolution Instrument (HRI)
471x471x1
PIA02123:
Gone in a Flash
Full Resolution:
TIFF
(222.3 kB)
JPEG
(11.77 kB)
2005-07-04
Tempel 1
Deep Impact
High Resolution Instrument (HRI)
504x506x1
PIA02133:
Looking Back at a Job Well Done
Full Resolution:
TIFF
(255.5 kB)
JPEG
(7.689 kB)
2005-07-04
Tempel 1
Deep Impact
High Resolution Instrument (HRI)
720x540x1
PIA02134:
Capturing the Flash
Full Resolution:
TIFF
(389.4 kB)
JPEG
(20.02 kB)
2005-07-05
Tempel 1
Deep Impact
High Resolution Instrument (HRI)
900x900x1
PIA02137:
Tempel Alive with Light
Full Resolution:
TIFF
(811 kB)
JPEG
(31.7 kB)
2005-07-08
Tempel 1
Deep Impact
High Resolution Instrument (HRI)
512x512x3
PIA02139:
Comet Tempel's Silhouette
Full Resolution:
TIFF
(264.2 kB)
JPEG
(37.36 kB)
2005-07-11
Tempel 1
Deep Impact
High Resolution Instrument (HRI)
314x234x1
PIA02140:
Tempel Fades into Night
Full Resolution:
TIFF
(73.78 kB)
JPEG
(2.4 kB)
2005-07-20
Tempel 1
Deep Impact
High Resolution Instrument (HRI)
512x512x1
PIA02141:
First Contact
Full Resolution:
TIFF
(262.6 kB)
JPEG
(8.103 kB)
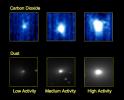
2010-11-04
Hartley 2
EPOXI
High Resolution Instrument (HRI)
640x327x3
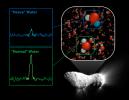
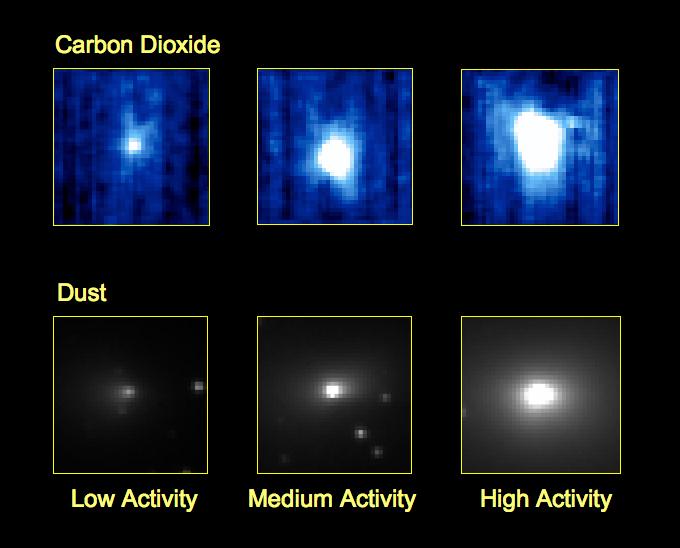
PIA13573:
Carbon Dioxide Fluctuations in Comet Hartley 2
Full Resolution:
TIFF
(628.7 kB)
JPEG
(18.46 kB)
2010-11-18
Hartley 2
EPOXI
High Resolution Instrument (HRI)
928x496x1
PIA13622:
Hartley 2, Close Up
Full Resolution:
TIFF
(461 kB)
JPEG
(36.85 kB)
2010-11-18
Hartley 2
EPOXI
High Resolution Instrument (HRI)
920x920x1
PIA13623:
Cometary Flurries
Full Resolution:
TIFF
(847.6 kB)
JPEG
(255.6 kB)
2010-11-18
Hartley 2
EPOXI
High Resolution Instrument (HRI)
529x400x1
PIA13628:
The Many Faces of Hartley 2
Full Resolution:
TIFF
(212 kB)
JPEG
(12.67 kB)
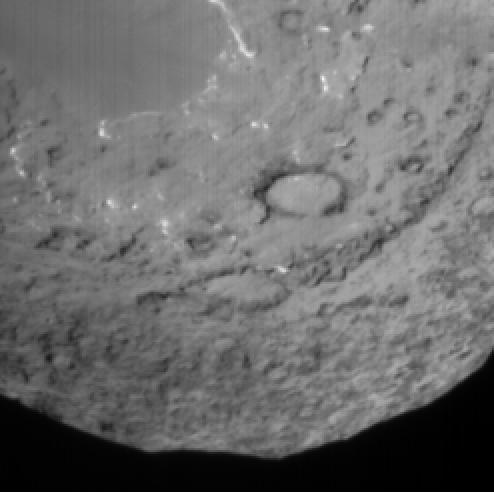
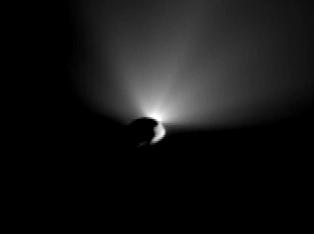
2005-01-18
Tempel 1
Deep Impact
Hale Telescope 200-inch
224x319x3
PIA07266:
Deep Impact on Its Way
Full Resolution:
TIFF
(214.8 kB)
JPEG
(36.38 kB)
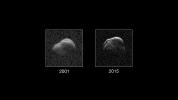
2015-07-23
Asteroid
Goldstone Deep Space Network (DSN)
Goldstone Solar System Radar
NRAO Green Bank Telescope
593x717x1
PIA19644:
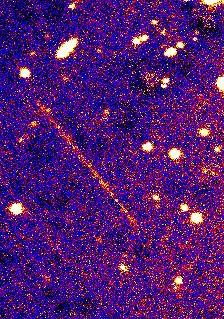
Radar Movie of Asteroid 2011 UW158
Full Resolution:
TIFF
(425.8 kB)
JPEG
(96.65 kB)
2015-07-31
Asteroid
Goldstone Deep Space Network (DSN)
Goldstone Solar System Radar
NRAO Green Bank Telescope
911x456x1
PIA19646:
Radar Movie of Asteroid 1999 JD6
Full Resolution:
TIFF
(416.1 kB)
JPEG
(38.34 kB)
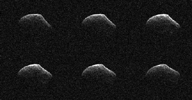
2015-07-31
Asteroid
Goldstone Deep Space Network (DSN)
Goldstone Solar System Radar
NRAO Green Bank Telescope
1380x681x1
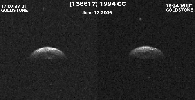
PIA19647:
Asteroid 1999 JD6
Full Resolution:
TIFF
(941.1 kB)
JPEG
(290.5 kB)
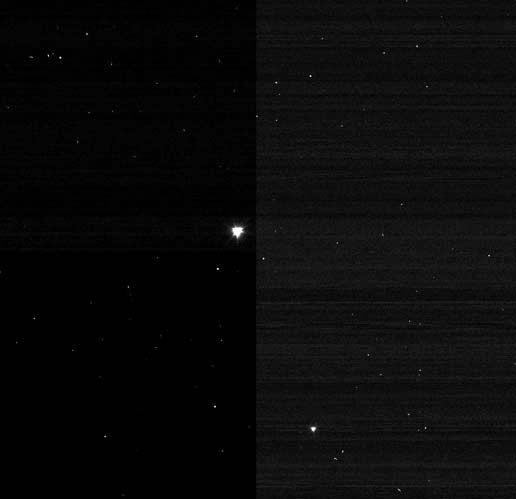
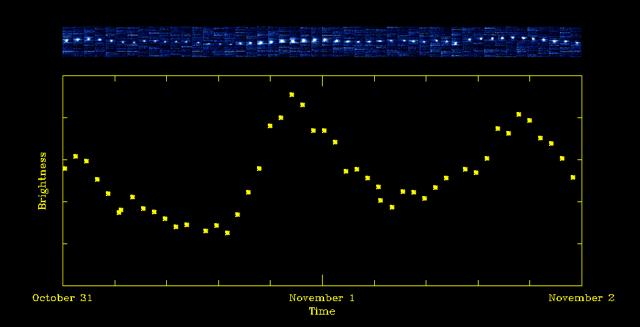
2009-08-06
Asteroid
Goldstone Deep Space Network (DSN)
Goldstone Solar System Radar
834x429x37
PIA12134:
Triple Asteroid System Triples Asteroid Observers Interest
Full Resolution:
TIFF
(358.4 kB)
JPEG
(42.08 kB)
2011-11-07
Asteroid
Goldstone Deep Space Network (DSN)
Goldstone Solar System Radar
958x830x1
PIA15019:
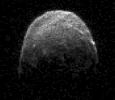
Asteroid 2005 YU55 Approaches Close Earth Flyby
Full Resolution:
TIFF
(796.2 kB)
JPEG
(55.67 kB)
2012-05-23
Asteroid
Goldstone Deep Space Network (DSN)
Goldstone Solar System Radar
901x407x1
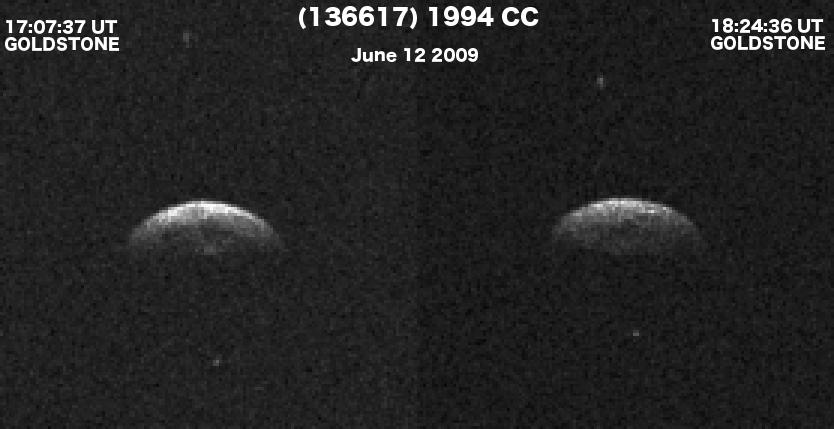
PIA15776:
Asteroid 1999 RQ36
Full Resolution:
TIFF
(367.3 kB)
JPEG
(90.74 kB)
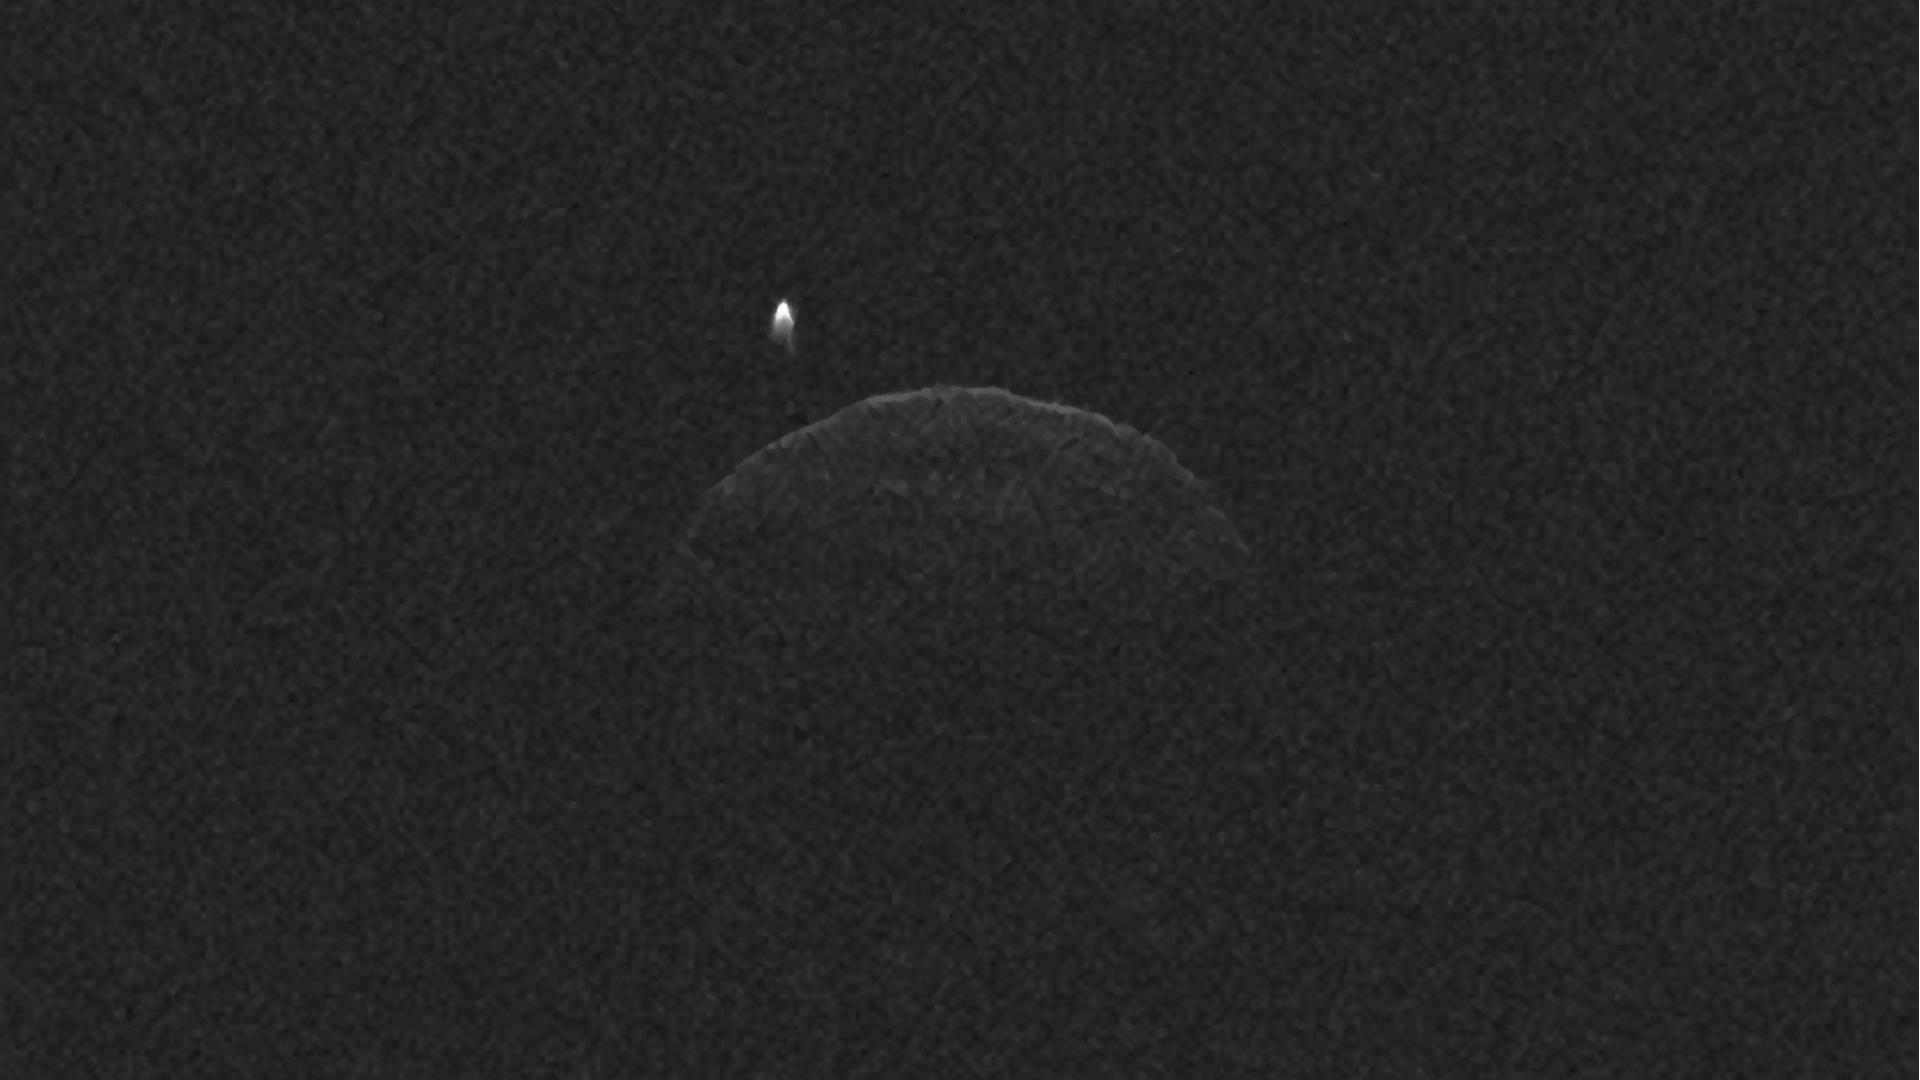
2012-11-06
Asteroid
Goldstone Deep Space Network (DSN)
Goldstone Solar System Radar
1305x424x1
PIA16296:
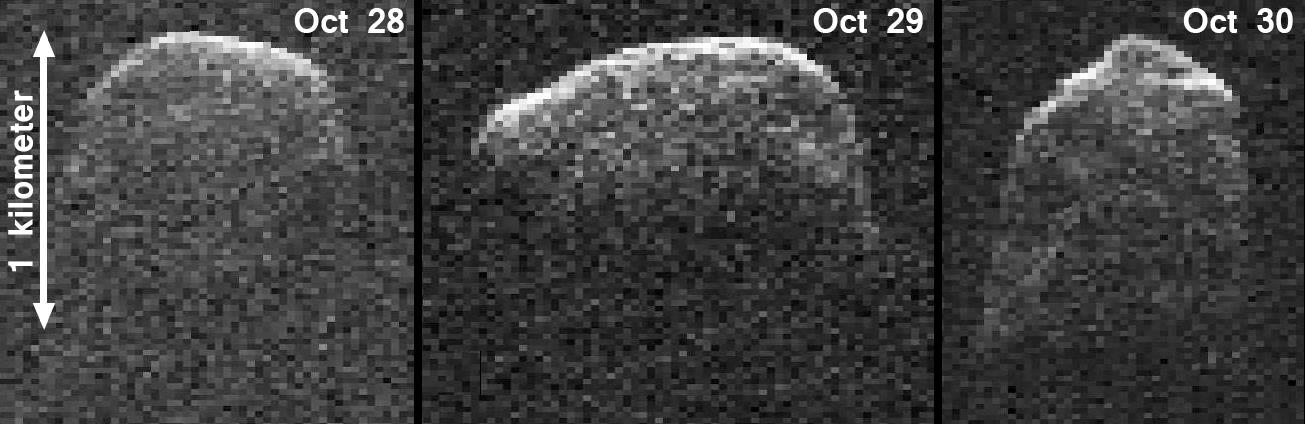
NASA Radar Images Asteroid 2007 PA8
Full Resolution:
TIFF
(554.1 kB)
JPEG
(87.88 kB)
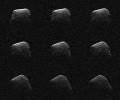
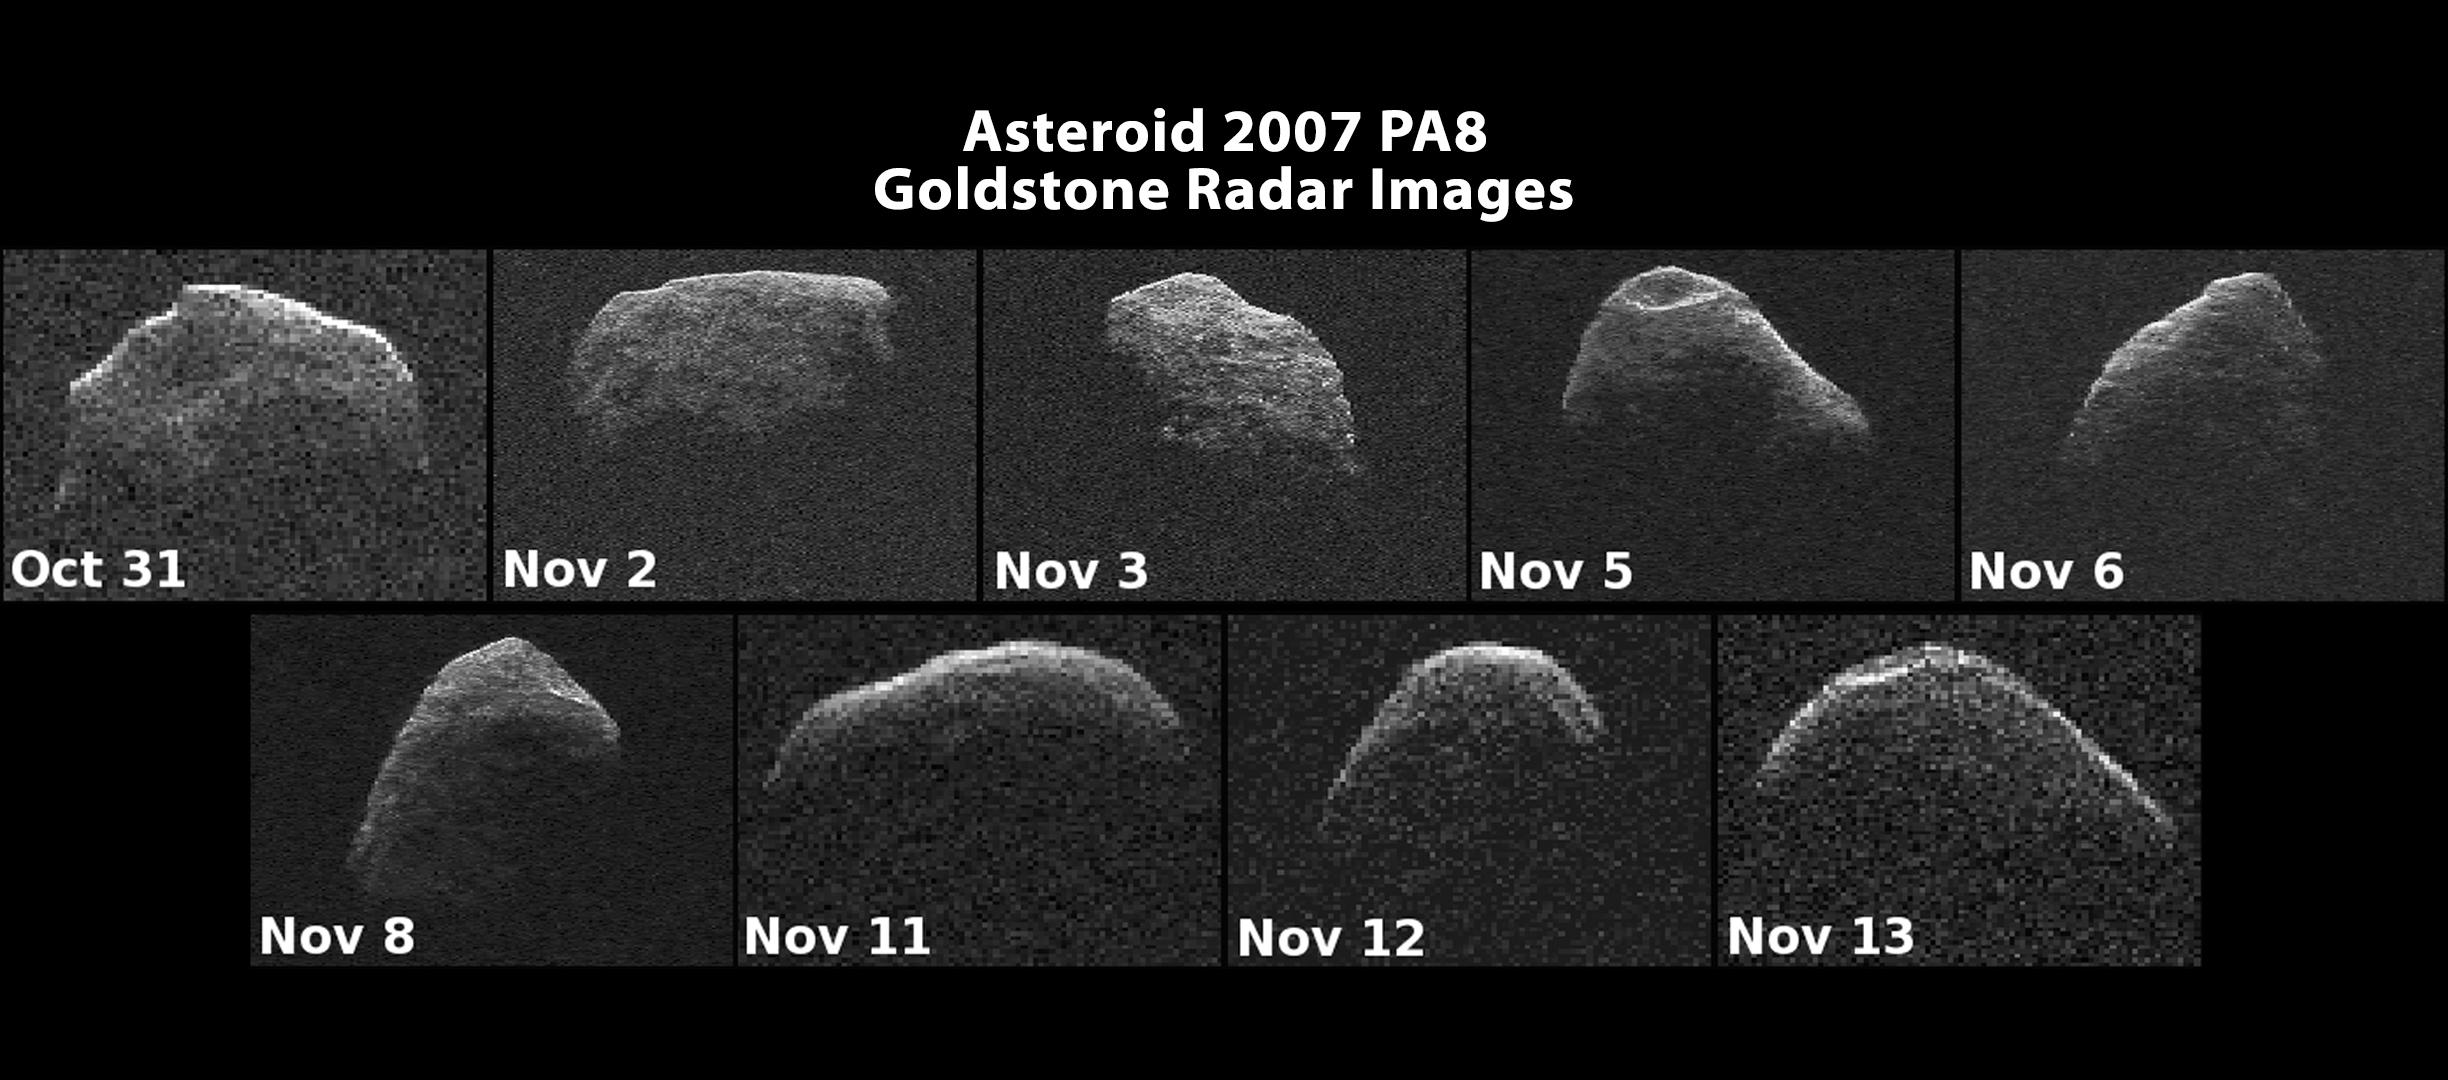
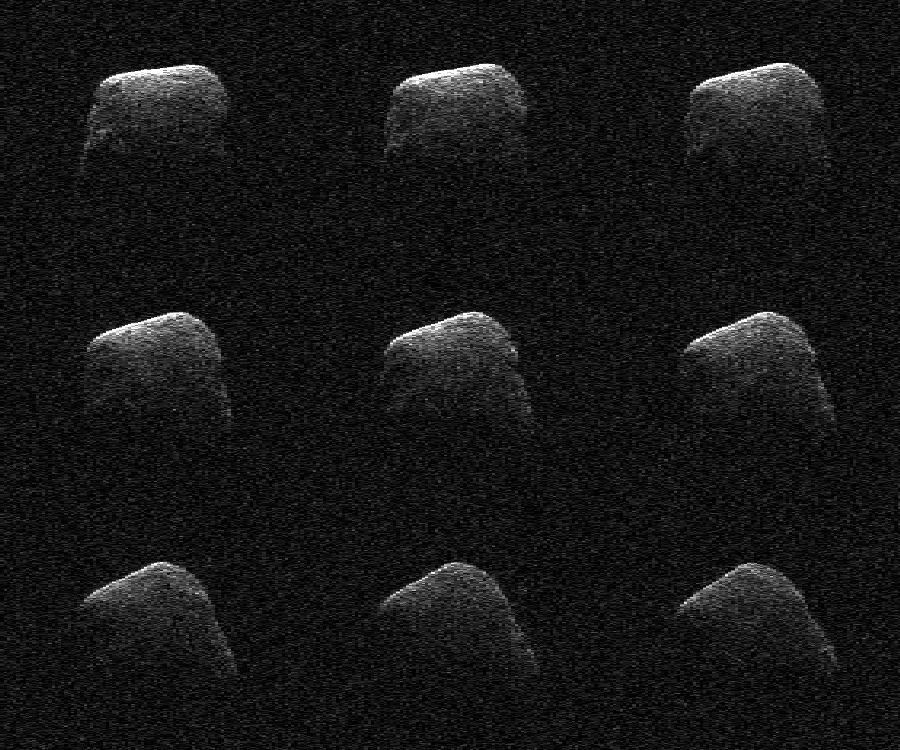
2012-11-26
Asteroid
Goldstone Deep Space Network (DSN)
Goldstone Solar System Radar
2448x1080x1
PIA16474:
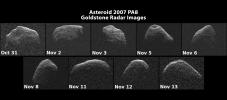
Nine Radar Images of Asteroid PA8
Full Resolution:
TIFF
(2.647 MB)
JPEG
(271.5 kB)
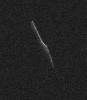
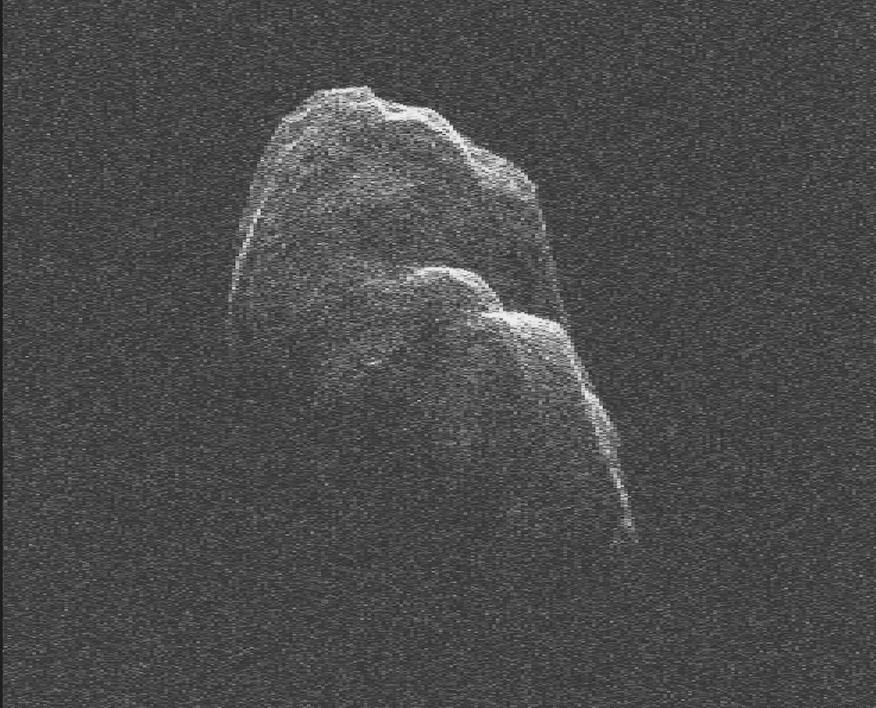
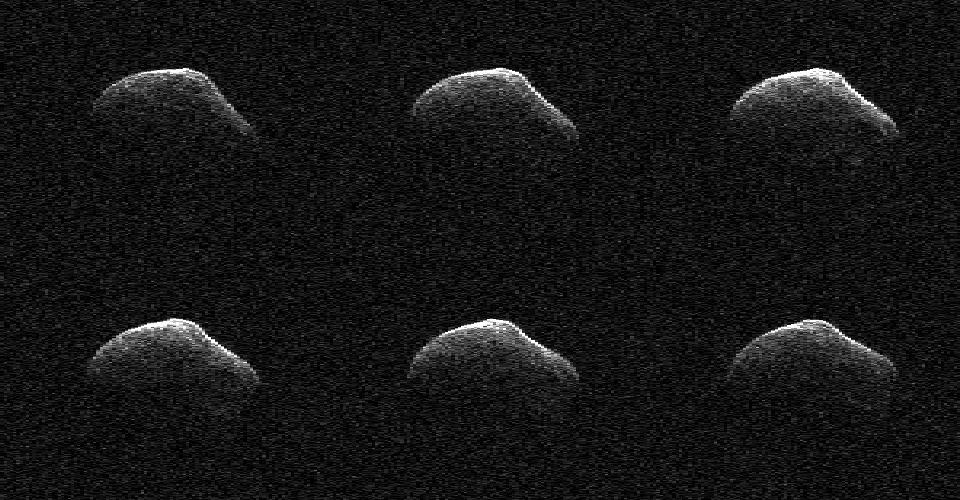
2012-12-14
Asteroid
Goldstone Deep Space Network (DSN)
Goldstone Solar System Radar
876x708x1
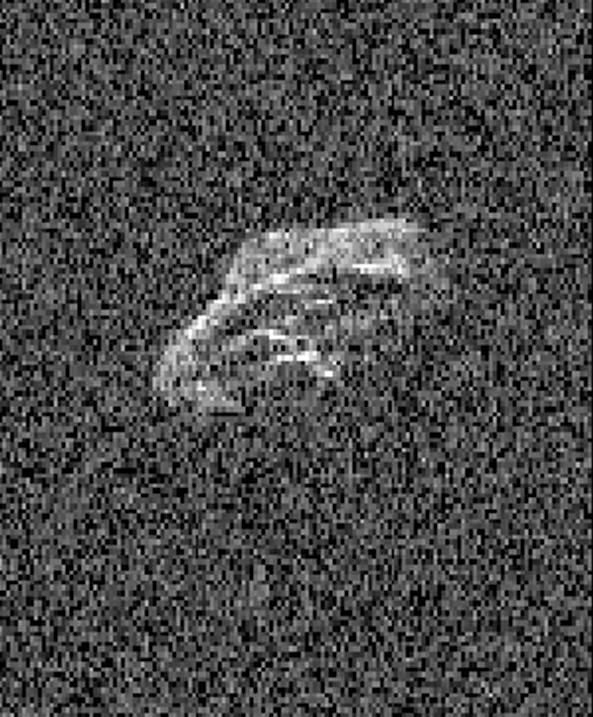
PIA16599:
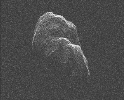
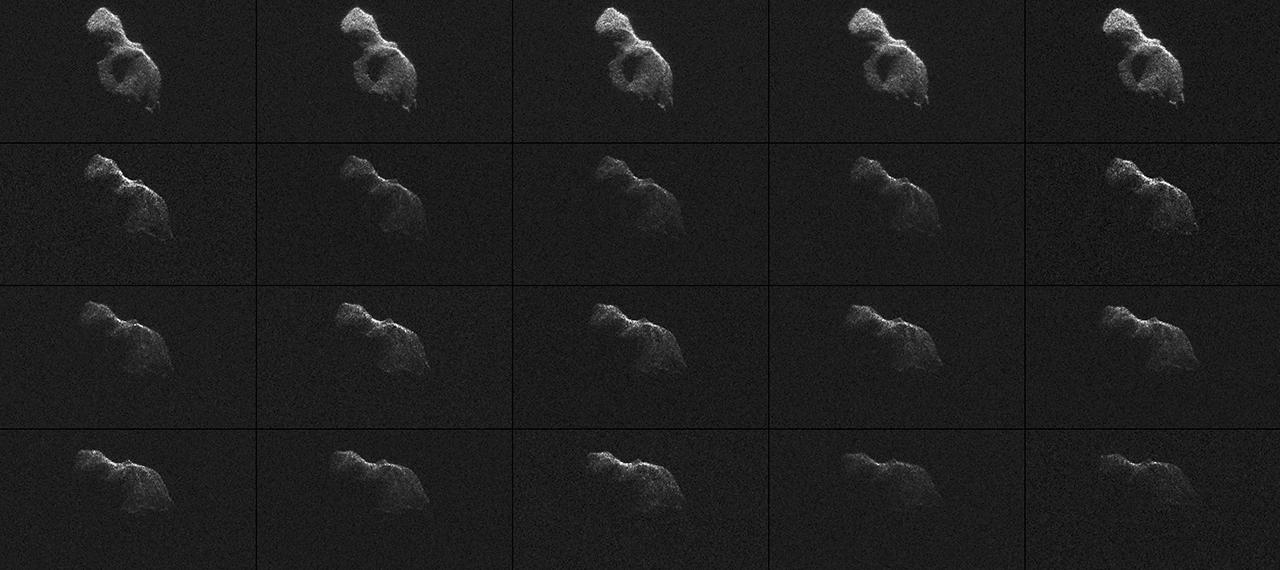
Tumbling Asteroid Toutatis
Full Resolution:
TIFF
(621.1 kB)
JPEG
(124.8 kB)
2013-03-18
Asteroid
Goldstone Deep Space Network (DSN)
Goldstone Solar System Radar
715x450x1
PIA16895:
Goldstone Radar Images of Asteroid 2013 ET
Full Resolution:
TIFF
(322.3 kB)
JPEG
(65.17 kB)
2013-06-06
Asteroid
Goldstone Deep Space Network (DSN)
Goldstone Solar System Radar
1920x1080x1
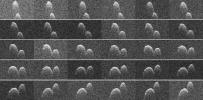
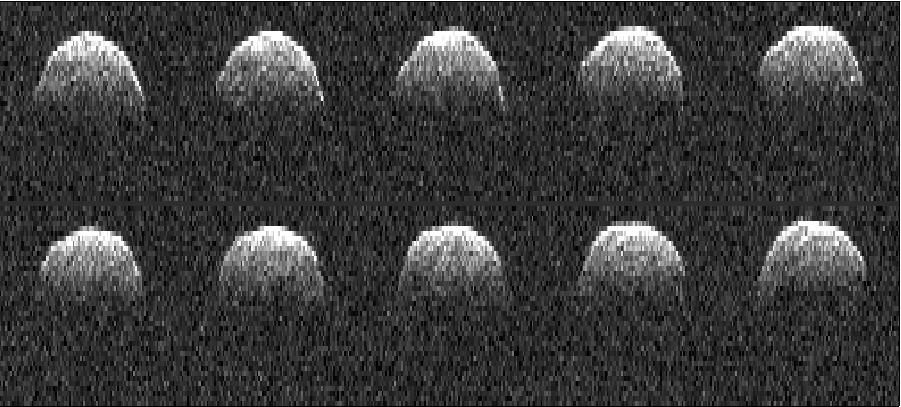
PIA17235:
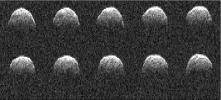
Radar Movies Highlight Asteroid 1998 QE2 and Its Moon
Full Resolution:
TIFF
(2.076 MB)
JPEG
(107.1 kB)
2013-08-15
Asteroid
Goldstone Deep Space Network (DSN)
Goldstone Solar System Radar
1920x962x1
PIA17406:
Asteroid 2005 WK4
Full Resolution:
TIFF
(1.849 MB)
JPEG
(263.5 kB)
2014-06-12
Asteroid
Goldstone Deep Space Network (DSN)
Goldstone Solar System Radar
1280x570x1
PIA18412:
Radar Images of Asteroid 2014 HQ124
Full Resolution:
TIFF
(730.6 kB)
JPEG
(93.79 kB)
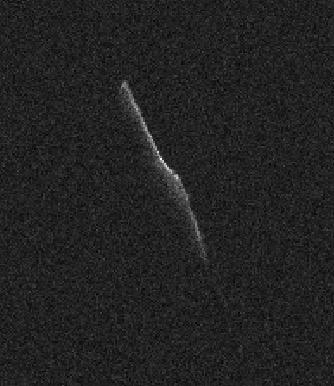
2015-12-23
Asteroid
Goldstone Deep Space Network (DSN)
Goldstone Solar System Radar
616x592x1
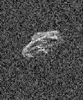
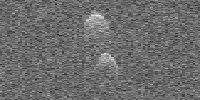
PIA20279:
Radar Image of 'Christmas Eve' Asteroid 2003 SD2020
Full Resolution:
TIFF
(254.1 kB)
JPEG
(42.62 kB)
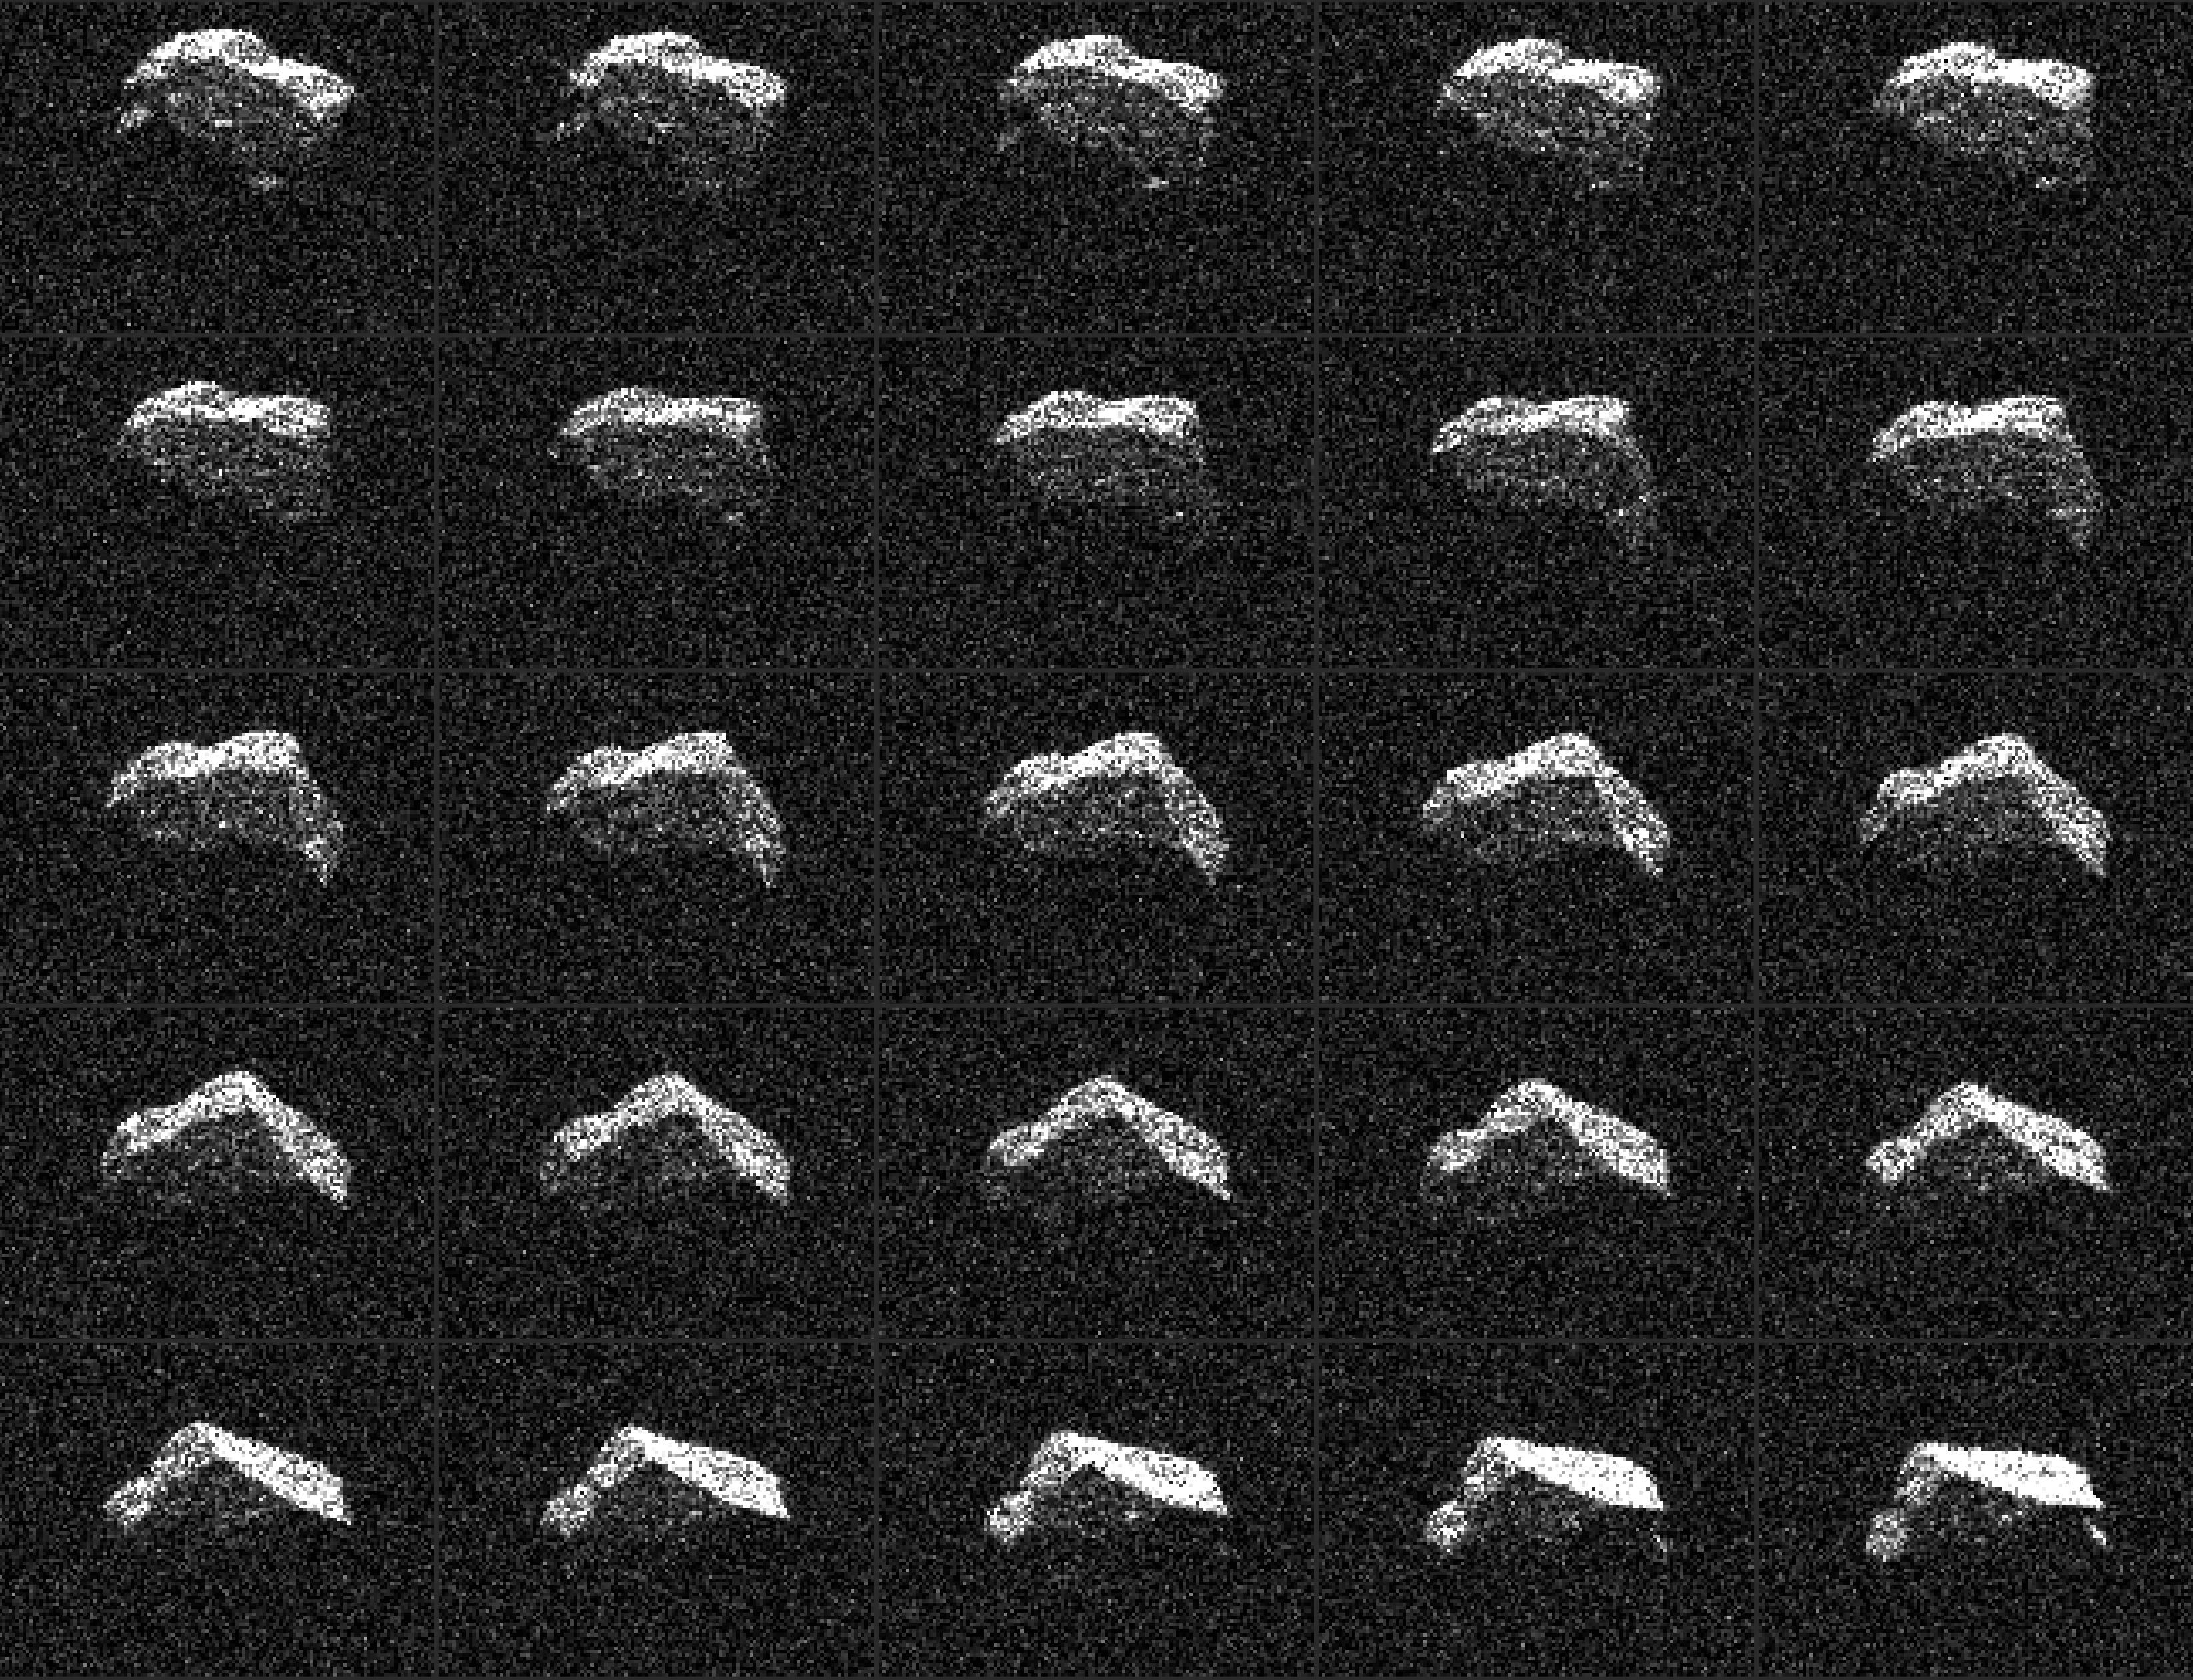
2015-11-03
Asteroid
Goldstone Deep Space Network (DSN)
Goldstone Solar System Radar
2172x1500x1
PIA20043:
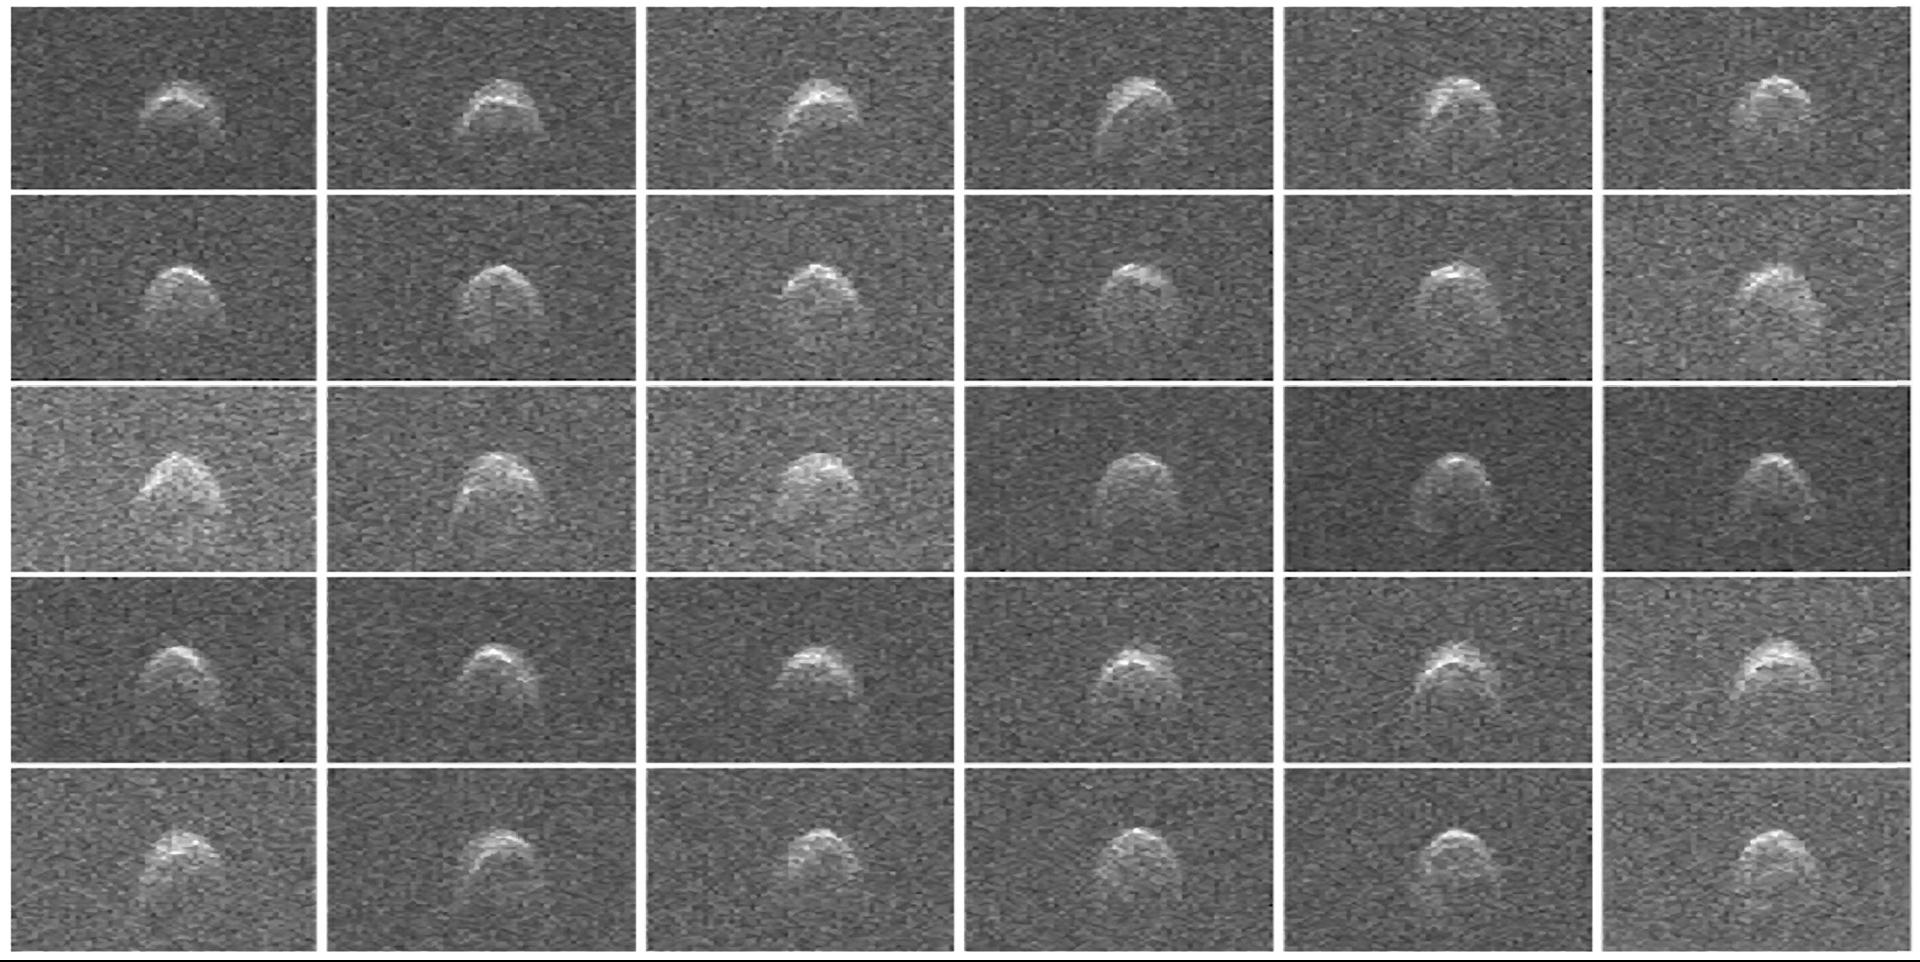
Halloween Asteroid Rotation
Full Resolution:
TIFF
(629.7 kB)
JPEG
(408.6 kB)
2015-12-17
Asteroid
Goldstone Deep Space Network (DSN)
Goldstone Solar System Radar
1920x1080x1
PIA20215:
Not Your Father's Asteroid
Full Resolution:
TIFF
(364.1 kB)
JPEG
(62.59 kB)
2015-12-23
Asteroid
Goldstone Deep Space Network (DSN)
Goldstone Solar System Radar
334x386x3
PIA20280:
Elongated Asteroid Will Safely Pass Earth on Christmas Eve
Full Resolution:
TIFF
(129.3 kB)
JPEG
(22.62 kB)
2016-03-24
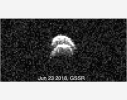
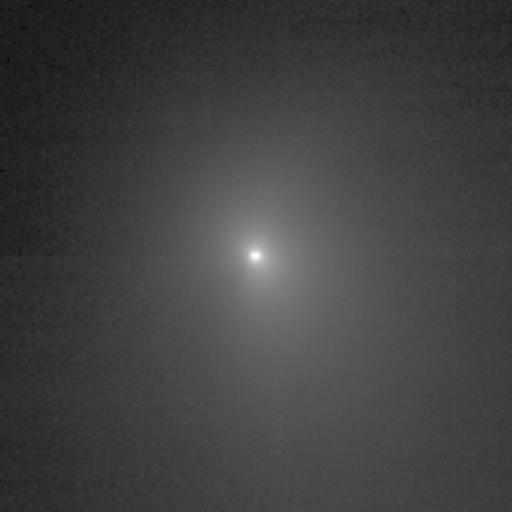
Comet
Goldstone Deep Space Network (DSN)
Goldstone Solar System Radar
960x500x1
PIA20542:
Comet Frozen In Time by NASA Radar
Full Resolution:
TIFF
(452.2 kB)
JPEG
(109.6 kB)
2016-03-29
Comet
Goldstone Deep Space Network (DSN)
Goldstone Solar System Radar
900x750x1
PIA19298:
Comet Scanned by NASA Radar
Full Resolution:
TIFF
(643.9 kB)
JPEG
(155.5 kB)
2017-02-10
Asteroid
Goldstone Deep Space Network (DSN)
Goldstone Solar System Radar
3291x2521x1
PIA21452:
Angular Asteroid Composite
Full Resolution:
TIFF
(3.736 MB)
JPEG
(1.809 MB)
2017-02-10
Asteroid
Goldstone Deep Space Network (DSN)
Goldstone Solar System Radar
1000x600x1
PIA21453:
Radar Images of Asteroid 2017 BQ6
Full Resolution:
TIFF
(544.8 kB)
JPEG
(104.9 kB)
2017-04-19
Asteroid
Goldstone Deep Space Network (DSN)
Goldstone Solar System Radar
1800x1500x1
PIA21594:
Radar Imagery of Asteroid 2014 JO25
Full Resolution:
TIFF
(2.556 MB)
JPEG
(527.8 kB)
2017-05-09
Asteroid
Goldstone Deep Space Network (DSN)
Goldstone Solar System Radar
700x720x1
PIA21597:
New Radar Images of Asteroid 2014 JO25
Full Resolution:
TIFF
(231 kB)
JPEG
(100.8 kB)
2018-07-12
Asteroid
Goldstone Solar System Radar
436x214x1
PIA22557:
Radar Images of Binary Asteroid 2017 YE5
Full Resolution:
TIFF
(52.47 kB)
JPEG
(22.87 kB)
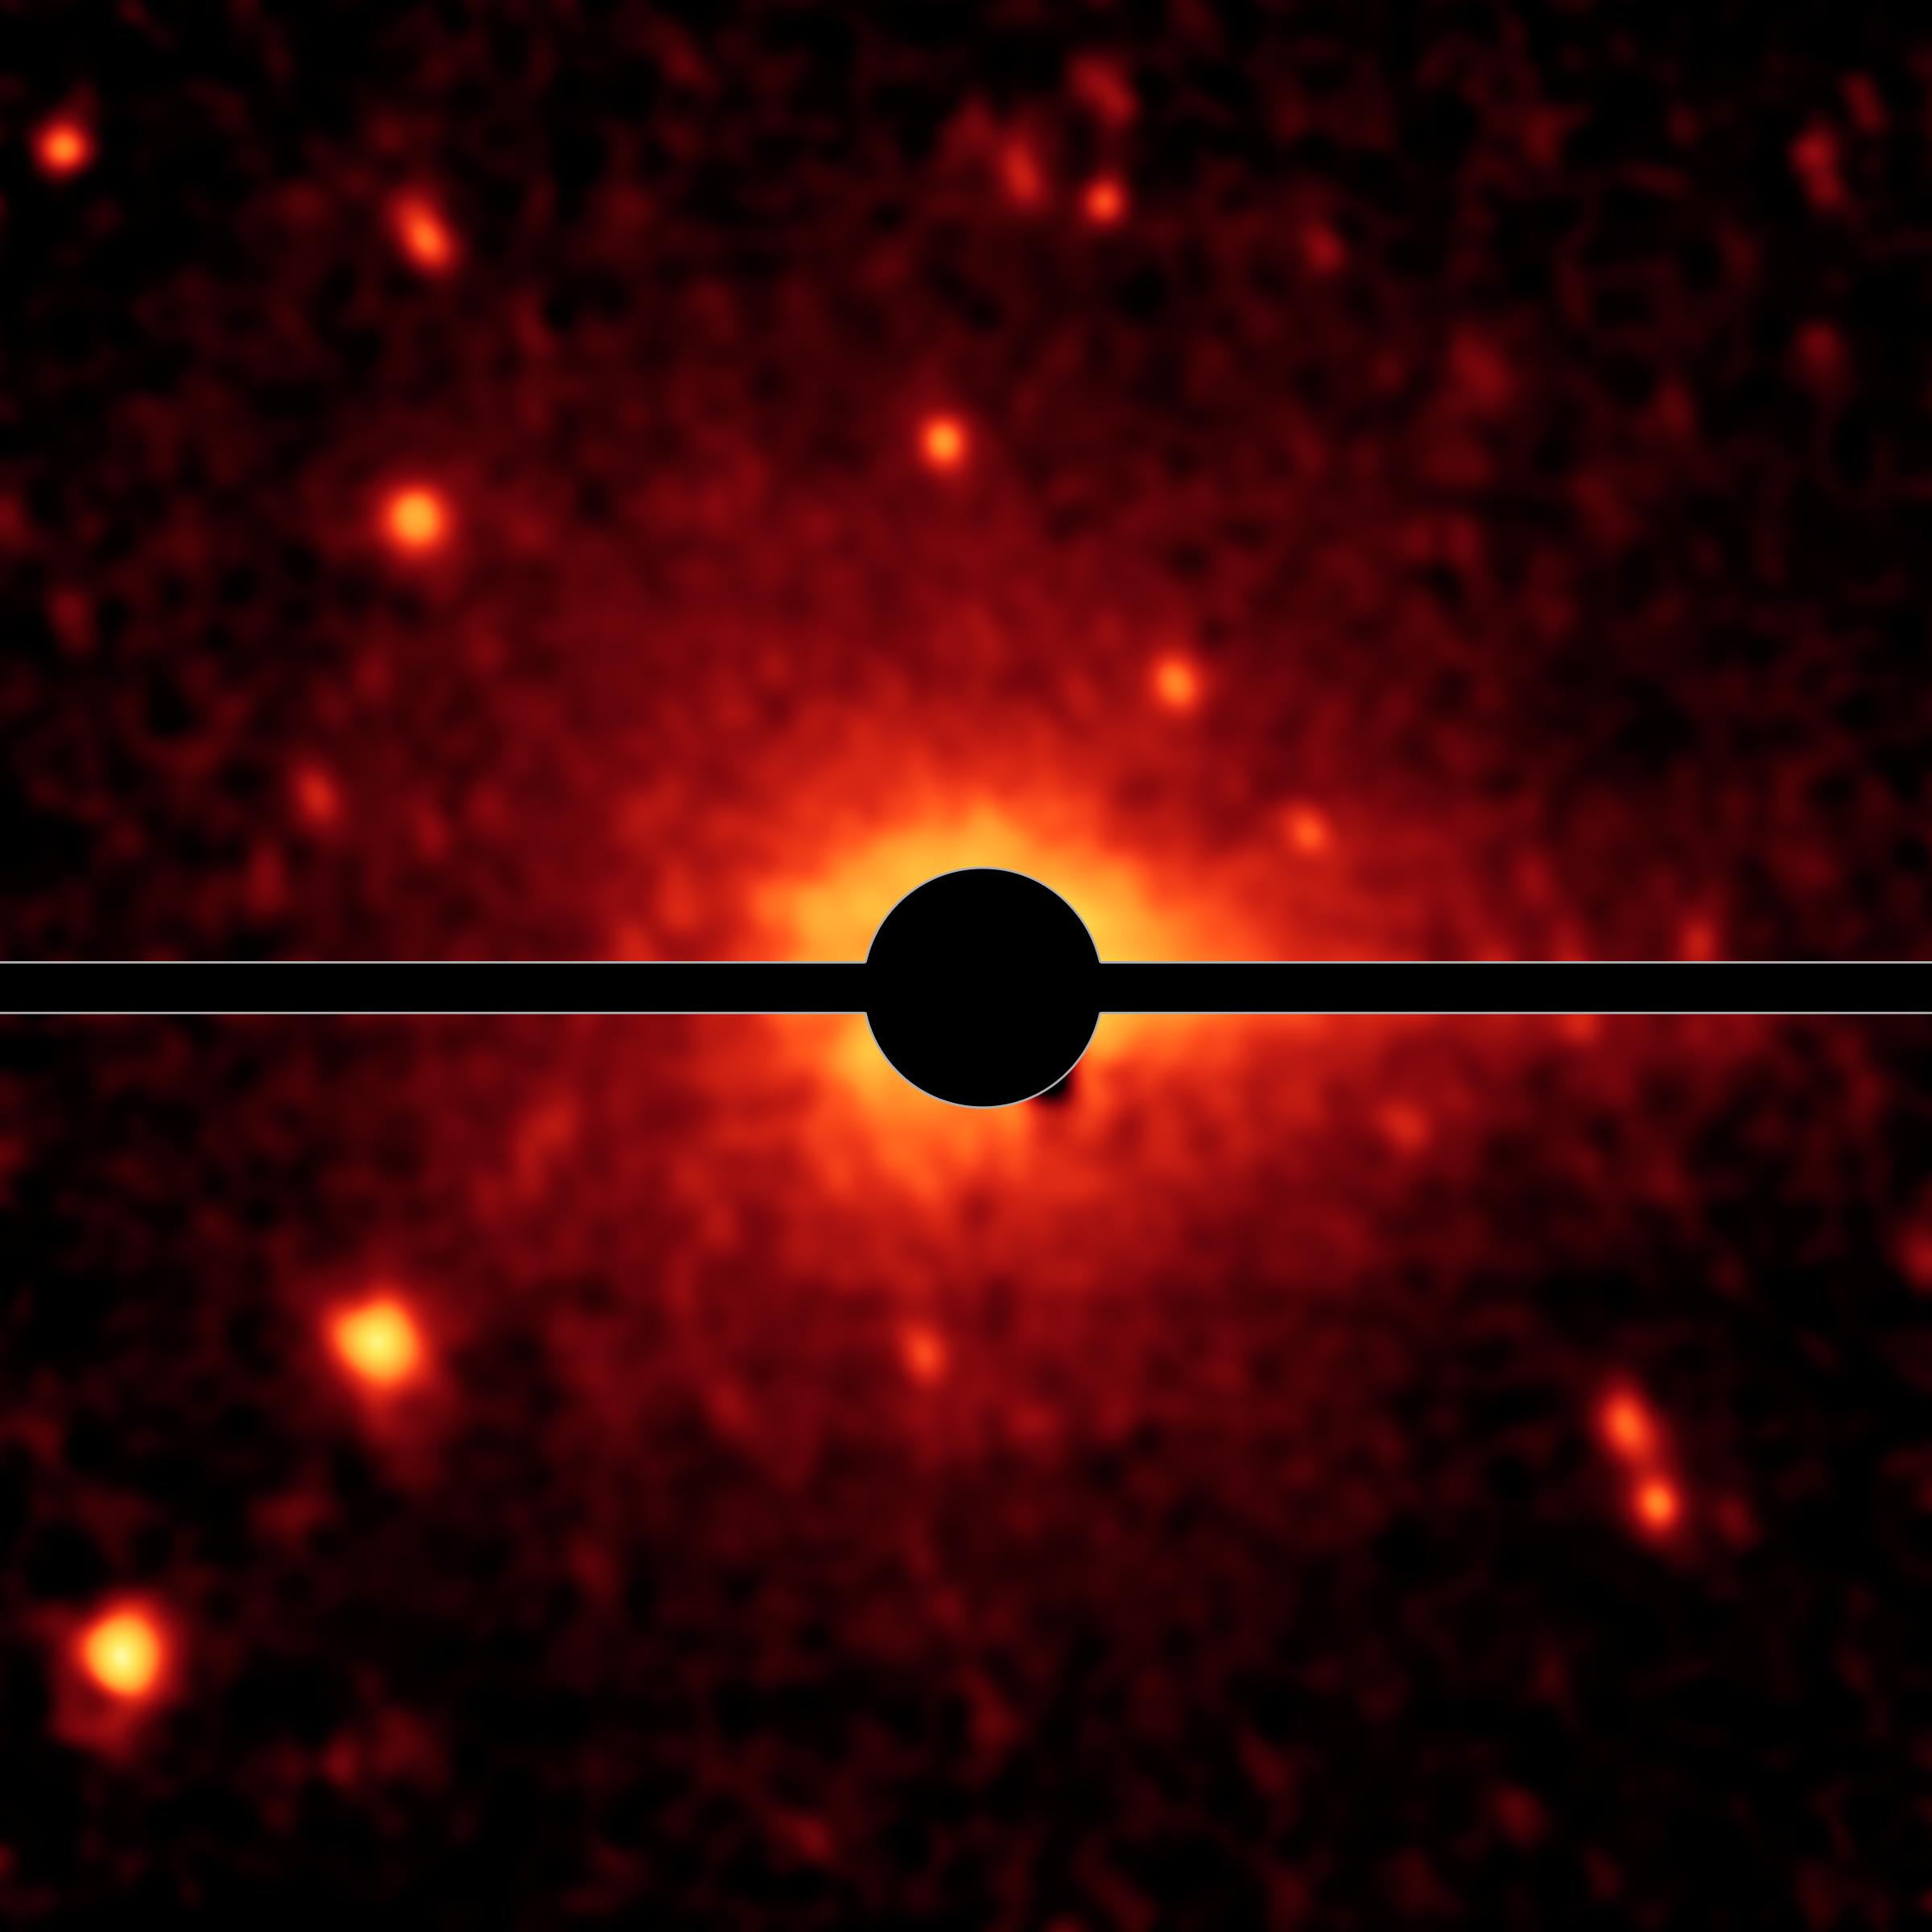
2020-07-07
Asteroid
Psyche
Gamma Ray/Neutron Spectrometer (GRNS)
9504x6336x3
PIA23880:
Psyche's Spectrometer
Full Resolution:
TIFF
(176.8 MB)
JPEG
(10.12 MB)
2021-10-04
Asteroid
Psyche
Gamma Ray and Neutron Spectrometer (GRNS)
8256x5504x3
PIA24891:
Psyche's Gamma Ray and Neutron Spectrometer in the Works
Full Resolution:
TIFF
(101 MB)
JPEG
(8.77 MB)
1-100
101-200
201-300
301-400
401-500
501-600
601-700
701-800
801-900
901-1000
Currently displaying images:
301 - 400
of 957


