My
List |
Addition Date
|
Target
|
Mission
|
Instrument
|
Size
|

|
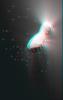
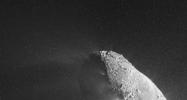
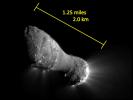
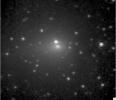
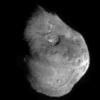
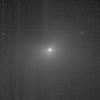
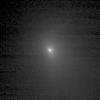
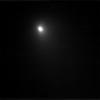
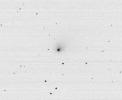
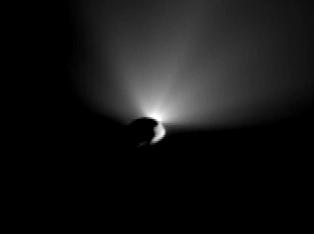
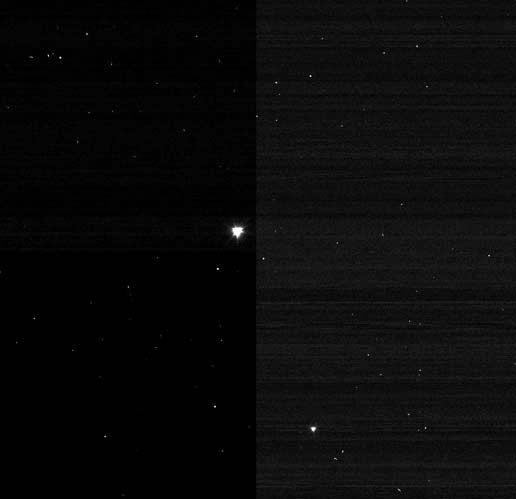
2013-02-05 |
ISON
|
Deep Impact
|
Medium Resolution Instrument (MRI)
|
786x720x1 |

|
-
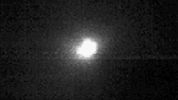
PIA16748:
-
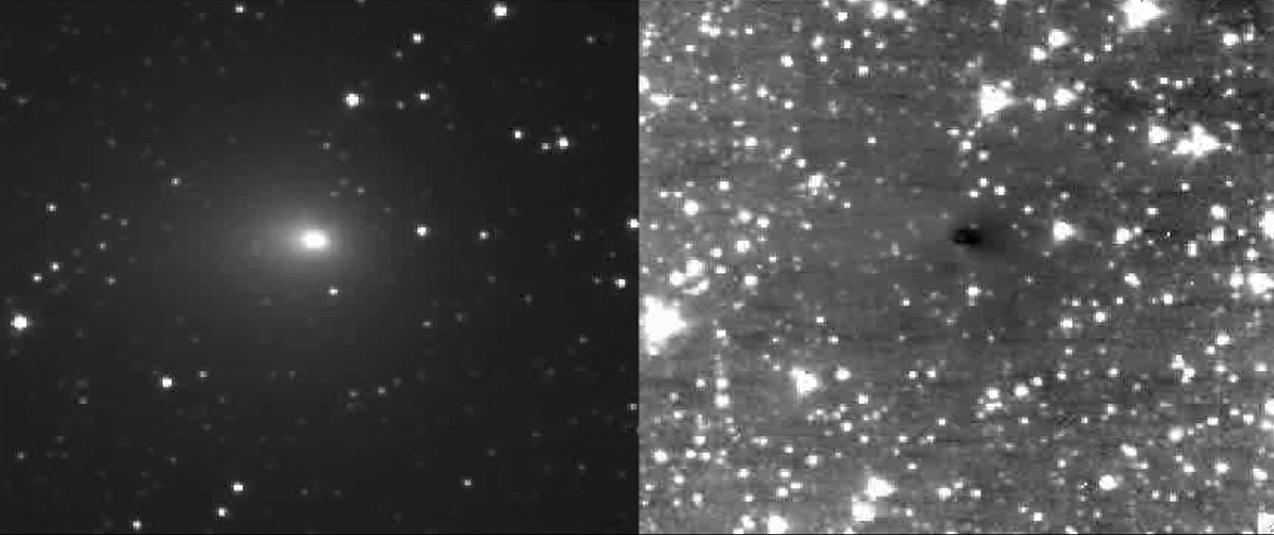
NASA'S Deep Impact Spacecraft Images Comet ISON

Full Resolution:
TIFF
(566.7 kB)
JPEG
(54.79 kB)
|
|
|
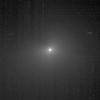
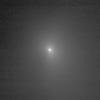
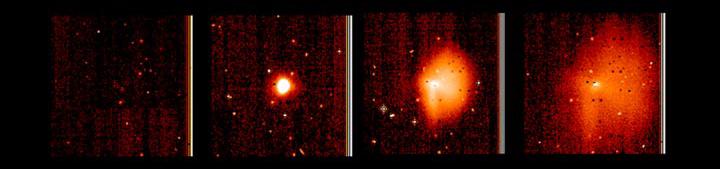
2011-10-05 |
Tempel 1
|
EPOXI
Herschel Space Observatory
|
Medium Resolution Instrument (MRI)
|
3200x1800x3 |
|
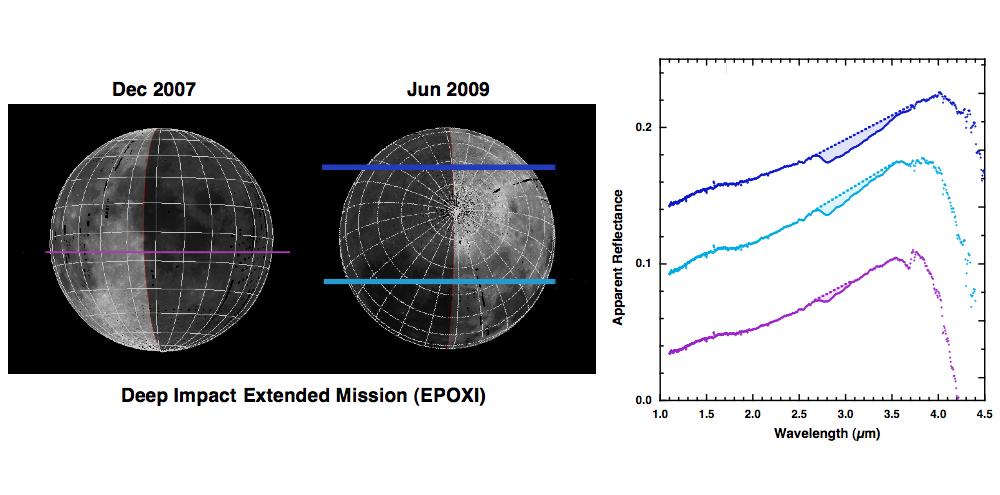
-
PIA14738:
-
The Same Here as There
Full Resolution:
TIFF
(17.28 MB)
JPEG
(389.3 kB)
|
|
|
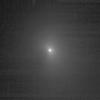
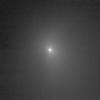
2011-10-05 |
Tempel 1
|
EPOXI
Herschel Space Observatory
|
Medium Resolution Instrument (MRI)
|
3300x2550x3 |
|
-
PIA14737:
-
Heavy and Light Just Right
Full Resolution:
TIFF
(25.25 MB)
JPEG
(397.7 kB)
|
|
|
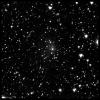
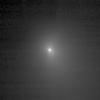
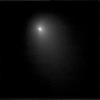
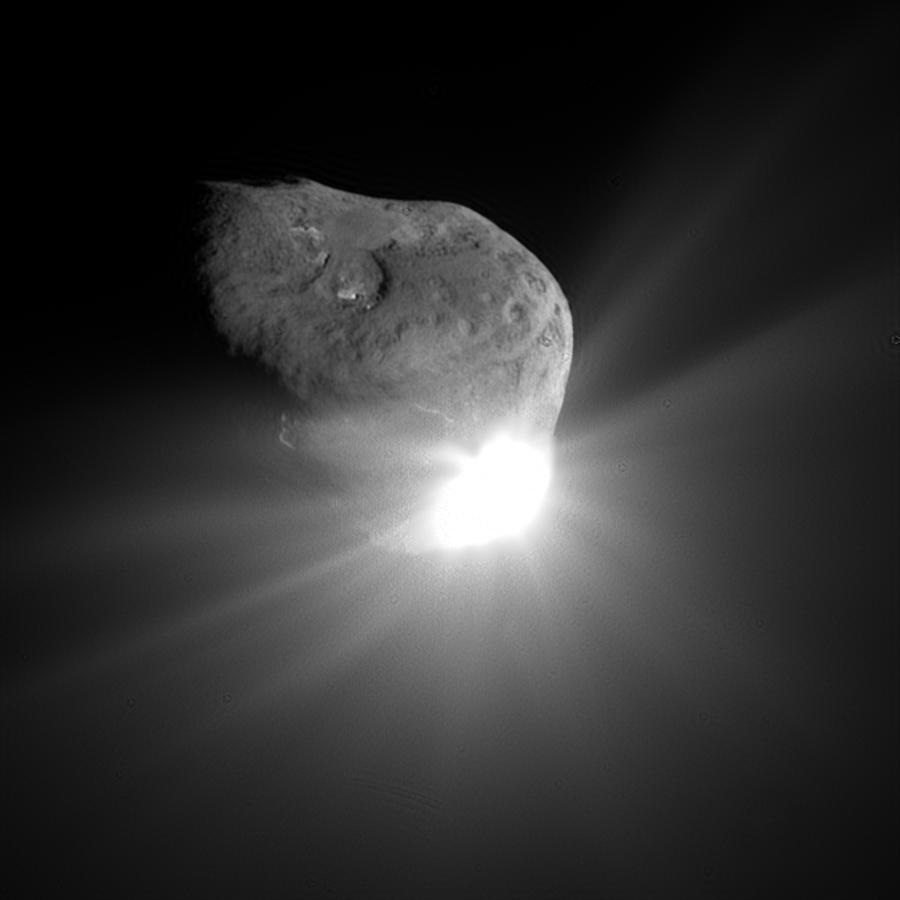
2011-02-16 |
Tempel 1
|
StardustNExT
|
Medium Resolution Instrument (MRI)
Stardust Navigation Camera
|
890x680x1 |
|
-
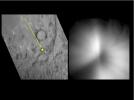
PIA13863:
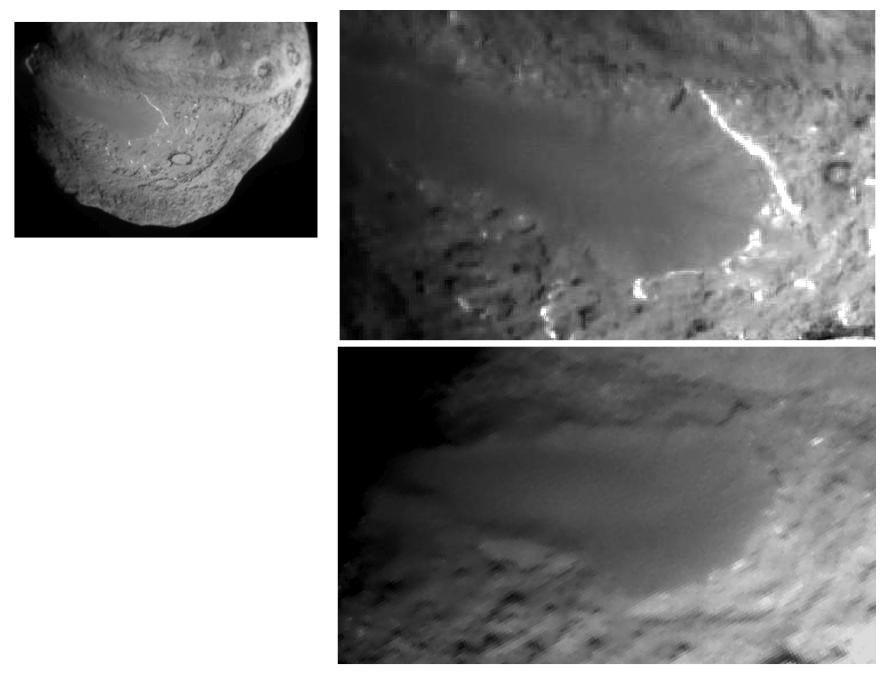
-
Changes to Smooth Terrain (Unannotated)
Full Resolution:
TIFF
(606 kB)
JPEG
(43.76 kB)
|
|
|
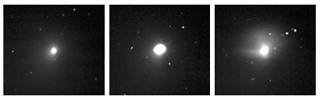
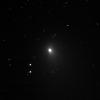
2011-02-16 |
Tempel 1
|
StardustNExT
|
Medium Resolution Instrument (MRI)
Stardust Navigation Camera
|
890x680x3 |

|
-
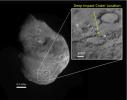
PIA13862:
-
Changes to Smooth Terrain (Annotated)
Full Resolution:
TIFF
(1.818 MB)
JPEG
(53.38 kB)
|
|
|
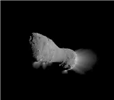
2011-02-16 |
Tempel 1
|
StardustNExT
|
Medium Resolution Instrument (MRI)
|
1489x1117x3 |
|
-
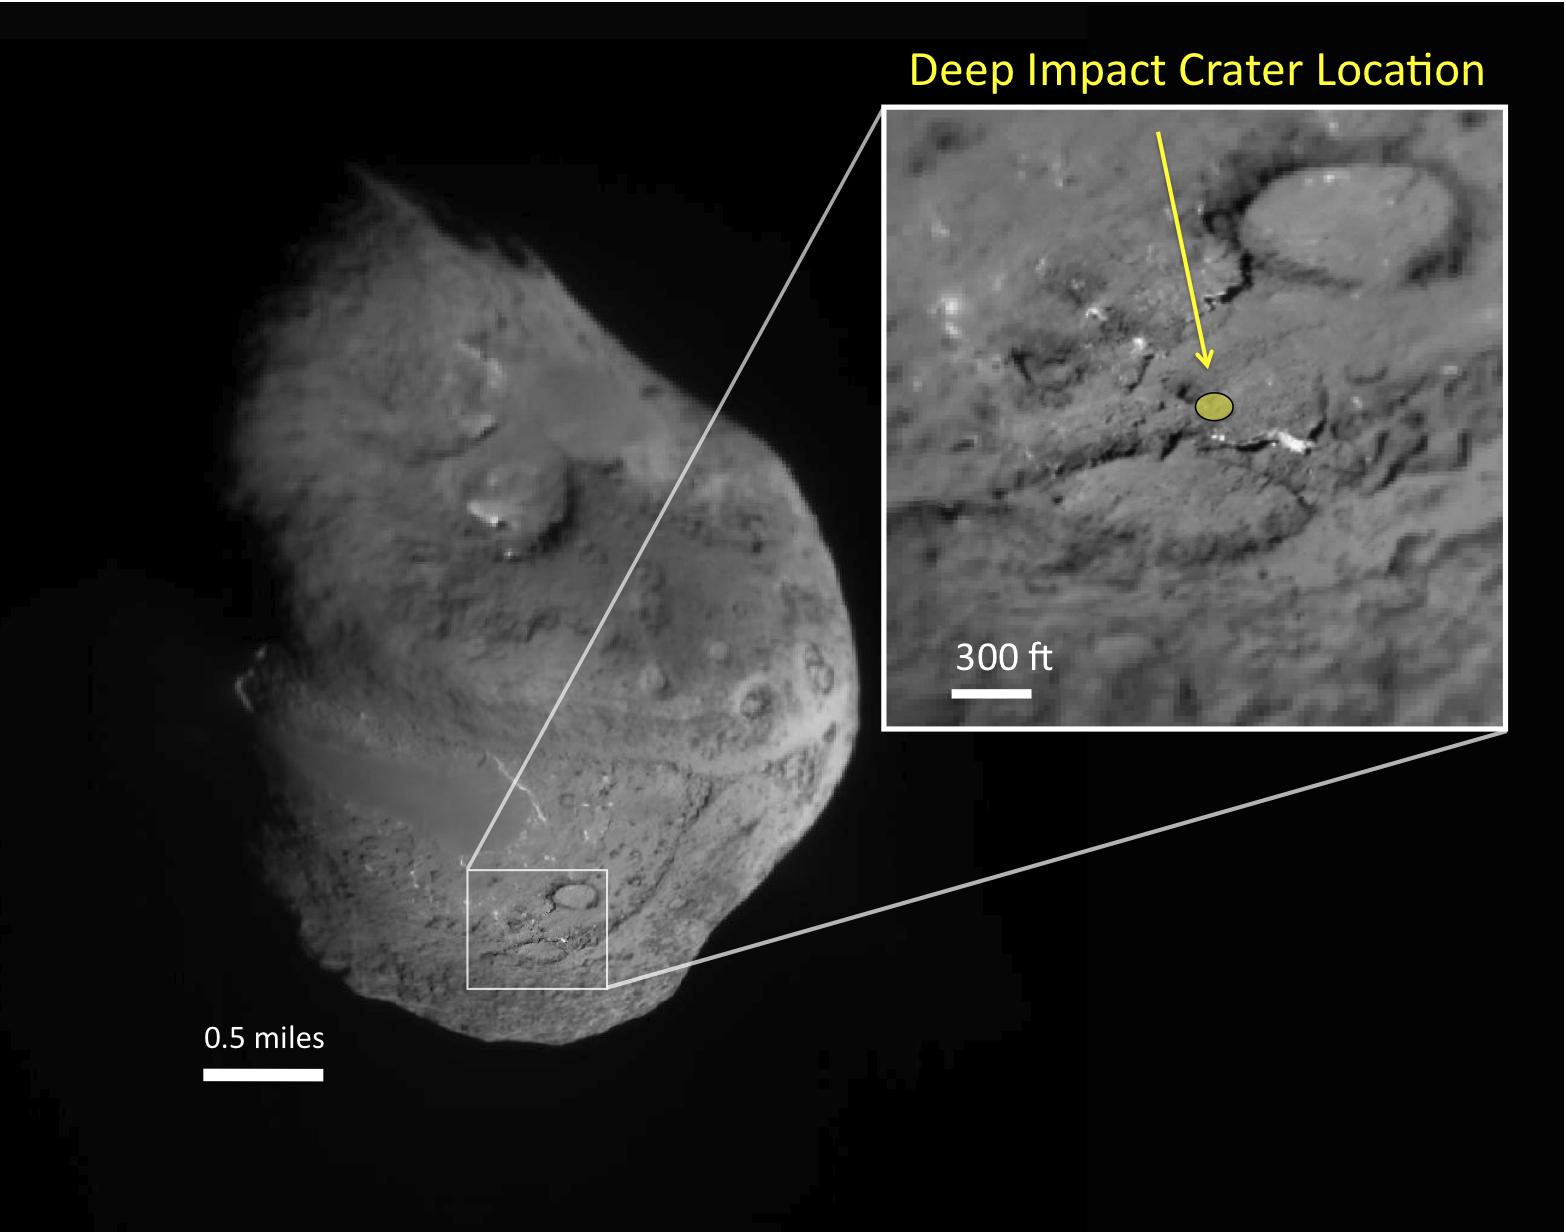
PIA13859:
-
Tempel 1, as Seen by Two Spacecraft
Full Resolution:
TIFF
(4.999 MB)
JPEG
(88.61 kB)
|
|
|
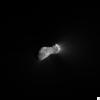
2011-02-16 |
Tempel 1
|
StardustNExT
|
Medium Resolution Instrument (MRI)
|
1494x1114x3 |
|
-
PIA13858:
-
Deep Impact's Effect on Tempel 1
Full Resolution:
TIFF
(5.002 MB)
JPEG
(81.46 kB)
|
|
|
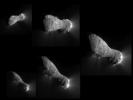
2011-02-16 |
Tempel 1
|
StardustNExT
|
Medium Resolution Instrument (MRI)
|
1566x1232x3 |
|
-
PIA13857:
-
Comet Tempel 1, in Context
Full Resolution:
TIFF
(5.798 MB)
JPEG
(122.7 kB)
|
|
|
2010-11-18 |
Tempel 1
|
EPOXI
|
Medium Resolution Instrument (MRI)
|
1280x720x1 |
|
-
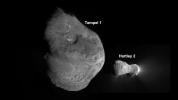
PIA13629:
-
Tempel 1 and Hartley 2
Full Resolution:
TIFF
(922.8 kB)
JPEG
(39.88 kB)
|
|
|
2010-11-18 |
Hartley 2
|
EPOXI
|
High Resolution Instrument (HRI)
|
529x400x1 |
|
-
PIA13628:
-
The Many Faces of Hartley 2
Full Resolution:
TIFF
(212 kB)
JPEG
(12.67 kB)
|
|
|
2010-11-18 |
Hartley 2
|
EPOXI
|
Medium Resolution Instrument (MRI)
|
456x722x3 |
|
-
PIA13627:
-
Hartley 2 in 3-D
Full Resolution:
TIFF
(989.1 kB)
JPEG
(25.46 kB)
|
|
|
2010-11-18 |
Hartley 2
|
EPOXI
|
Medium Resolution Instrument (MRI)
|
864x625x1 |
|
-
PIA13626:
-
Tracking "Snowballs"
Full Resolution:
TIFF
(540.8 kB)
JPEG
(48.6 kB)
|
|
|
2010-11-18 |
Hartley 2
|
EPOXI
|
Medium Resolution Instrument (MRI)
|
439x545x1 |
|
-
PIA13625:
-
Icy Particle Spray
Full Resolution:
TIFF
(239.7 kB)
JPEG
(37.32 kB)
|
|
|
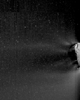
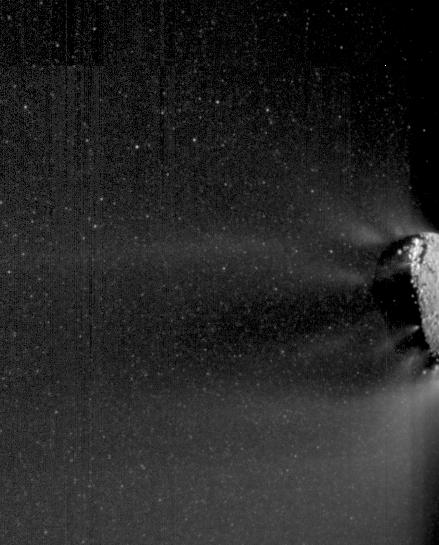
2010-11-18 |
Hartley 2
|
EPOXI
|
Medium Resolution Instrument (MRI)
|
960x720x1 |

|
-
PIA13624:
-
Views of Hartley 2 Nucleus and Inner Coma
Full Resolution:
TIFF
(692.2 kB)
JPEG
(56.47 kB)
|
|
|
2010-11-18 |
Hartley 2
|
EPOXI
|
High Resolution Instrument (HRI)
|
920x920x1 |
|
-
PIA13623:
-
Cometary Flurries
Full Resolution:
TIFF
(847.6 kB)
JPEG
(255.6 kB)
|
|
|
2010-11-18 |
Hartley 2
|
EPOXI
|
High Resolution Instrument (HRI)
|
928x496x1 |
|
-
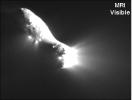
PIA13622:
-
Hartley 2, Close Up
Full Resolution:
TIFF
(461 kB)
JPEG
(36.85 kB)
|
|
|
2010-11-05 |
Hartley 2
|
EPOXI
|
Medium Resolution Instrument (MRI)
|
513x448x1 |
|
-
PIA13602:
-
Flight of the Comet
Full Resolution:
TIFF
(230.3 kB)
JPEG
(9.195 kB)
|
|
|
2010-11-05 |
Hartley 2
|
EPOXI
|
Medium Resolution Instrument (MRI)
|
501x501x1 |

|
-
PIA13601:
-
Leaving Comet Hartley 2
Full Resolution:
TIFF
(251.5 kB)
JPEG
(5.035 kB)
|
|
|
2010-11-05 |
Hartley 2
|
EPOXI
|
Medium Resolution Instrument (MRI)
|
501x501x1 |

|
-
PIA13600:
-
Slipping By Comet Hartley 2
Full Resolution:
TIFF
(251.5 kB)
JPEG
(7.469 kB)
|
|
|
2010-11-05 |
Hartley 2
|
EPOXI
|
Medium Resolution Instrument (MRI)
|
501x501x1 |

|
-
PIA13579:
-
Almost There at Comet Hartley 2
Full Resolution:
TIFF
(251.5 kB)
JPEG
(8.066 kB)
|
|
|
2010-11-05 |
Hartley 2
|
EPOXI
|
Medium Resolution Instrument (MRI)
|
501x501x1 |
|
-
PIA13578:
-
Closing in on Comet Hartley 2
Full Resolution:
TIFF
(251.5 kB)
JPEG
(5.171 kB)
|
|
|
2010-11-04 |
Hartley 2
|
EPOXI
|
Medium Resolution Instrument (MRI)
|
2999x2249x1 |
|
-
PIA13577:
-
Flying Under Comet Hartley 2
Full Resolution:
TIFF
(6.754 MB)
JPEG
(172.1 kB)
|
|
|
2010-11-04 |
Hartley 2
|
EPOXI
|
|
2999x2249x1 |

|
-
PIA13576:
-
Fab Five
Full Resolution:
TIFF
(6.754 MB)
JPEG
(265.1 kB)
|
|
|
2010-11-04 |
Hartley 2
|
EPOXI
|
Medium Resolution Instrument (MRI)
|
2999x2249x3 |
|
-
PIA13575:
-
Up Close and Personal with Hartley 2
Full Resolution:
TIFF
(20.23 MB)
JPEG
(204.6 kB)
|
|
|
2010-11-04 |
Hartley 2
|
EPOXI
|
Medium Resolution Instrument (MRI)
|
2999x2249x3 |

|
-
PIA13574:
-
Jets Galore
Full Resolution:
TIFF
(6.754 MB)
JPEG
(199.9 kB)
|
|
|
2010-11-04 |
Hartley 2
|
EPOXI
|
High Resolution Instrument (HRI)
|
640x327x3 |

|
-
PIA13573:
-
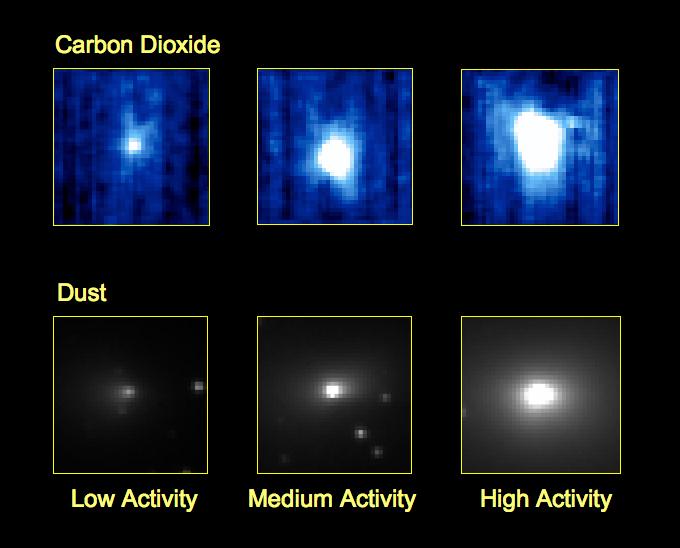
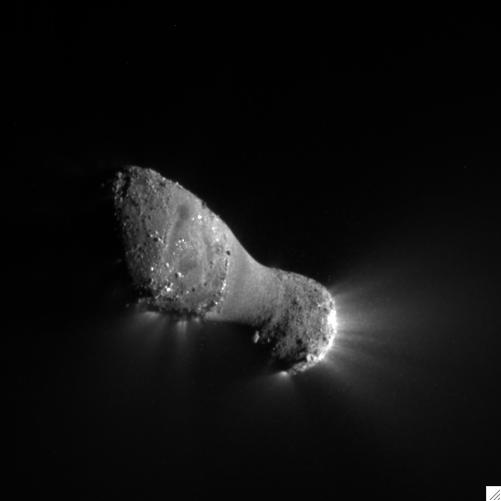
Carbon Dioxide Fluctuations in Comet Hartley 2
Full Resolution:
TIFF
(628.7 kB)
JPEG
(18.46 kB)
|
|
|
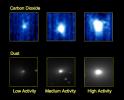
2010-11-04 |
Hartley 2
|
EPOXI
|
High Resolution Instrument (HRI)
Medium Resolution Instrument (MRI)
|
680x548x3 |
|
-
PIA13572:
-
Evidence for a First-of-Its-Kind Comet Jet
Full Resolution:
TIFF
(1.119 MB)
JPEG
(35.8 kB)
|
|
|
2010-11-04 |
Hartley 2
|
EPOXI
|
Medium Resolution Instrument (MRI)
|
501x501x1 |

|
-
PIA13570:
-
Introducing Comet Hartley 2
Full Resolution:
TIFF
(251.5 kB)
JPEG
(9.679 kB)
|
|
|
2010-11-04 |
Hartley 2
|
EPOXI
|
High Resolution Instrument (HRI)
Medium Resolution Instrument (MRI)
|
1274x535x1 |
|
-
PIA13568:
-
Spacecraft Images Comet Target's Jets
Full Resolution:
TIFF
(682.5 kB)
JPEG
(57.09 kB)
|
|
|
2010-11-03 |
Hartley 2
|
EPOXI
|
|
512x512x1 |
|
-
PIA13566:
-
Comet Hartley 2 Looms Large in the Sky
Full Resolution:
TIFF
(262.6 kB)
JPEG
(21.42 kB)
|
|
|
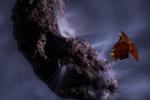
2010-10-26 |
Hartley 2
|
EPOXI
|
|
600x338x3 |

|
-
PIA13548:
-
Comet Hartley 2 Gets a Visitor (Artist Concept)
Full Resolution:
TIFF
(609.3 kB)
JPEG
(13.71 kB)
|
|
|
2010-10-26 |
Hartley 2
|
EPOXI
|
Medium Resolution Instrument (MRI)
|
642x552x1 |
|
-
PIA13547:
-
Hartley 2 on the Move
Full Resolution:
TIFF
(355 kB)
JPEG
(29.7 kB)
|
|
|
2010-09-08 |
Hartley 2
|
Deep Impact
|
Medium Resolution Instrument (MRI)
|
512x512x1 |
|
-
PIA13374:
-
Deep Impact Spacecraft's First Glimpse of Comet Hartley 2
Full Resolution:
TIFF
(262.6 kB)
JPEG
(50.98 kB)
|
|
|
2009-09-24 |
Moon
|
Deep Impact
|
|
1000x495x3 |

|
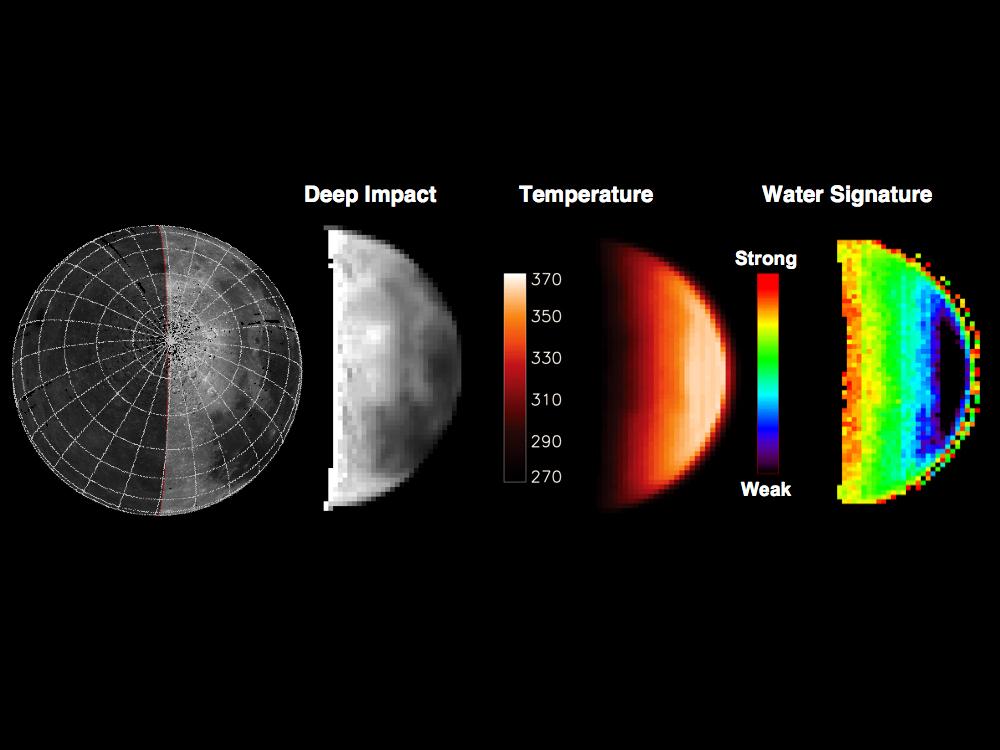
-
PIA12224:
-
Deep Impact Identifies Water on the Lunar Surface
Full Resolution:
TIFF
(1.487 MB)
JPEG
(60.06 kB)
|
|
|
2009-09-24 |
Moon
|
Deep Impact
|
|
1000x750x3 |

|
-
PIA12223:
-
Water Abundance Dependent on Temperature
Full Resolution:
TIFF
(2.253 MB)
JPEG
(61.51 kB)
|
|
|
2009-09-24 |
Moon
|
Deep Impact
|
|
1000x750x3 |
|
-
PIA12222:
-
Water Abundances Change with Time of Day
Full Resolution:
TIFF
(2.253 MB)
JPEG
(86.12 kB)
|
|
|
2009-09-24 |
|
Deep Impact
|
|
800x618x3 |
|
-
PIA12221:
-
Daytime Water Cycle on the Moon
Full Resolution:
TIFF
(1.485 MB)
JPEG
(49.1 kB)
|
|
|
2006-10-19 |
|
Deep Impact
|
Impactor Targeting Sensor (ITS)
S-band Antenna
|
720x469x3 |
|
-
PIA02109:
-
The Making of Deep Impact
Full Resolution:
TIFF
(1.015 MB)
JPEG
(67.63 kB)
|
|
|
2006-10-19 |
|
Deep Impact
|
Impactor Targeting Sensor (ITS)
S-band Antenna
|
720x1105x3 |
|
-
PIA02110:
-
A Game of Space Telephone
Full Resolution:
TIFF
(2.39 MB)
JPEG
(127.5 kB)
|
|
|
2005-11-28 |
Tempel 1
|
Deep Impact
|
Medium Resolution Instrument (MRI)
|
2608x1950x3 |

|
-
PIA02144:
-
Tempel 1 Mission Update
Full Resolution:
TIFF
(15.27 MB)
JPEG
(225.4 kB)
|
|
|
2005-10-20 |
Tempel 1
|
Deep Impact
|
Infrared Spectrometer (IRS)
|
595x586x3 |
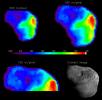
|
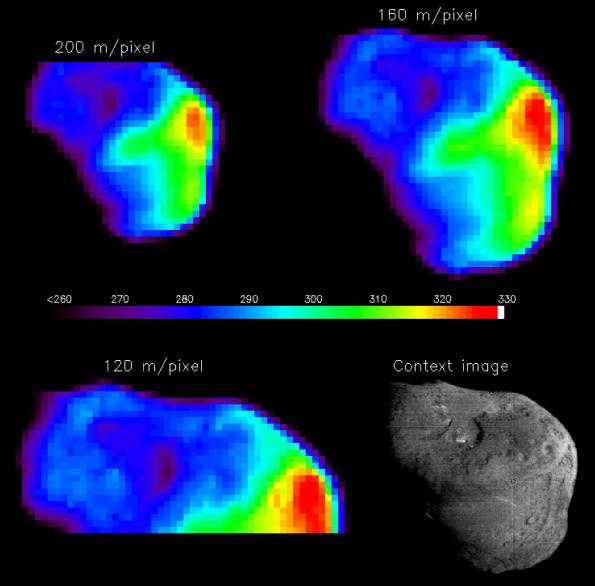
-
PIA02143:
-
Temperature Map of Tempel 1
Full Resolution:
TIFF
(1.047 MB)
JPEG
(36.92 kB)
|
|
|
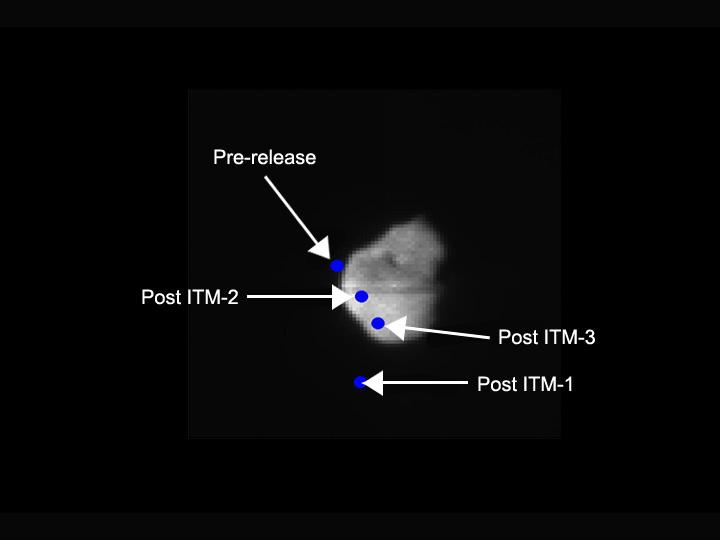
2005-09-06 |
Tempel 1
|
Deep Impact
|
Impactor Targeting Sensor (ITS)
|
2048x2048x1 |
|
-
PIA02142:
-
Tempel 1 Composite Map
Full Resolution:
TIFF
(4.199 MB)
JPEG
(121.6 kB)
|
|
|
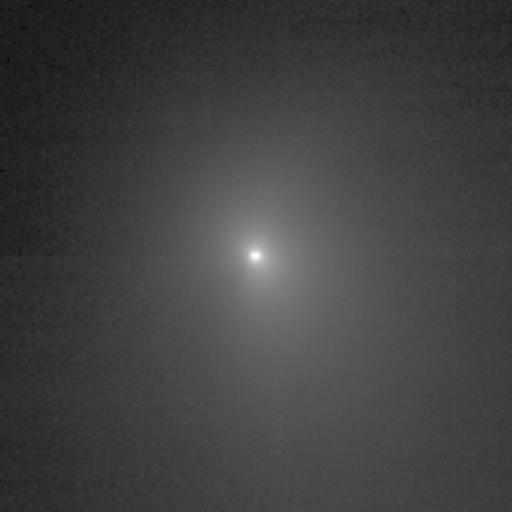
2005-07-20 |
Tempel 1
|
Deep Impact
|
High Resolution Instrument (HRI)
|
512x512x1 |

|
-
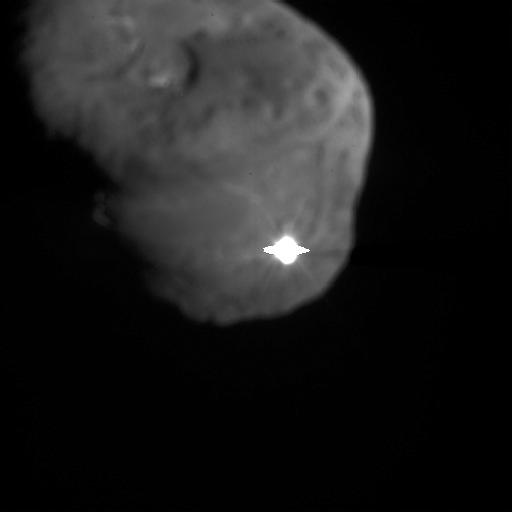
PIA02141:
-
First Contact
Full Resolution:
TIFF
(262.6 kB)
JPEG
(8.103 kB)
|
|
|
2005-07-11 |
Tempel 1
|
Deep Impact
|
High Resolution Instrument (HRI)
|
314x234x1 |
|
-
PIA02140:
-
Tempel Fades into Night
Full Resolution:
TIFF
(73.78 kB)
JPEG
(2.4 kB)
|
|
|
2005-07-08 |
Tempel 1
|
Deep Impact
|
High Resolution Instrument (HRI)
|
512x512x3 |

|
-
PIA02139:
-
Comet Tempel's Silhouette
Full Resolution:
TIFF
(264.2 kB)
JPEG
(37.36 kB)
|
|
|
2005-07-06 |
Tempel 1
|
Deep Impact
|
Impactor Targeting Sensor (ITS)
|
247x241x1 |
|
-
PIA02138:
-
Wipe Out
Full Resolution:
TIFF
(59.82 kB)
JPEG
(6.405 kB)
|
|
|
2005-07-05 |
Tempel 1
|
Deep Impact
|
High Resolution Instrument (HRI)
|
900x900x1 |

|
-
PIA02137:
-
Tempel Alive with Light
Full Resolution:
TIFF
(811 kB)
JPEG
(31.7 kB)
|
|
|
2005-07-05 |
Tempel 1
|
Deep Impact
|
Autonomous Navigation System
|
720x540x3 |
|
-
PIA02136:
-
A Cyber-Astronaut's Final Moves
Full Resolution:
TIFF
(1.168 MB)
JPEG
(15.58 kB)
|
|
|
2005-07-04 |
Tempel 1
|
Deep Impact
|
Impactor Targeting Sensor (ITS)
|
616x458x1 |

|
-
PIA02135:
-
One-Way Trip to Tempel
Full Resolution:
TIFF
(282.6 kB)
JPEG
(27.03 kB)
|
|
|
2005-07-04 |
Tempel 1
|
Deep Impact
|
High Resolution Instrument (HRI)
|
720x540x1 |

|
-
PIA02134:
-
Capturing the Flash
Full Resolution:
TIFF
(389.4 kB)
JPEG
(20.02 kB)
|
|
|
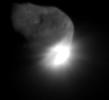
2005-07-04 |
Tempel 1
|
Deep Impact
|
High Resolution Instrument (HRI)
|
504x506x1 |
|
-
PIA02133:
-
Looking Back at a Job Well Done
Full Resolution:
TIFF
(255.5 kB)
JPEG
(7.689 kB)
|
|
|
2005-07-04 |
Tempel 1
|
Deep Impact
|
High Resolution Instrument (HRI)
Infrared Spectrometer
|
275x232x3 |
|
-
PIA02132:
-
Sunny Side of a Comet
Full Resolution:
TIFF
(191.8 kB)
JPEG
(4.867 kB)
|
|
|
2005-07-04 |
Tempel 1
|
Deep Impact
|
Impactor Targeting Sensor (ITS)
|
1000x1016x1 |
|
-
PIA02131:
-
Moment of Impact
Full Resolution:
TIFF
(1.017 MB)
JPEG
(39.3 kB)
|
|
|
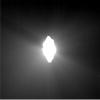
2005-07-04 |
Tempel 1
|
Deep Impact
|
Medium Resolution Instrument (MRI)
|
239x222x1 |
|
-
PIA02130:
-
Impactor No More (Animation)
Full Resolution:
TIFF
(53.34 kB)
JPEG
(3.669 kB)
|
|
|
2005-07-04 |
Tempel 1
|
Deep Impact
|
Impactor Targeting Sensor (ITS)
|
480x480x1 |
|
-
PIA02129:
-
Untouched Tempel
Full Resolution:
TIFF
(230.9 kB)
JPEG
(18.74 kB)
|
|
|
2005-07-04 |
Tempel 1
|
Deep Impact
|
Impactor Targeting Sensor (ITS)
|
494x494x1 |

|
-
PIA02128:
-
So Close You Can Almost Touch It
Full Resolution:
TIFF
(244.5 kB)
JPEG
(21.56 kB)
|
|
|
2005-07-04 |
Tempel 1
|
Deep Impact
|
Impactor Targeting Sensor (ITS)
|
500x500x1 |
|
-
PIA02127:
-
Hit Me With Your Best Shot
Full Resolution:
TIFF
(250.5 kB)
JPEG
(13.7 kB)
|
|
|
2005-07-04 |
Tempel 1
|
Deep Impact
|
Impactor Targeting Sensor (ITS)
|
494x494x1 |
|
-
PIA02126:
-
Blinded by the Jets
Full Resolution:
TIFF
(244.5 kB)
JPEG
(13.57 kB)
|
|
|
2005-07-04 |
Tempel 1
|
Deep Impact
|
Impactor Targeting Sensor (ITS)
|
256x256x1 |

|
-
PIA02125:
-
We're Going In!
Full Resolution:
TIFF
(65.83 kB)
JPEG
(4.034 kB)
|
|
|
2005-07-04 |
Tempel 1
|
Deep Impact
|
Impactor Targeting Sensor (ITS)
|
256x256x1 |

|
-
PIA02124:
-
Before the Crash
Full Resolution:
TIFF
(65.83 kB)
JPEG
(4.034 kB)
|
|
|
2005-07-04 |
Tempel 1
|
Deep Impact
|
High Resolution Instrument (HRI)
|
471x471x1 |
|
-
PIA02123:
-
Gone in a Flash
Full Resolution:
TIFF
(222.3 kB)
JPEG
(11.77 kB)
|
|
|
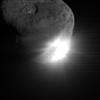
2005-07-04 |
Tempel 1
|
Deep Impact
|
Medium Resolution Instrument (MRI)
|
484x444x1 |
|
-
PIA02121:
-
Bull's Eye!
Full Resolution:
TIFF
(215.4 kB)
JPEG
(7.146 kB)
|
|
|
2005-07-04 |
Tempel 1
|
Deep Impact
|
Impactor Targeting Sensor (ITS)
|
247x240x1 |

|
-
PIA02120:
-
Face-to-Face With a Comet
Full Resolution:
TIFF
(59.57 kB)
JPEG
(5.865 kB)
|
|
|
2005-07-04 |
Tempel 1
|
Deep Impact
|
High Resolution Instrument (HRI)
|
516x402x1 |

|
-
PIA02119:
-
Tempel 1 Nucleus
Full Resolution:
TIFF
(207.9 kB)
JPEG
(10.41 kB)
|
|
|
2005-07-04 |
Tempel 1
|
Deep Impact
|
Medium Resolution Instrument (MRI)
|
516x290x1 |
|
-
PIA02117:
-
Journey to a Comet (Animation)
Full Resolution:
TIFF
(150 kB)
JPEG
(14.68 kB)
|
|
|
2005-07-04 |
Tempel 1
|
Deep Impact
|
Impactor Targeting Sensor (ITS)
|
512x512x1 |

|
-
PIA02116:
-
Impactor Eyes Comet Target
Full Resolution:
TIFF
(262.6 kB)
JPEG
(3.756 kB)
|
|
|
2005-07-04 |
Tempel 1
|
Deep Impact
|
Medium Resolution Instrument (MRI)
|
516x499x1 |
|
-
PIA02115:
-
Separation Anxiety Over for Deep Impact
Full Resolution:
TIFF
(258 kB)
JPEG
(12.95 kB)
|
|
|
2005-07-01 |
Tempel 1
|
Deep Impact
|
Medium Resolution Instrument (MRI)
|
720x169x3 |
|
-
PIA02111:
Analyzing a Cometary 'Sneeze'
Full Resolution:
TIFF
(365.7 kB)
JPEG
(18.19 kB)
|
|
|
2005-07-01 |
Tempel 1
|
Deep Impact
|
|
720x540x3 |
|
-
PIA02106:
-
The Road to Tempel (Artist's Concept)
Full Resolution:
TIFF
(1.168 MB)
JPEG
(15.33 kB)
|
|
|
2005-07-01 |
Tempel 1
|
Deep Impact
|
Medium Resolution Instrument (MRI)
|
512x512x1 |
|
-
PIA02114:
-
Less Than Three Days Away!
Full Resolution:
TIFF
(262.6 kB)
JPEG
(17.8 kB)
|
|
|
2005-06-30 |
Tempel 1
|
Deep Impact
|
Medium Resolution Instrument (MRI)
|
512x512x1 |
|
-
PIA02113:
-
Headed Toward the Light
Full Resolution:
TIFF
(262.6 kB)
JPEG
(15.74 kB)
|
|
|
2005-06-29 |
Tempel 1
|
Deep Impact
|
Medium Resolution Instrument (MRI)
|
512x512x1 |
|
-
PIA02112:
-
Closing in on a Comet
Full Resolution:
TIFF
(262.6 kB)
JPEG
(16.22 kB)
|
|
|
2005-06-28 |
Tempel 1
|
Deep Impact
|
Medium Resolution Instrument (MRI)
|
480x150x1 |
|
-
PIA02105:
-
Cometary 'Sneeze'
Full Resolution:
TIFF
(72.3 kB)
JPEG
(8.569 kB)
|
|
|
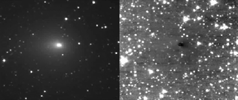
2005-06-27 |
Tempel 1
|
Deep Impact
|
Medium Resolution Instrument (MRI)
|
512x512x1 |
|
-
PIA02104:
-
On Course for a Comet
Full Resolution:
TIFF
(262.6 kB)
JPEG
(23.18 kB)
|
|
|
2005-06-26 |
Tempel 1
|
Deep Impact
|
Medium Resolution Instrument (MRI)
|
512x512x1 |
|
-
PIA02103:
-
Comet Dead Ahead
Full Resolution:
TIFF
(262.6 kB)
JPEG
(11.86 kB)
|
|
|
2005-06-25 |
Tempel 1
|
Deep Impact
|
Medium Resolution Instrument (MRI)
|
512x512x1 |
|
-
PIA02102:
-
I Spy a Comet!
Full Resolution:
TIFF
(262.6 kB)
JPEG
(11.89 kB)
|
|
|
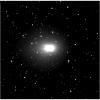
2005-06-24 |
Tempel 1
|
Deep Impact
|
Medium Resolution Instrument (MRI)
|
512x512x1 |
|
-
PIA02101:
-
Capturing the Coma
Full Resolution:
TIFF
(262.6 kB)
JPEG
(15.99 kB)
|
|
|
2005-06-20 |
Tempel 1
|
Deep Impact
|
Medium Resolution Instrument (MRI)
|
512x512x1 |

|
-
PIA02100:
-
Getting Closer
Full Resolution:
TIFF
(262.6 kB)
JPEG
(21.94 kB)
|
|
|
2005-06-19 |
Tempel 1
|
Deep Impact
|
Medium Resolution Instrument (MRI)
|
512x512x1 |

|
-
PIA03299:
-
Tempel Poses Next to a Star
Full Resolution:
TIFF
(262.6 kB)
JPEG
(14.84 kB)
|
|
|
2005-06-17 |
Tempel 1
|
Deep Impact
|
Medium Resolution Instrument (MRI)
|
512x512x1 |
|
-
PIA03298:
-
Deep Impact View of Tempel 1
Full Resolution:
TIFF
(262.6 kB)
JPEG
(7.006 kB)
|
|
|
2005-06-17 |
Tempel 1
|
Deep Impact
|
Medium Resolution Instrument (MRI)
|
492x492x1 |
|
-
PIA03297:
-
Deep Impact View of Tempel 1
Full Resolution:
TIFF
(242.5 kB)
JPEG
(15.32 kB)
|
|
|
2005-06-16 |
Tempel 1
|
Deep Impact
|
Medium Resolution Instrument (MRI)
|
512x512x1 |
|
-
PIA07998:
-
Deep Impact View of Tempel 1
Full Resolution:
TIFF
(262.6 kB)
JPEG
(7.048 kB)
|
|
|
2005-05-09 |
Tempel 1
|
Deep Impact
|
|
8598x5732x3 |
|
-
PIA07923:
-
Artist's Concept of Deep Impact's Encounter with Comet Tempel 1
Full Resolution:
TIFF
(147.9 MB)
JPEG
(3.652 MB)
|
|
|
2005-04-27 |
Tempel 1
|
Deep Impact
|
Impactor Targeting Sensor (ITS)
|
872x714x1 |
|
-
PIA07880:
-
Tempel 1 First Op-Nav
Full Resolution:
TIFF
(623.5 kB)
JPEG
(58.06 kB)
|
|
|
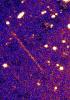
2005-04-27 |
Tempel 1
|
Deep Impact
|
Medium Resolution Instrument (MRI)
|
750x750x1 |

|
-
PIA07879:
-
Deep Impact Spots Quarry
Full Resolution:
TIFF
(563.3 kB)
JPEG
(57.53 kB)
|
|
|
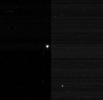
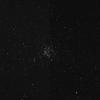
2005-04-26 |
M11
|
Deep Impact
|
Impactor Targeting Sensor (ITS)
|
1000x1000x1 |
|
-
PIA07878:
-
Wild Duck Cluster
Full Resolution:
TIFF
(1.001 MB)
JPEG
(102.3 kB)
|
|
|
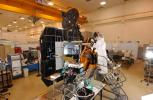
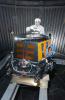
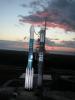
2005-01-21 |
|
Deep Impact
|
|
1920x2560x3 |
|
-
PIA07292:
-
Deep Impact on Launch Pad
Full Resolution:
TIFF
(11.04 MB)
JPEG
(298.1 kB)
|
|
|
2005-01-18 |
Tempel 1
|
Deep Impact
|
Hale Telescope 200-inch
|
224x319x3 |
|
-
PIA07266:
-
Deep Impact on Its Way
Full Resolution:
TIFF
(214.8 kB)
JPEG
(36.38 kB)
|
 Planetary Data System


